2.11VEHICLE ALIGNMENT
INSPECTION
TOOL NAMEPART NUMBER
AXLE ALIGNMENT PLUG SETHD-48856
Only a Harley-Davidson dealer should perform vehicle
alignment. Improper alignment can adversely affect sta-
bility and handling, which could result in death or serious
injury. (00060a)
Check vehicle alignment according to following proced-
ures. Incorrect alignment can adversely affect stability and
handling, which could result in death or serious injury.
(00287a)
1. Verify wheels are true to specifications. See 2.9 TRUING
LACED WHEELS or 2.10 CHECKING CAST WHEEL
RUNOUT
2. Check steering head bearing adjustment and adjust if
necessary. See 2.18 STEERING HEAD.
3. See Figure 2-59. To ensure accurate measurements,
obtain a piece of 1/8 in. (3.2 mm) aluminum welding rod
12.25 in. (311 mm) long. Grind one end down to a blunt
point. With a pliers, bend the rod 90° as shown. Place a
snug fitting O-ring or cable strap on the rod to act as a
slide measurement indicator.
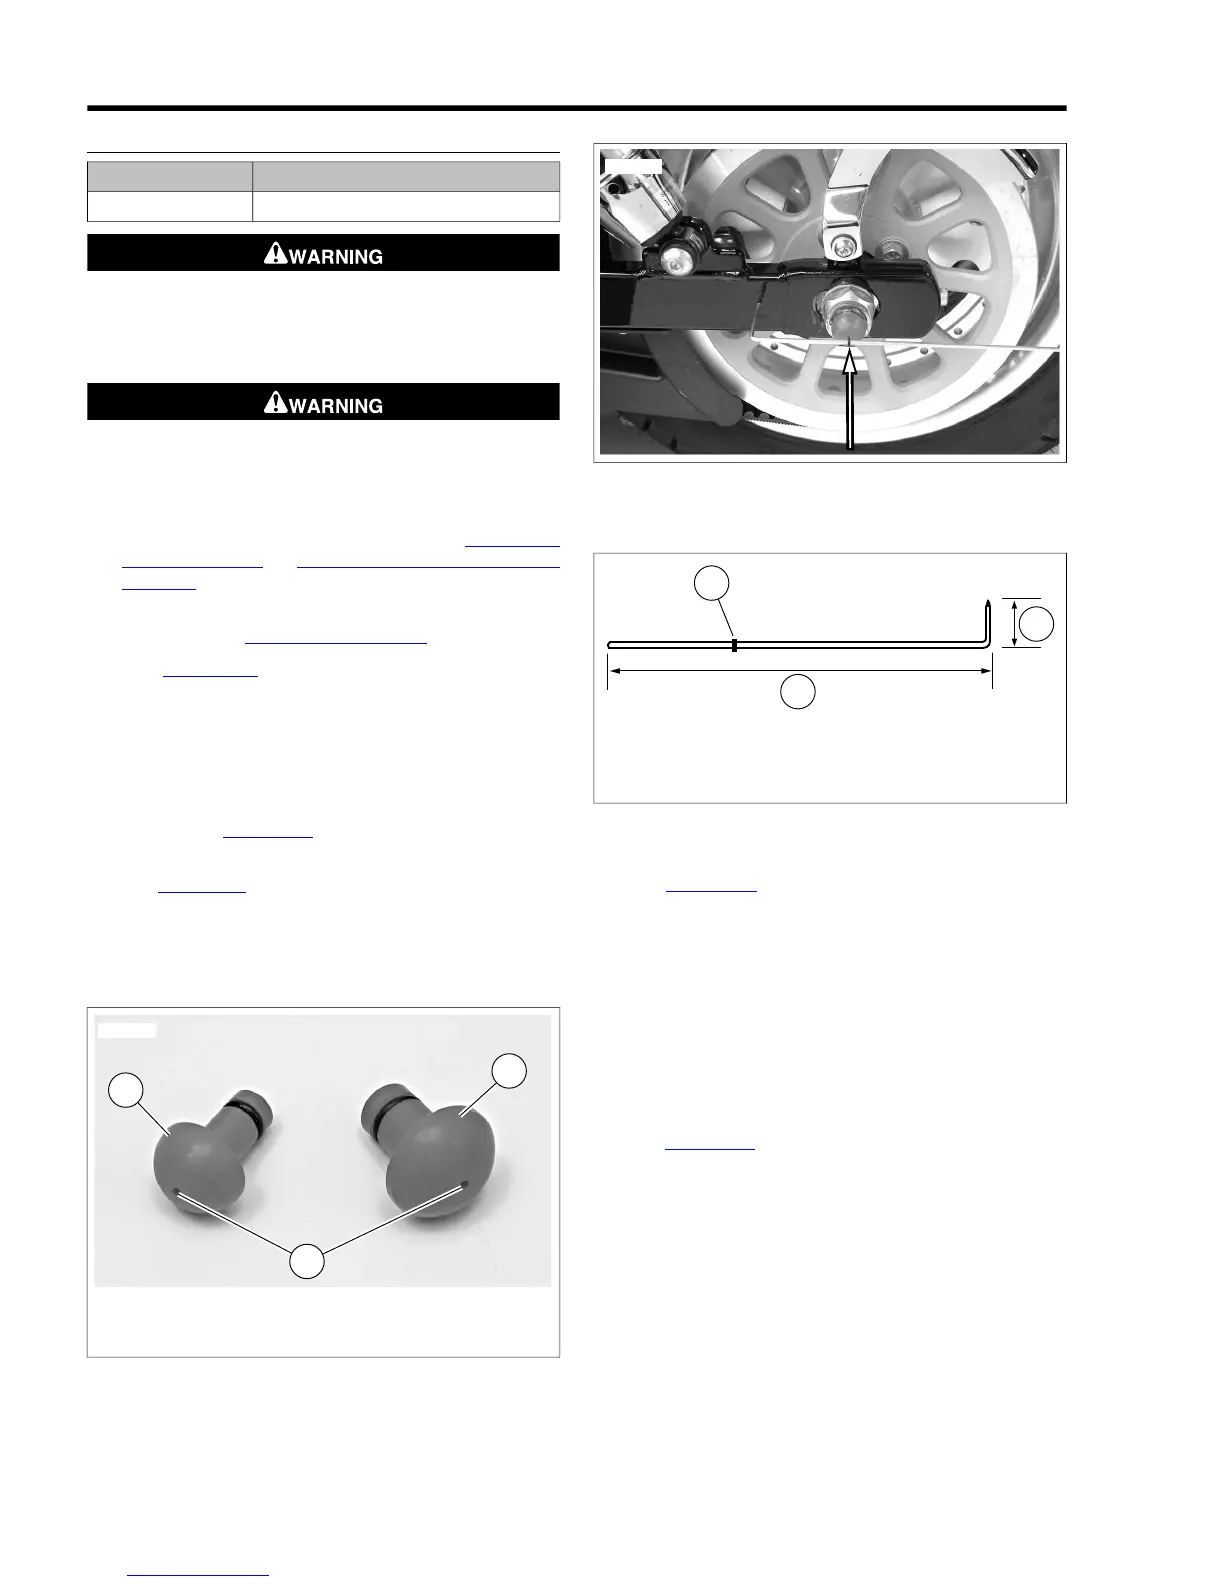
4. Obtain AXLE ALIGNMENT PLUG SET (Part No. HD-
48856). See Figure 2-57. Insert axle alignment plugs (1,
2) into left and right ends of rear axle.
5. See Figure 2-58.With the blunt point of the alignment tool
inserted in the rear fork pilot hole, slide the O-ring along
the tool until it is aligned with the center of the alignment
plug as shown. Measure and record distance from end of
tool to O-ring. Repeat for the other side of the motorcycle.
1. O-ring
2. 1.25 in (32 mm)
3. 10.0 in (254 mm)
Figure 2-59. Alignment Tool
6. See Figure 2-60. The measurement between the center
of the rear axle and the rear fork hole must be equal to
within 1/32 in. (0.8 mm) on both sides of the motorcycle.
If it is not, adjust the rear wheel with the axle adjusters to
accomplish the equal measurement. It is extremely
important that this adjustment be made as accurately as
possible in order to make the remaining adjustments
accurate.
7. Raise the rear of the motorcycle so that the rear wheel
spins freely. Do this by placing a center stand or blocking
under the frame.
8. See Figure 2-61. Remove the bolt (2) which attaches the
top stabilizer link (1) to the engine mounting bracket.
9. Position front wheel so brake disc is vertical using an
inclinometer. If possible, use a digital inclinometer for the
best accuracy.
2-30 2008 Dyna Service: Chassis