Do not remove or install the master cylinder assembly
without first positioning a 5/32-inch (4 mm) thick insert
between the brake lever and lever bracket. Removing or
installing the master cylinder assembly without the insert
in place may result in damage to the rubber boot and
plunger on the front stoplight switch. (00324a)
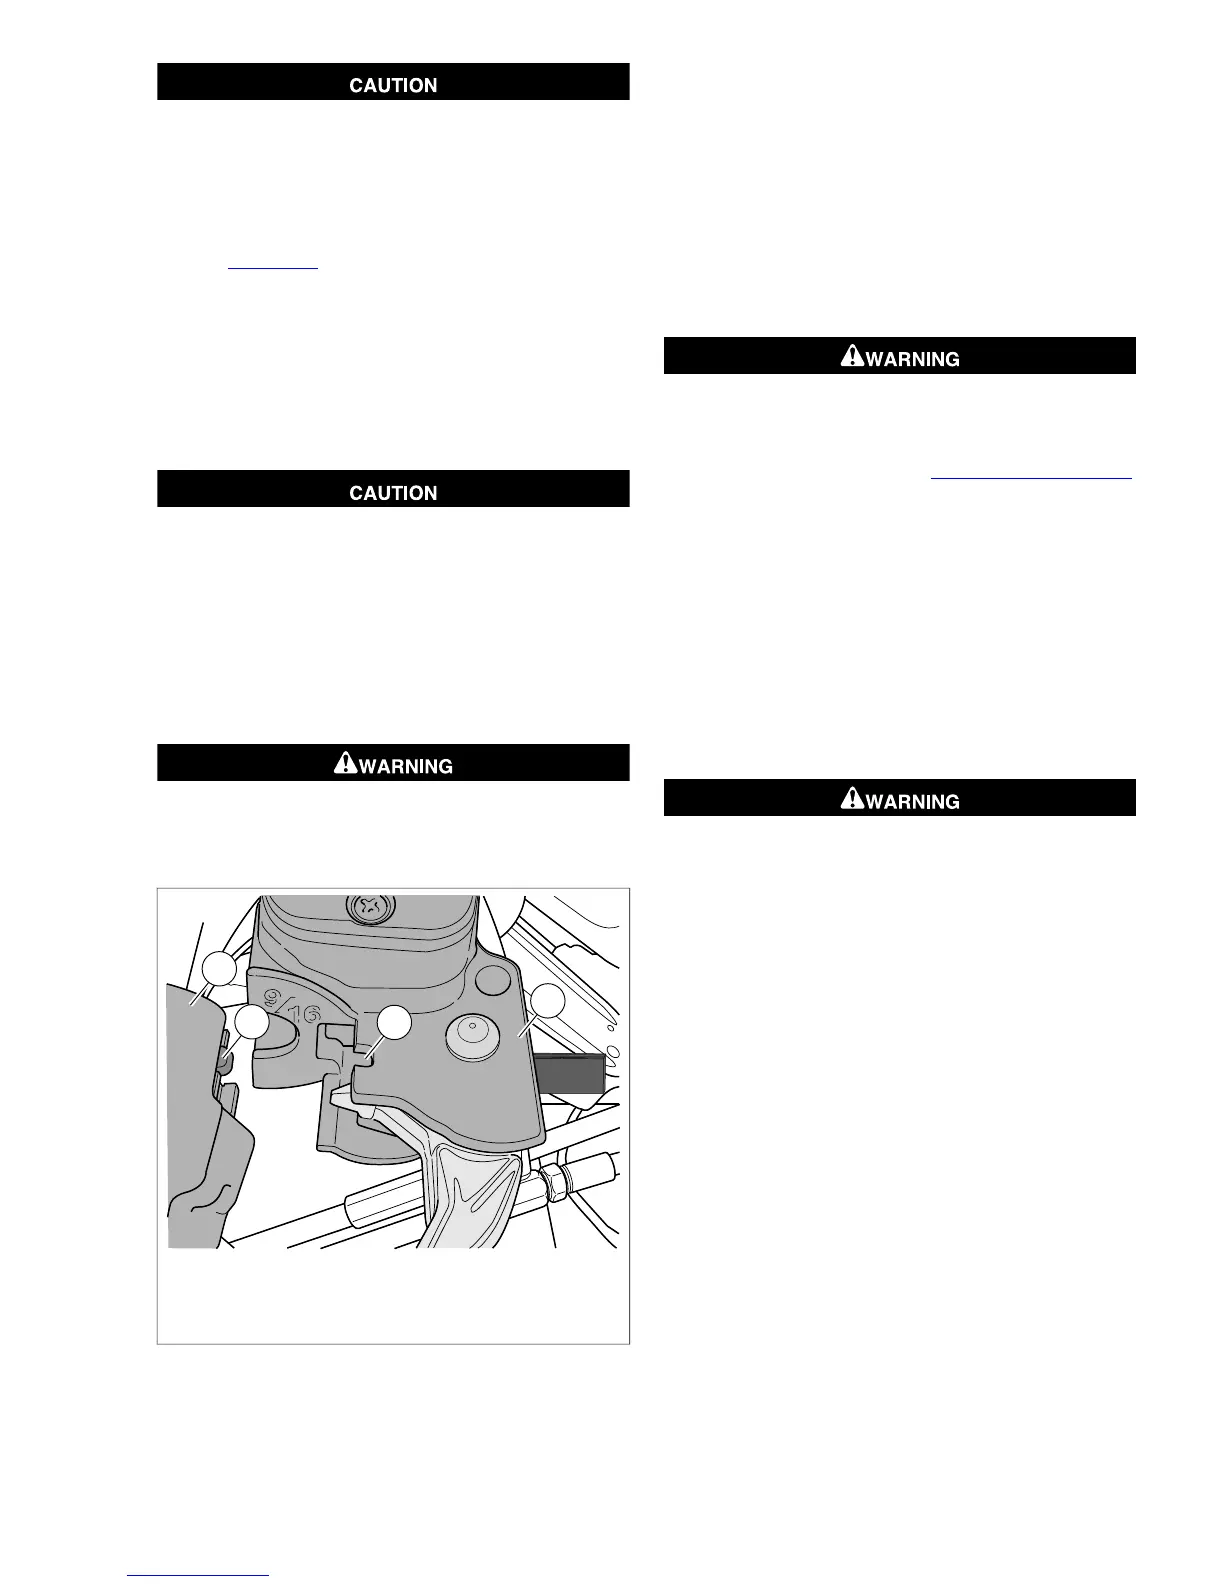
12. See Figure 2-65. Position the brake lever/master cylinder
assembly inboard of the switch housing assembly enga-
ging the tab (2) on the lower switch housing (1) in the
groove (3) at the top of the brake lever bracket (4).
13. Align the holes in the handlebar clamp with those in the
master cylinder housing and start the two T27 TORX
screws (with flat washers). Position for rider comfort.
Beginning with the top screw, tighten the screws to 60-80
in-lbs (6.8-9.0 Nm).
Avoid leakage. Be sure gaskets, banjo bolt(s), brake line
and caliper bore are clean and undamaged before
assembly. (00321a)
To avoid leakage, verify that the steel/rubber washers,
banjo bolt, brake line fitting and master cylinder bore are
completely clean.
14. Start banjo bolt (with new steel/rubber washers) to secure
brake line fitting to master cylinder reservoir.Tighten banjo
bolt to 21-25 ft-lbs (28.5-33.9 Nm).
Use fresh D.O.T. 4 fluid. Contaminated fluid can adversely
affect braking, which could result in death or serious
injury. (00504b)
1. Switch housing assembly
2. Tab
3. Groove
4. Brake lever bracket
Figure 2-65. Attach Master Cylinder to Right Handlebar
Switches
NOTE
The shelf life of a bottle of unopened DOT 4 brake fluid is one
year. The shelf life of an uncontaminated bottle that has been
opened and then resealed is one week.
15. Remove the master cylinder reservoir cover. Stand
motorcycle up so master cylinder is level. Add brake fluid
to master cylinder reservoir until fluid level is about 1/4
inch (6.4 mm) from the top.
NOTE
Use only Harley-Davidson DOT 4 BRAKE FLUID, Part No.
99953-99A (12 ounce bottle), from a sealed container.
A plugged or covered relief port can cause brake drag or
lock-up, which could lead to loss of control, resulting in
death or serious injury. (00288a)
16. Bleed front brake system. See 1.15 BLEEDING BRAKES.
17. Verify proper operation of the master cylinder relief port.
Actuate the brake hand lever. A slight spurt of fluid will
break the fluid surface in the reservoir compartment if all
internal components are working properly.
18. Add brake fluid to the master cylinder reservoir until the
fluid level is about 1/4 inch (6.4 mm) from the top.
19. Install the master cylinder reservoir coverand gasket.
Tighten to 6-8 in-lbs (0.7-0.9 Nm).
20. With the Ignition/Light Key Switch turned to IGNITION,
actuate the front brake hand lever to verify operation of
the brake lamp.
After repairing the brake system, test brakes at low speed.
If brakes are not operating properly, testing at high speeds
can cause loss of control, which could result in death or
serious injury. (00289a)
21. Test ride the motorcycle. If the brake feels spongy, repeat
the bleeding procedure.
NOTE
The sight glass allows a visual check of the brake fluid level
without having to remove the master cylinder reservoir cover.
The sight glass is dark when the reservoir is full, and lightens
as the fluid level drops.
2008 Dyna Service: Chassis 2-35



 To Next Page