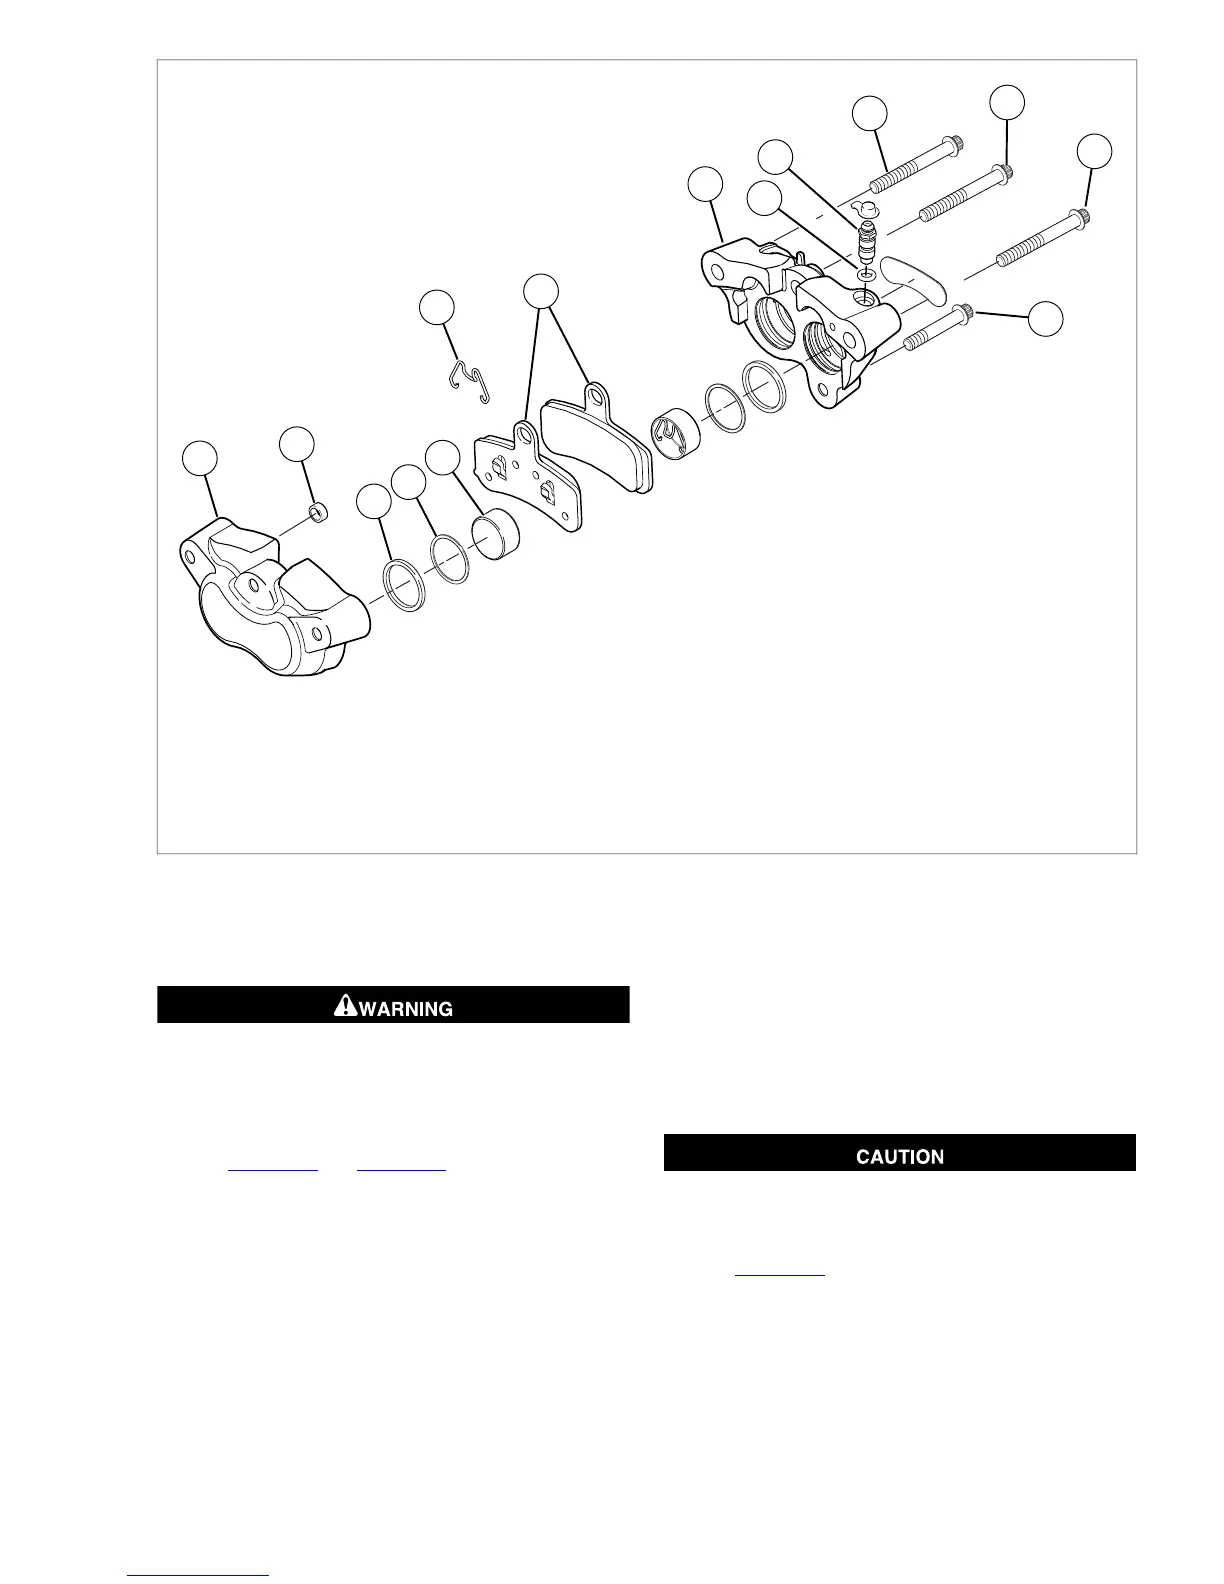
8.1. Outer caliper housingInner caliper housing
2. 9.Crossover seal O-ring
10.3. Bleeder valveSquare seal (4)
4. 11.Wiper (4) Bridge bolt
12.5. Bridge bolt/pad pinPiston (4)
6. 13.Anti-rattle spring (4) Upper mounting bolt (long)
14.7. Lower mounting bolt (short)Brake pads (2)
Figure 2-67. Front Brake Caliper
2. If necessary, remove bleeder valve (10).
Compressed air can pierce the skin and flying debris from
compressed air could cause serious eye injury. Wear
safety glasses when working with compressed air. Never
use your hand to check for air leaks or to determine air
flow rates. (00061a)
3. See Figure 2-68 and Figure 2-69. Remove pistons.
a. Place FRONT BRAKE CALIPER PISTON
REMOVER (Part No. HD-48649) (3) between caliper
housings.
NOTE
Ensure the hole in the tool (1) aligns with the crossover
holes (2) in the caliper housings.
b. Insert two bridge bolts (2) (metric) and tighten
securely.
c. If the bleeder valve was removed, install finger-tight.
d. Apply low pressure compressed air to banjo bolt hole
(1) to remove pistons from caliper bores. Listen for
all four pistons to "pop" against the tool.
e. Remove bridge bolts and remove tool.
4. Wiggle pistons from caliper bores to completely remove.
5. If necessary, remove pad springs from each piston.
Avoid leakage. Prevent damage to piston or piston bore.
Use non-metallic tools when servicing components.
(00529d)
6. See Figure 2-70. Remove and discard crossover seal (1)
from inside caliper housing.
7. Using a wooden toothpick (2), remove a wiper (3) and
square seal (4) from each caliper bore. Discard all
removed parts.
2008 Dyna Service: Chassis 2-37



 To Next Page