3.14INSTALLING ENGINE IN CHASSIS
PROCEDURE
1. Using a suitable hoist, position engine in chassis and align
four transmission mounting holes. A pry bar wrapped in a
shop rag may be needed to position engine so two lower
locating dowel pins engage holes in crankcase.
2. Install new engine to transmission case gasket.
3. Install four bolts and washers to mate transmission and
engine.Tighten bolts finger tight.
4. Align two front engine mount bracket holes with engine
and install bolts and washers. Tighten bolts finger tight.
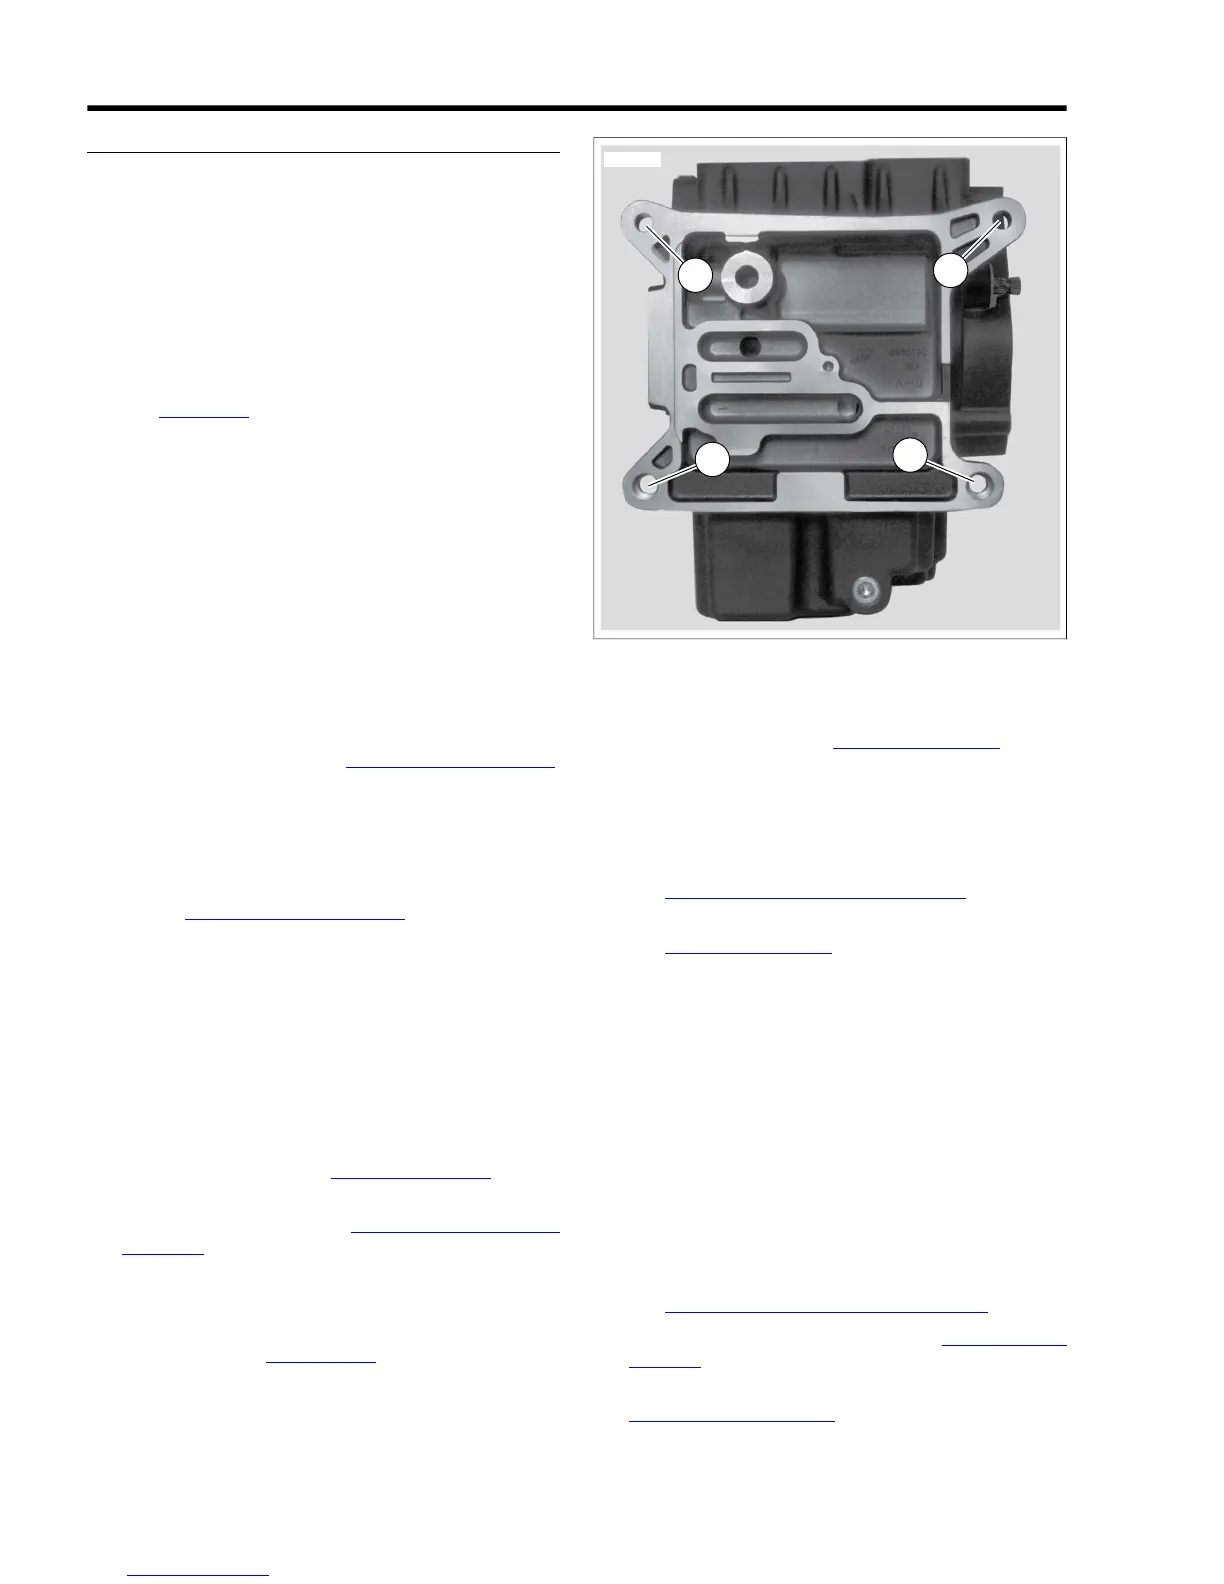
5. See Figure 3-16. Tighten the four transmission mounting
bolts in the sequence shown as follows:
a. Tighten to 15 ft-lbs (20.3 Nm).
b. Tighten to 30-35 ft-lbs (40.7-47.5 Nm).
6. Tighten two crankcase to front engine mounting bracket
bolts to 25-30 ft-lbs (33.9-40.7 Nm).
7. Remove ratchet strap securing transmission to chassis.
8. Install engine oil dipstick.
9. Remove jack and block of wood from under transmission.
10. Remove wire loom or protective material from front
downtubes.
11. Route clutch cable back to left side of motorcycle and
install to clutch lever. See 2.24 CLUTCH CONTROL.
Secure clutch cable to left downtube with clip.
12. Install MAP sensor connector [80] to MAP sensor.
NOTE
If the stabilizer link bolt cannot be installed without pushing the
engine to the right or left, perform the vehicle alignment pro-
cedure. See 2.11 VEHICLE ALIGNMENT.
13. Install horn bracket/stabilizer link assembly to frame tab
and cylinder heads. Place spacer between frame tab and
stabilizer link. Make sure horn ground wire is installed
beneath bracket on front cylinder.
a. Tighten the stabilizer link bolt to 18-22 ft-lbs (24.4-
29.8 Nm).
b. Tighten two cylinder head bracket bolts to 35-40 ft-
lbs (47.5-54.2 Nm).
14. Install spark plugs to cylinder heads. Connect spark plug
cables to spark plugs. See 1.19 SPARK PLUGS.
15. Install new gasket between engine and primary chaincase.
Install primary chaincase. See 6.4 PRIMARY CHAINCASE
HOUSING.
NOTE
Make sure spring washer is in position on shifter shaft between
engine and primary chaincase.
16. Adjust clutch. See 1.11 CLUTCH.
Figure 3-16.Transmission Housing to Crankcase Torque
Sequence
17. Adjust primary chain. See 1.9 PRIMARY CHAIN.
NOTE
The gasket between the primary chaincase cover and chain-
case must be replaced each time the cover is removed. Failure
to replace this gasket may cause primary chaincase leaks.
18. Install primary chaincase cover and magnetic drain plug.
See 6.4 PRIMARY CHAINCASE HOUSING.
19. Fill primary chaincase with primary chaincase lubricant.
See 1.9 PRIMARY CHAIN.
20. Install left side footpeg and bracket with two screws.
Tighten to 25-35 ft-lbs (33.9-47.5 Nm).
21. Install shifter foot lever to primary chaincase.Tighten pinch
bolt to 18-22 ft-lbs (24.4-29.8 Nm). Connect shifter linkage.
22. Move to right side of motorcycle. Connect the following
connectors.
a. Crank position sensor connector [79].
b. Stator/voltage regulator connector [46].
c. Oil pressure sending unit connector [140].
23. Install rear brake pedal and right footpeg bracket with two
screws. Tighten to 25-35 ft-lbs (33.9-47.5 Nm). Install
actuator lever to pedal with clevis pin and new cotter pin.
See 2.14 REAR BRAKE MASTER CYLINDER.
24. Install exhaust and heat shields. See 4.16 EXHAUST
SYSTEM.
25. Install throttle control cables to induction module. See
4.9 INDUCTION MODULE.
3-24 2008 Dyna Service: Engine
 Loading...