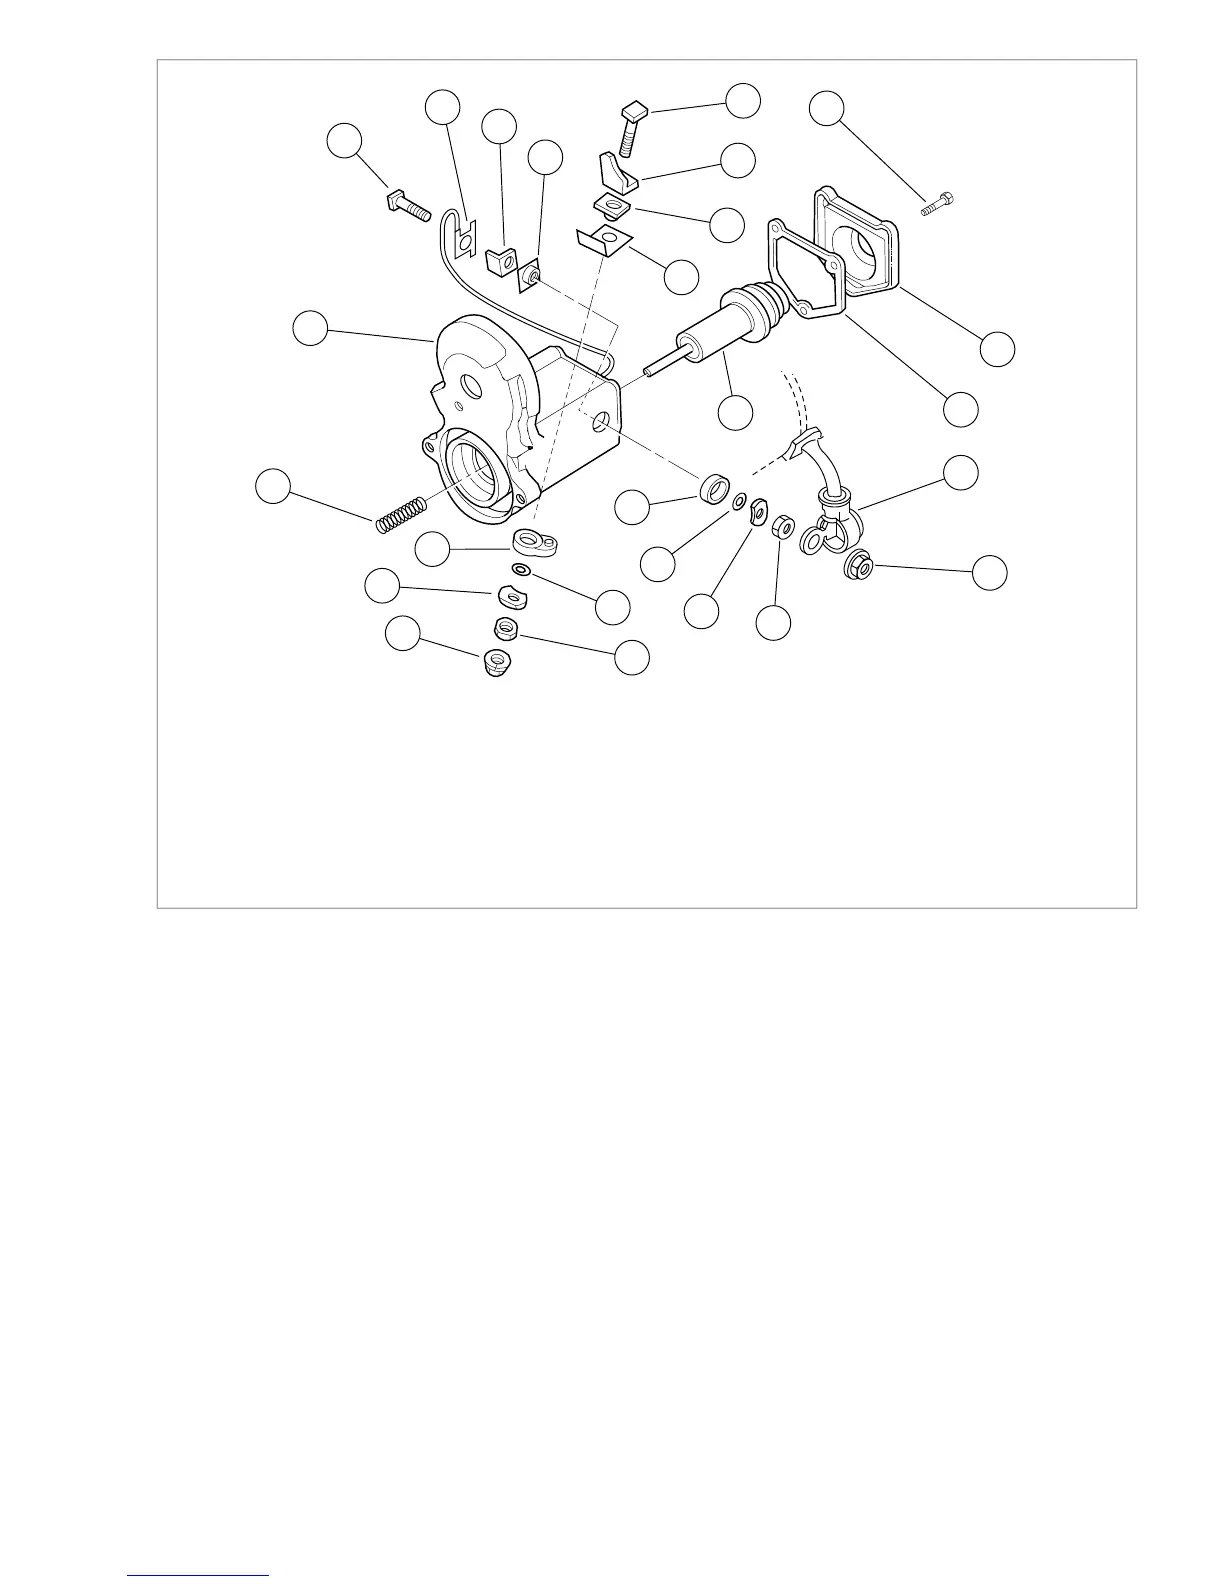
10.1. Wave washerSolenoid
2. 11.Hex screw O-ring
12.3. Round bushingSolenoid cover
4. 13.Rubber gasket Square bushing
14.5. Contact platePlunger
6. 15.Return spring Post bolt
16.7. Paper insulator washerRubber boot
8. 17.Hex nut Hold-in terminal
9. Jam nut
Figure 5-10. Solenoid Assembly
Assembly
1. Assemble short post (field coil):
a. From inside solenoid housing, insert sleeve on square
bushing into hole in solenoid housing.
b. With the foot inboard against solenoid winding, align
hole in contact plate with hole in square bushing.
c. Slide short post bolt through holes in hold-in terminal,
contact plate, square bushing and solenoid housing.
d. At outside of solenoid housing, install round bushing,
O-ring and wave washer onto end of post. Install jam
nut, but do not tighten.
2. Assemble long post (battery):
a. On inside of solenoid housing, align hole in paper
insulator washer with hole in solenoid housing. Insert
sleeve on square bushing into holes.
b. With the foot inboard against solenoid winding, align
hole in contact plate with hole in square bushing.
c. Slide long post bolt through holes in contact plate,
square bushing, paper insulator washer and solenoid
housing.
d. At outside of solenoid housing, install round bushing,
o-ring and wave washer onto end of post. Verify that
index pin on round bushing engages blind hole in
solenoid housing. Install jam nut, but do not tighten.
3. Apply a light film of LUBRIPLATE 110 to plunger shaft and
install return spring. Install plunger in solenoid.
2008 Dyna Service: Starter 5-9



 To Next Page