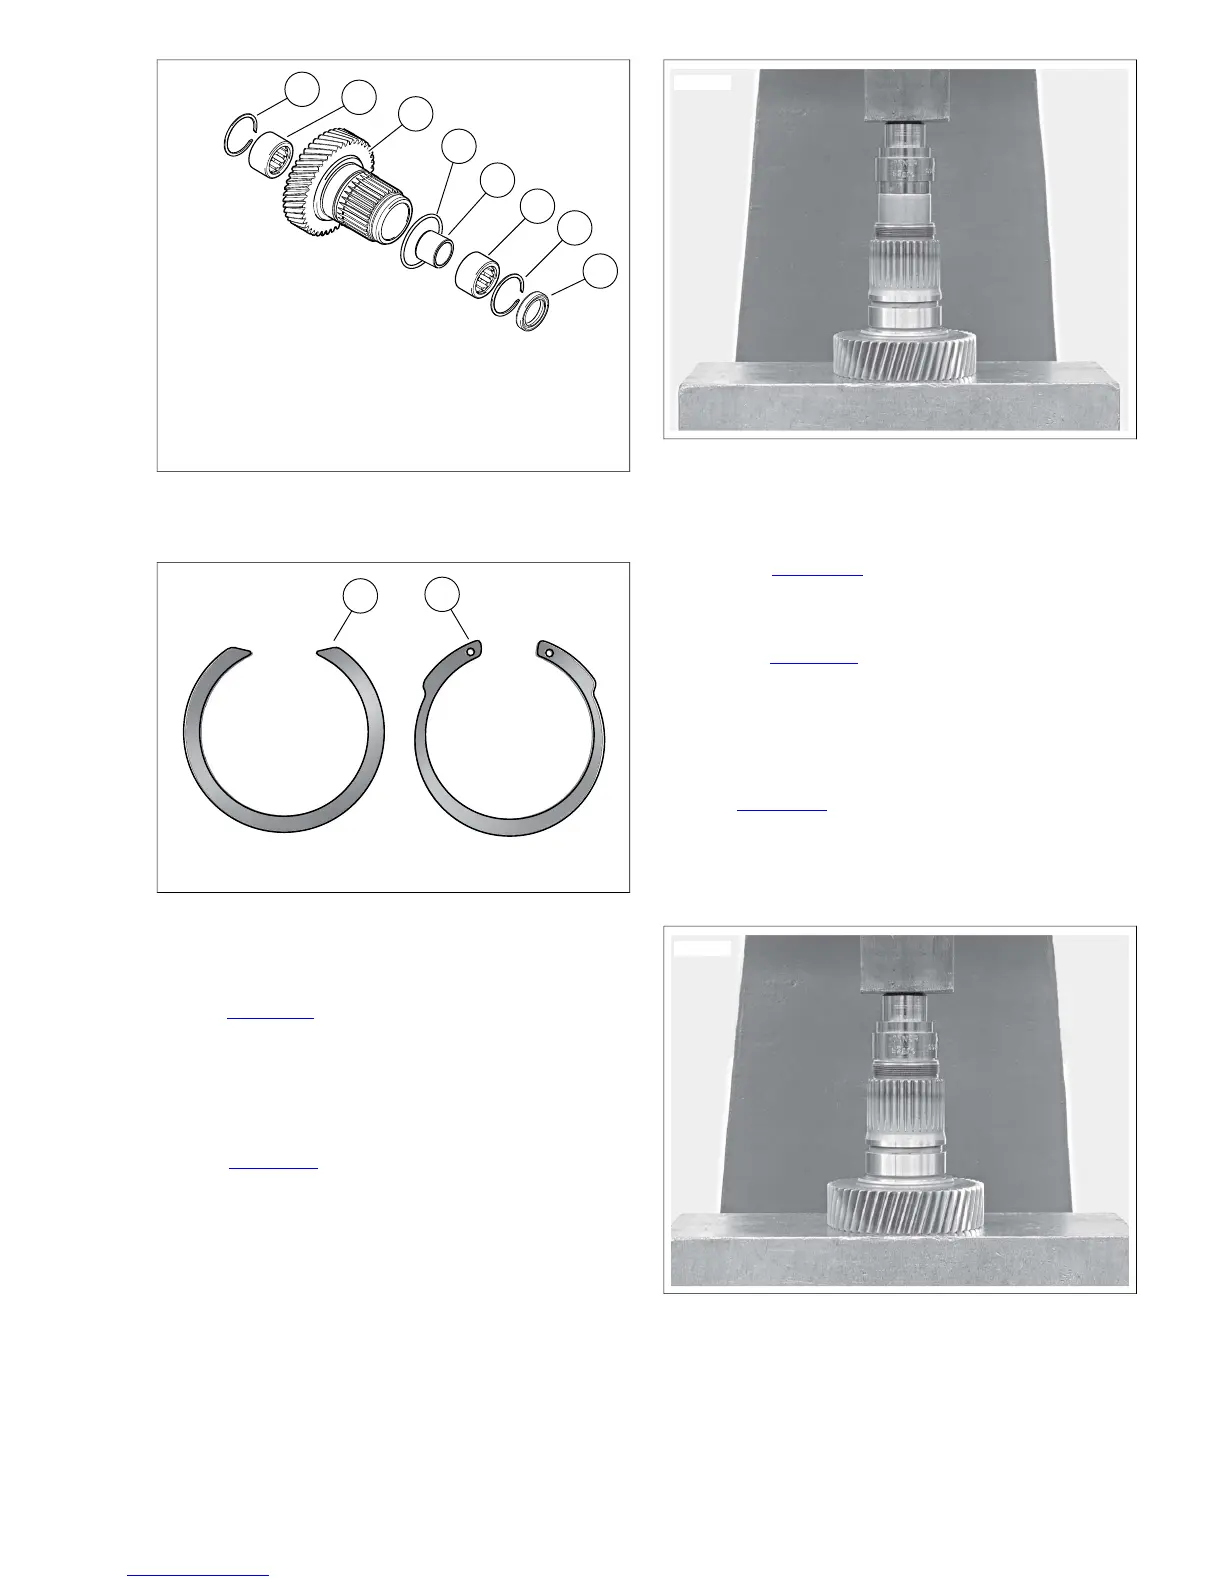
1. Original retaining ring
2. Replacement retaining ring
Figure 7-37. Main Drive Gear Retaining Rings
NOTES
• See Figure 7-37.When replacing needle bearings, discard
original retaining rings (1) and install replacement retaining
rings (2).
• To install the inner main drive gear needle bearings and
mainshaft seal, use MAIN DRIVE GEAR BEARING AND
SEAL INSTALLATION TOOL (Part No. HD-47932).
2. See Figure 7-38. Install clutch side needle bearing using
an arbor press and the 0.400 in. step end of tool as shown.
Press until tool is flush.
NOTES
• An alternative method is provided which allows the main-
shaft seal to be pressed into place after installation of the
main drive gear. For detailed information, refer to steps
that follow.
• If a serviceable mainshaft seal is already installed, then
skip next step.
Figure 7-38. Installing Clutch Side Needle Bearing in Main
Drive Gear
3. Install mainshaft seal:
a. See Figure 7-39. Turn over tool and press in main-
shaft seal using the 0.090 in. step.
b. Install spacer.
c. See Figure 7-36.Turn over the main drive gear in the
arbor press.With the tool at the 0.188 in. step, press
in inner bearing.
d. Install new retaining rings.
e. Install new o-ring into groove in main drive gear.
4. See Figure 7-41. If the mainshaft seal was not installed
with the needle bearings (or if a faulty seal is discovered
with the main drive gear installed in the transmission case),
an alternative method is provided using the MAIN DRIVE
GEAR SEAL INSTALLER (Part No. HD-47933).
 Loading...