1.11CLUTCH
ADJUSTMENT
NOTE
Perform the clutch adjustment with the motorcycle at room
temperature.The clearance at the adjuster screw will increase
as the powertrain temperature increases. If adjuster screw is
adjusted with powertrain hot, clearance at push rod bearing
could be insufficient with powertrain cold and clutch slippage
could occur.
1. Stand motorcycle upright and level.
2. Remove five TORX screws with captive washers to detach
clutch inspection cover from primary chaincase cover.
3. Remove and discard clutch inspection cover seal.
4. See Figure 1-20. Add freeplay to cable.
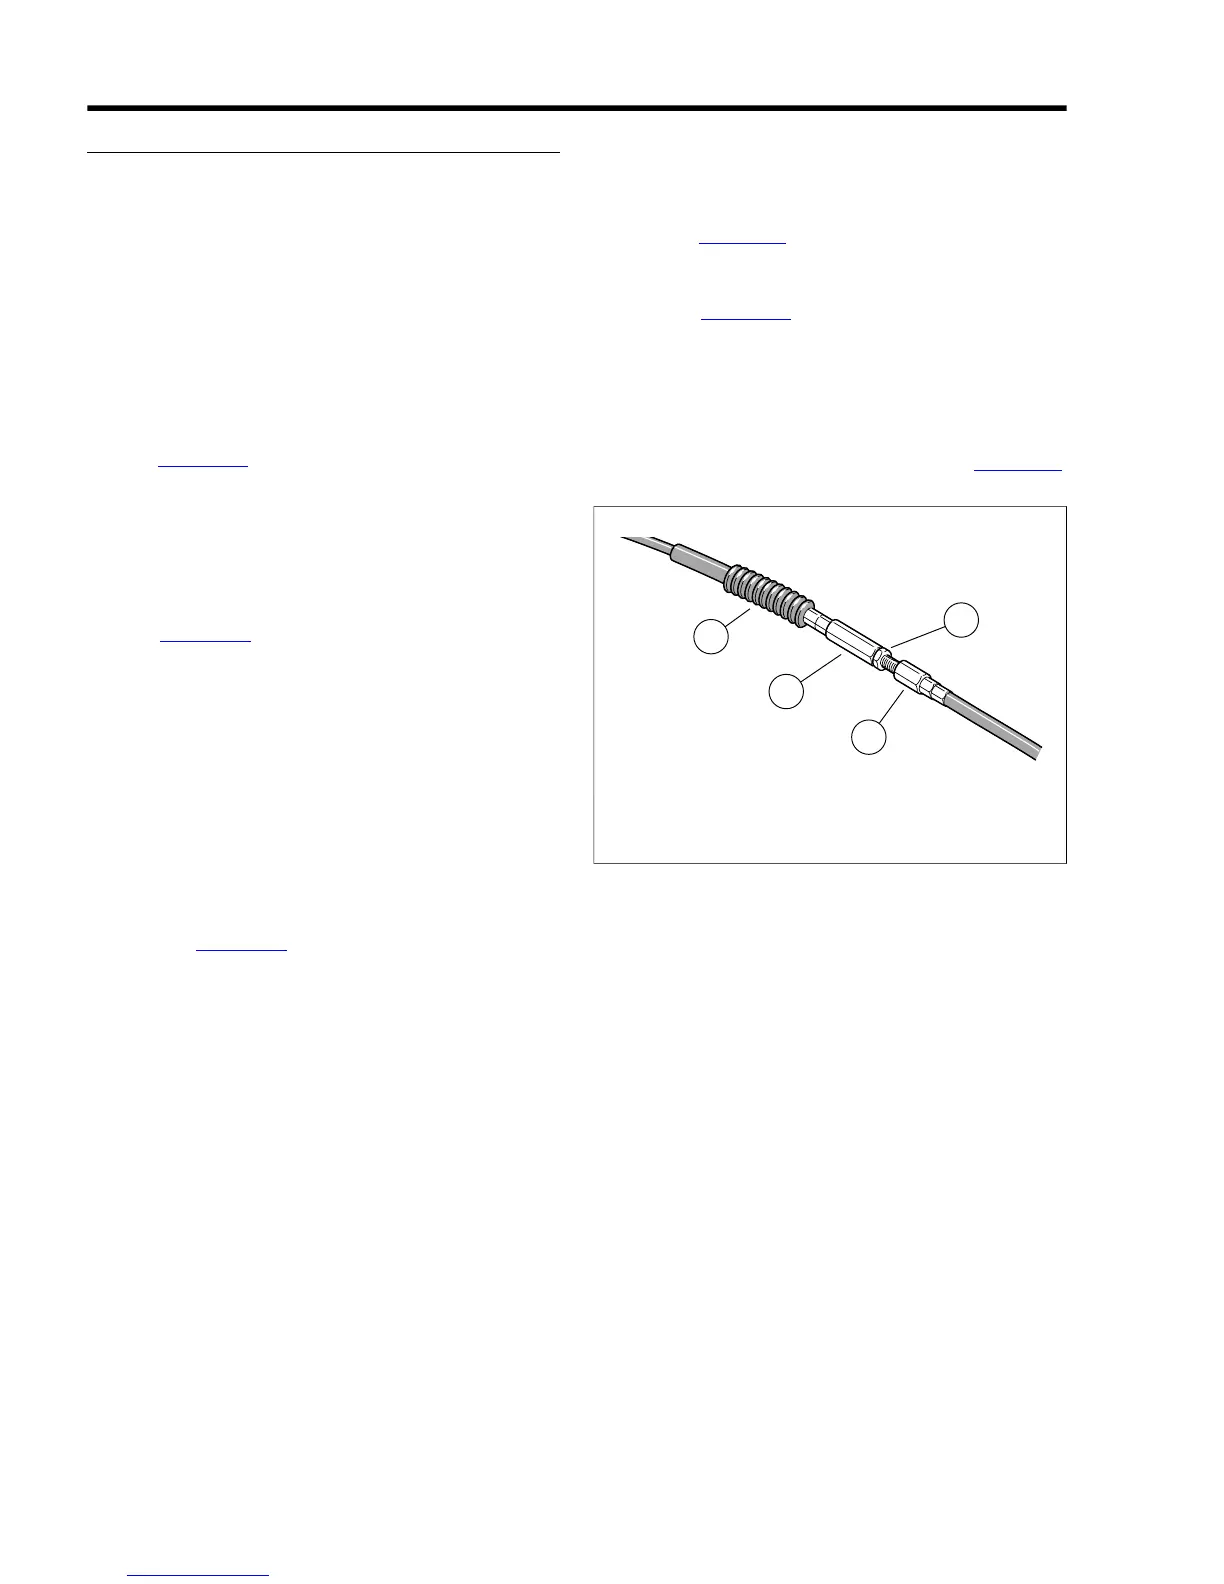
a. Slide rubber boot (1) off cable adjuster.
b. Holding cable adjuster (2) with 1/2 in. wrench, loosen
jam nut (3) using a 9/16 in. wrench.
c. Turn cable adjuster (2) until there is a large amount
of freeplay at clutch hand lever.
5. See Figure 1-21. Loosen jam nut (1) on clutch adjuster
screw (2). To take up all freeplay, turn screw inward
(clockwise) until lightly seated. Activate the clutch lever to
verify the balls are seated in the ramps.
6. Back out adjusting screw (counterclockwise) 1/2 to 1 full
turn.Tighten jam nut to 72-120 in-lbs (8.1-13.6 Nm), while
holding adjusting screw with an Allen wrench.
7. Squeeze clutch lever to maximum limit three times, to set
ball and ramp release mechanism.
8. Check freeplay.
a. Turn cable adjuster away from jam nut until slack is
eliminated at hand lever.
b. See Figure 1-22. Pull clutch cable ferrule (2) away
from clutch lever bracket (3) to check freeplay. Turn
cable adjuster as necessary to obtain 1/16-1/8
in. (1.6-3.2 mm) freeplay between end of cable ferrule
and clutch lever bracket.
9. Hold adjuster with 1/2 in. wrench. Using 9/16 in. wrench,
tighten jam nut against cable adjuster. Cover cable
adjuster mechanism with rubber boot.
10. Install clutch inspection cover and seal. Install seal as fol-
lows:
a. Thoroughly wipe all lubricant from cover mounting
surface and groove in chaincase.
b. See Figure 1-15. Position seal (1) in groove in primary
chaincase cover and press each of the nubs on seal
into the groove. The nubs will retain seal in position.
c. See Figure 1-16. Insert screw (with captive washer)
through clutch inspection cover and carefully thread
it into the top cover screw hole.
d. Start the remaining four screws (with captive
washers).
e. Alternately tighten screws to 84-108 in-lbs (9.5-12.2
Nm) following torque sequence shown in Figure 1-16.