8.15FUEL GAUGE
GENERAL
• For FXDC, FXDL, FXDB, FXDWG and FXDF models, the
fuel gauge is mounted in a simulated left fuel tank cap.
Remove by gently pulling upward. Do not twist.
• For FXD models, the fuel gauge is in the center console.
See FXD MODELS which follows for replacement
instructions.
• If gauge is to be replaced, remove wires from back of
gauge (FXDC, FXDL, FXDB, FXDWG and FXDF models).
• The fuel gauge sending unit is in the fuel tank under a
console and top plate.
ALL BUT FXD MODELS
Removal
NOTE
The gauge wires are routed through a tube in the tank and are
secured by a cable tie located in the top frame tube underneath
the fuel tank.
Stop the engine when refueling or servicing the fuel
system. Do not smoke or allow open flame or sparks near
gasoline. Gasoline is extremely flammable and highly
explosive, which could result in death or serious injury.
(00002a)
To prevent accidental vehicle start-up, which could cause
death or serious injury, disconnect negative (-) battery
cable before proceeding. (00048a)
1. Disconnect negative battery cable.
2. Loosen fuel tank to gain access to the fuel gauge con-
nector. See 4.5 FUEL TANK.
3. Disconnect fuel gauge connector [117] located under left
side of fuel tank.
4. Detach terminals from connector (4).
NOTE
Do not twist gauge and wiring during removal.
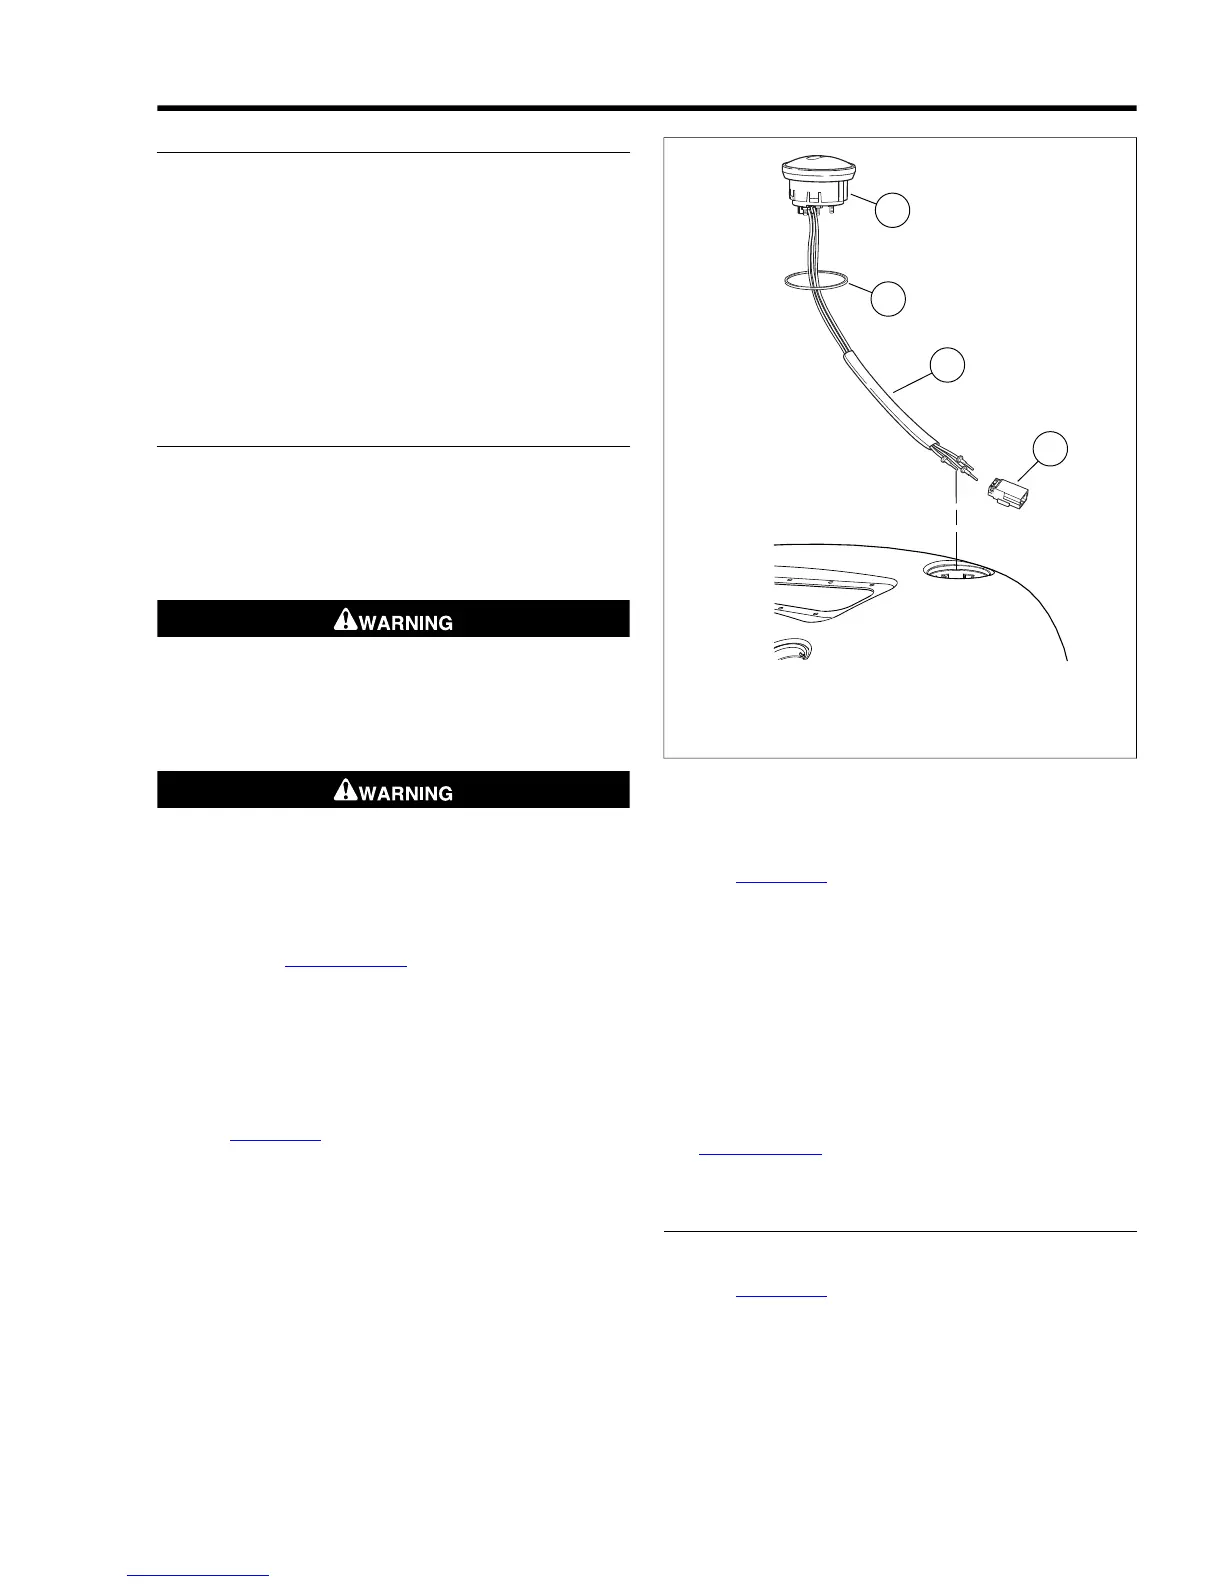
5. See Figure 8-38. Pull up on gauge (1). Remove gauge,
gasket (2) and wiring from fuel tank. Discard gasket.
1. Gauge
2. Gasket
3. Wiring harness
4. Connector [117]
Figure 8-38. Fuel Gauge: All but FXD
Installation
1. See Figure 8-38. Install wiring harness (3) through new
gasket (2).
2. Push wiring harness through tube in fuel tank.
3. While gently pulling on wiring harness, install gauge (1)
and gasket by carefully moving gauge back and forth while
pushing down at the same time.
4. Install wiring into connector (4) [117]. Mate connector
halves.
5. Secure wire under fuel tank with new cable tie.
6. Slide fuel tank into position and install fasteners. See
4.5 FUEL TANK.
7. Connect negative battery cable.
FXD MODELS
Console Removal
1. See Figure 8-39. Remove eight screws (12) that secure
fuel cap trim ring (13) and top plate (3).
2. Remove screw (10) securing console (14) to fuel tank.
2008 Dyna Service: Electrical 8-27