Gauge Removal
To prevent accidental vehicle start-up, which could cause
death or serious injury, disconnect negative (-) battery
cable before proceeding. (00048a)
1. Disconnect negative battery cable.
Stop the engine when refueling or servicing the fuel
system. Do not smoke or allow open flame or sparks near
gasoline. Gasoline is extremely flammable and highly
explosive, which could result in death or serious injury.
(00002a)
2. Loosen fuel tank to gain access to the fuel gauge con-
nector. See 4.5 FUEL TANK.
3. Disconnect fuel gauge connector [117] located under left
side of fuel tank.
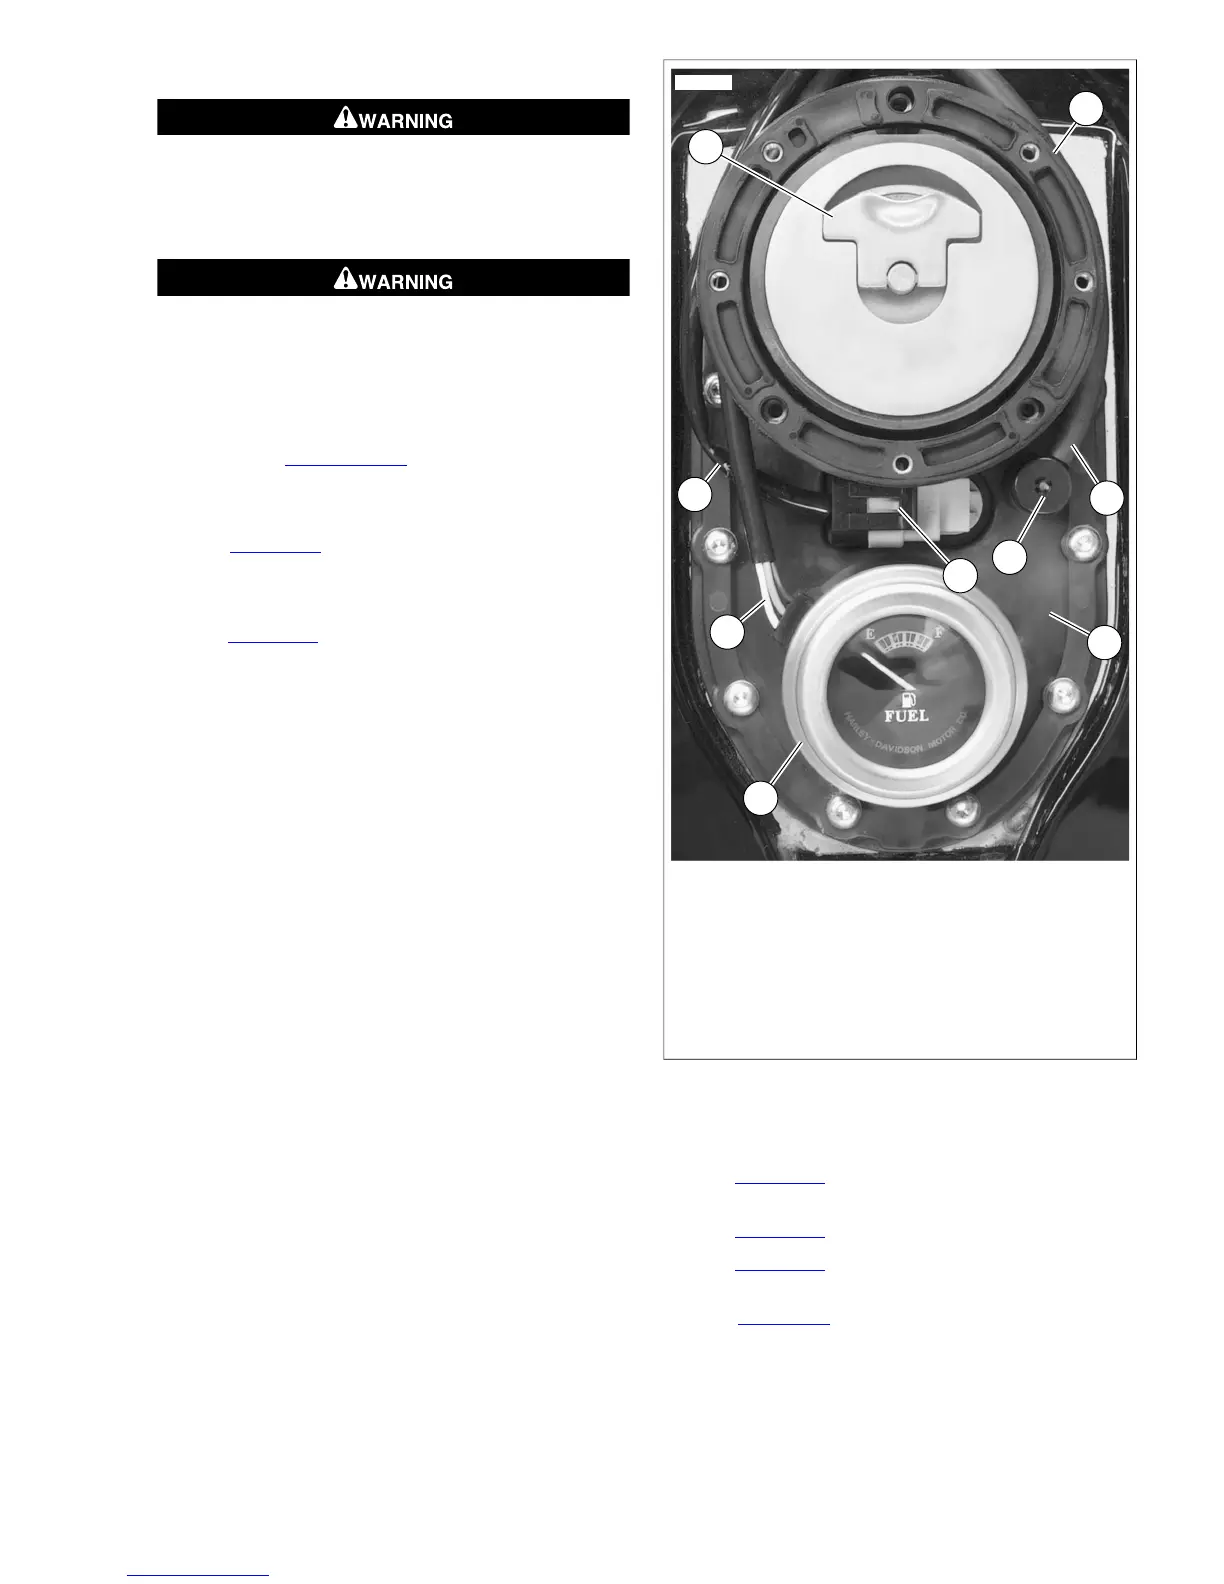
4. See Figure 8-40. Remove fuel gauge (1) from top plate
(9).
Gauge Installation
1. See Figure 8-40. Install fuel gauge (1) into top plate (9).
2. Route fuel gauge wiring (2) as shown.
3. Connect fuel gauge connector [117] located under left side
of fuel tank.
1. Fuel gauge
2. Fuel gauge wiring
3. Fuel pump/sending unit wiring
4. Filler cap
5. Fuel cap trim ring
6. Vent hose
7. Vent
8. Fuel pump/sending unit connector [141]
9. Top plate
Figure 8-40.Top Plate: FXD
Console Installation
1. See Figure 8-40. If removed, install trim ring (5) so holes
in fuel cap trim ring align with threaded towers of top plate.
2. See Figure 8-39. Install console (14) over top plate (3).
3. See Figure 8-41. In next step, be sure slot (2) of fuel cap
trim ring (1) is installed over tab (3) of console (4).
4. See Figure 8-39. Loosely install eight screws (12) that
hold fuel cap trim ring (13) to top plate (3).Tighten screws
to 18-22 in-lbs (2.03-2.49 Nm).
5. Install screw (10) securing console to fuel tank. Tighten
screw to 18-24 in-lbs (2.0-2.7 Nm).
2008 Dyna Service: Electrical 8-29
 Loading...