1.15BLEEDING BRAKES
GENERAL
Use denatured alcohol to clean brake system components.
Do not use mineral-based solvents (such as gasoline or
paint thinner), which will deteriorate rubber parts even
after assembly. Deterioration of these components can
cause brake failure, which could result in death or serious
injury. (00291a)
Direct contact of D.O.T. 4 brake fluid with eyes can cause
irritation. Avoid eye contact. In case of eye contact flush
with large amounts of water and get medical attention.
Swallowing large amounts of D.O.T. 4 brake fluid can cause
digestive discomfort. If swallowed, obtain medical atten-
tion. Use in well ventilated area. KEEP OUT OF REACH OF
CHILDREN. (00240a)
D.O.T. 4 brake fluid will damage painted and body panel
surfaces it comes in contact with. Always use caution and
protect surfaces from spills whenever brake work is per-
formed. Failure to comply can result in cosmetic damage.
(00239b)
Do not allow dirt or debris to enter the master cylinder
reservoir. Dirt or debris in the reservoir can cause improper
operation and equipment damage. (00205c)
Front brake hand lever and rear brake foot pedal must have a
firm feel when brakes are applied. If not, bleed system as
described.
PROCEDURE
NOTE
Hydraulic brake fluid bladder-type pressure equipment can be
used to fill brake master cylinder through the bleeder valve.
Remove master cylinder reservoir cover so that system cannot
pressurize. Do not use pressure bleeding equipment when the
hydraulic system is sealed with master cylinder reservoir cover
and gasket in place.
1. Remove bleeder valve cap. Install end of a length of clear
plastic tubing over caliper bleeder valve; place other end
in a clean container. Stand motorcycle upright.
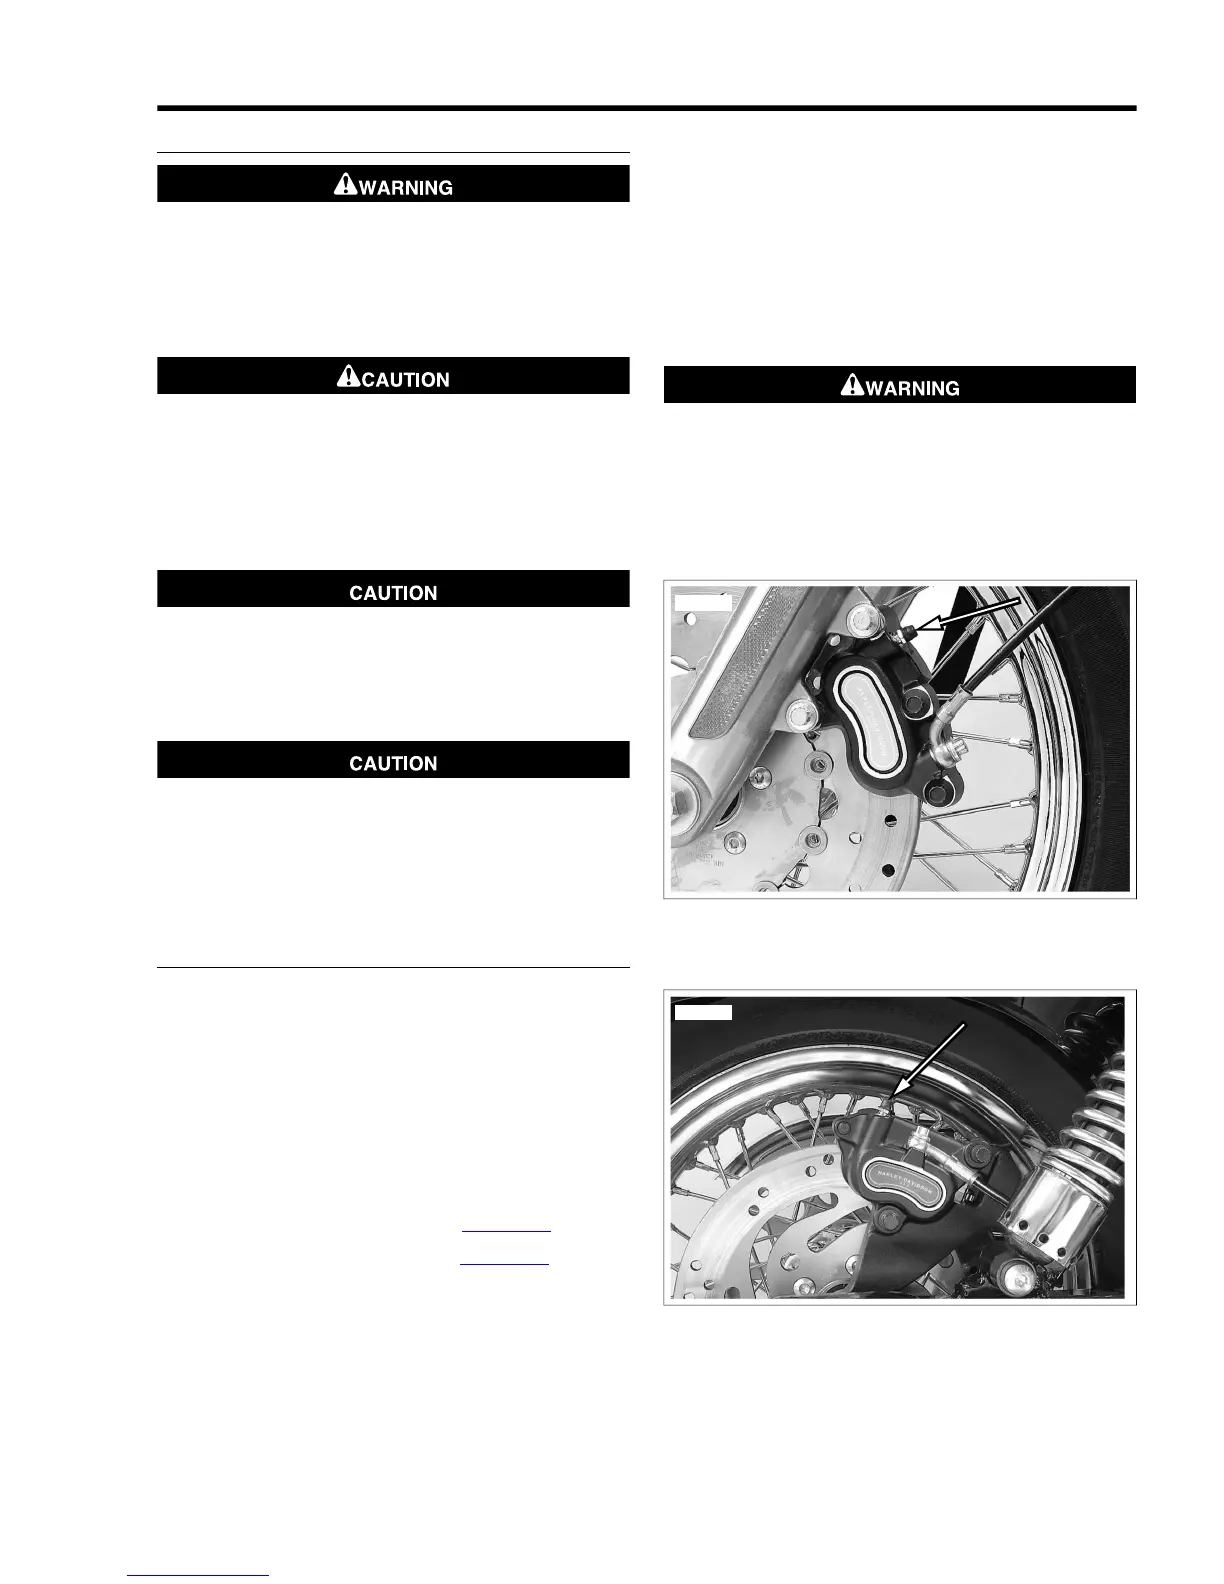
a. Front brake bleeder valve-see Figure 1-31.
b. Rear brake bleeder valve-see Figure 1-32.
2. Add D.O.T. 4 BRAKE FLUID to master cylinder reservoir.
Fluid level should be 1/8-1/4 in. (3.2-6.4 mm) below the
gasket surface. Depress and hold brake lever/pedal to
build up hydraulic pressure.
3. Open bleeder valve slowly about 1/2-turn counterclock-
wise; brake fluid will flow from bleeder valve and through
tubing. When brake lever/pedal has moved its full range
of travel, close bleeder valve (clockwise). Allow brake
lever/pedal to return slowly to its released position.
4. Repeat Steps 2-3 until all air bubbles are purged.
5. Tighten bleeder valve to 80-100 in-lbs (9.0-11.3 Nm).
Install bleeder valve cap.
6. Verify master cylinder fluid level as described in Step 2.
After repairing the brake system, test brakes at low speed.
If brakes are not operating properly, testing at high speeds
can cause loss of control, which could result in death or
serious injury. (00289a)
7. Attach covers to master cylinder reservoirs.Tighten screws
on covers to 6-8 in-lbs (0.7-0.9 Nm).



 To Next Page