A.16PACKARD ECM CONNECTOR
PACKARD 100W CONNECTOR REPAIR
General
A Packard 100W connector connects the the electronic control
module (ECM) to the main harness.
NOTE
For vehicles with 73-pin connectors, see A.17 PACKARD
MICRO-64 CONNECTORS and A.15 PACKARD METRI-PACK
TERMINALS.
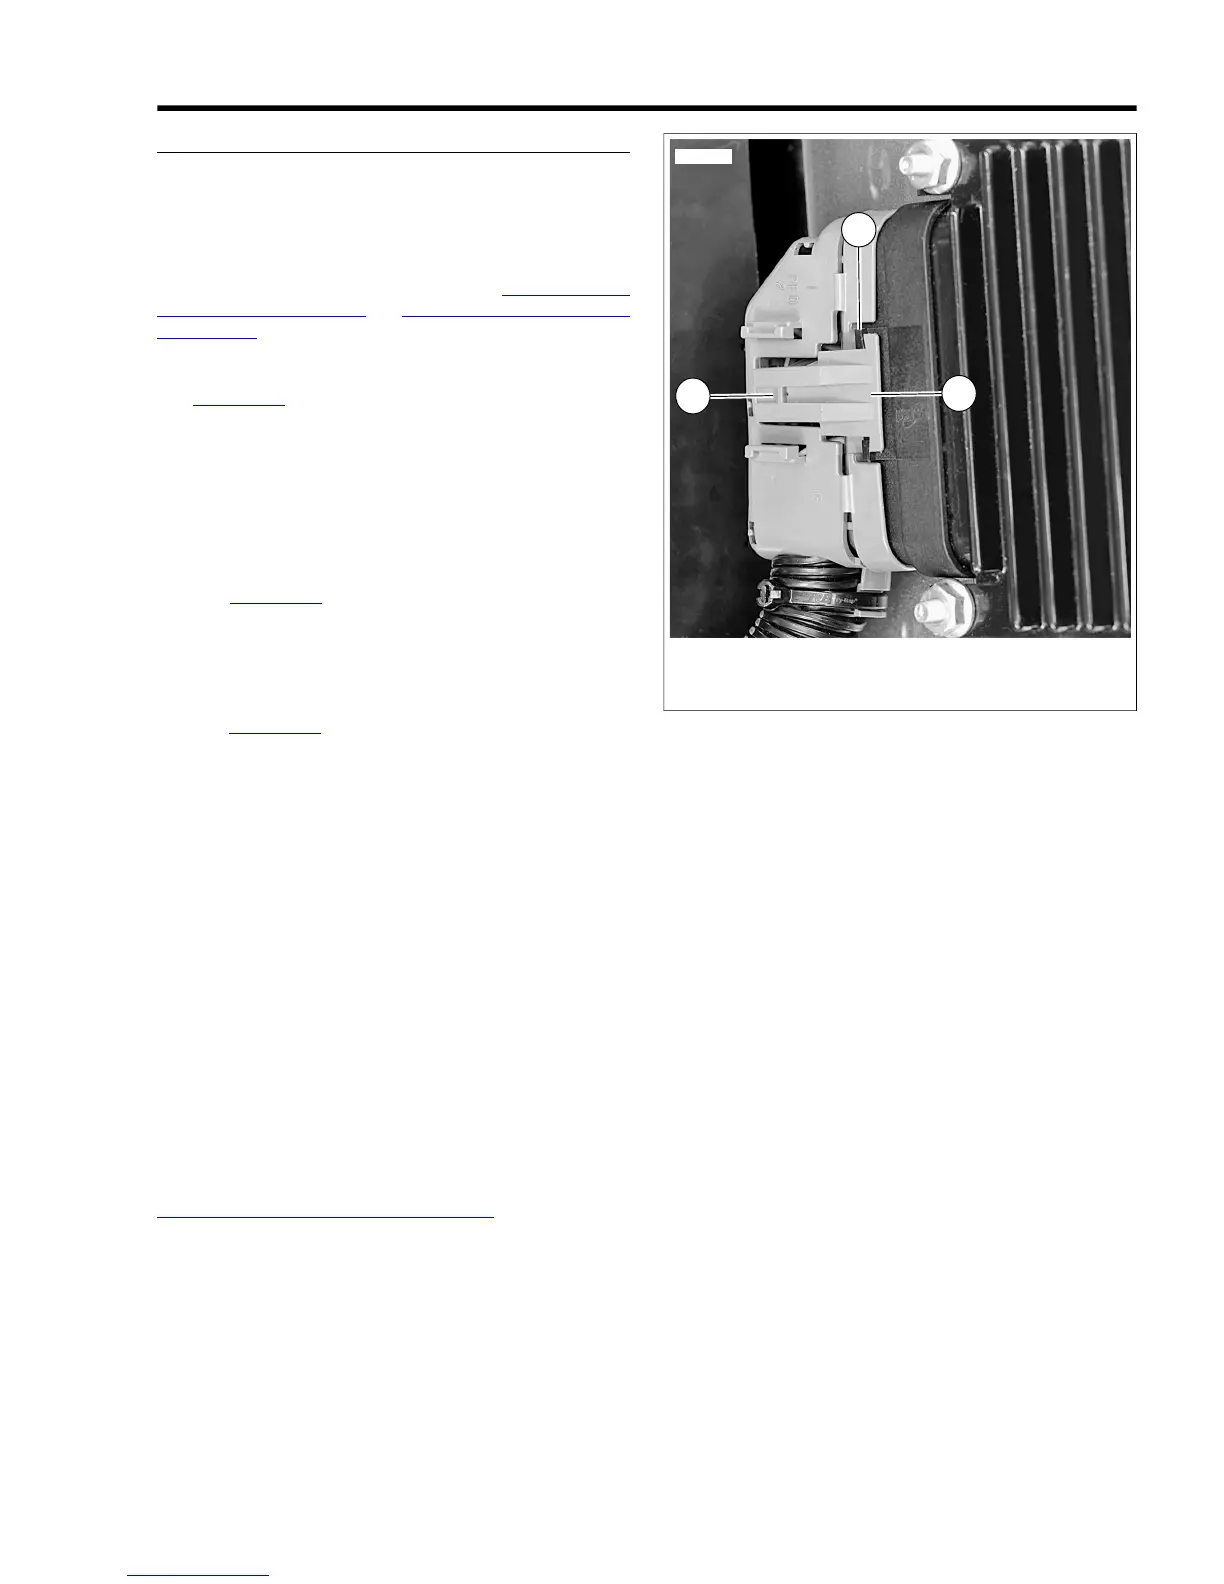
Separating Socket Housing From ECM
See Figure A-46. While pressing the connector into the ECM,
press the thumb lever (1) against the connector until the latch
(2) pops out of the catch (3) on the ECM.
Mating Socket Housing To ECM
Push the connector into the ECM until the latch is captured by
the catch on the ECM.
Removing Socket Terminal
1. See Figure A-47. Gently depress latch (1) on each side
of the clear plastic secondary lock (2) and remove. For
best results, release one side at a time.
2. Carefully cut cable strap (3) to free strain relief collar (4)
from conduit (5).
3. See Figure A-48. Using a thin blade, gently pry at seam
at back of socket housing to release three plastic pins (1)
from slots in housing. Separate and spread halves of
socket housing.
4. Push on wire lead to free terminal from chamber.
Installing Socket Terminal
1. From inside socket housing, gently pull on wire to draw
terminal into chamber.
2. Exercising caution to avoid pinching wires, press halves
of socket housing together until three plastic pins fully
engage slots in housing.
3. Install new cable strap in groove of strain relief collar
capturing cable conduit.
4. With the two ribs on the secondary lock on the same side
as the external latch, install over terminals until latches
lock in place.
Crimping Terminals
If necessary, crimp new terminals on wire leads. See
A.15 PACKARD METRI-PACK TERMINALS.



 To Next Page