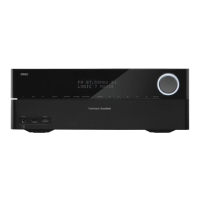
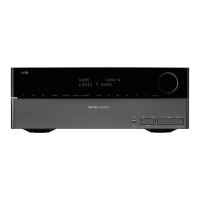
3. Remove the Fip PCB(37-1), referring to the previous step<6>.
4. Remove 10 screws(S2) and then remove the Key PCB(37-2).
<8>TUNER MODULE(43) REMOVAL
1. Remove the Top-cabinet, referring to the previous step<1>.
2. Disconnect the card cable between connector(CON1-13P) on the Tuner module(43)
and connector(CN13) on the Input PCB(39-1).
3. Remove 2 screws(S8) and then remove the Tuner Module(43).
<9>HUDSON PCB(42) REMOVAL
1. Remove the Top-cabinet, referring to the previous step<1>.
2. Disconnect connector(CN80) on the HUDSON PCB(42) from the lead wire(BN80-3P) on the RS232 PCB(37-7).
3. Remove 3 screws(S15).
4. Disconnect the board to board connector between and connector(CN81-44P) on the HUDSON PCB(42)
and connector(BN81-44P) on VIDEO PCB(41) and then remove the HUDSON PCB(42).
<10>VIDEO PCB(41) REMOVAL
1. Remove the Top-cabinet, referring to the previous step<1>.
2. Remove the Hudson PCB(42), referring to the previous step<9>.
3. Disconnect the card cable between connector(BN14-17p) on the Video PCB(41)
and connector(CN14) on the Input PCB(39-1).
4. Disconnect connector(CN43) on the Video PCB(41)
from the lead wire(BN43-3P) on the Regulator PCB(A)(40-2).
5. Disconnect connector(CN41) on the Video PCB(41) from the lead wire(BN41-6P) on the Volume PCB(37-6).
6. Disconnect the card cable between connector(CN42) on the Video PCB(41)
and connector(BN44-11P) on the iPod PCB(39-2).
7. Disconnect the card cable between connector(BN15-15P) on the Video PCB(41)
and connector(CN15-15P) on the INPUT PCB(39-1).
8. Remove 6 screws(S8) and then remove the Video PCB(41).
<11>iPod PCB(39-2) REMOVAL
1. Remove the Top-cabinet, referring to the previous step<1>.
2. Remove the Hudson PCB(42), referring to the previous step<9>.
3. Remove the Video PCB(41), referring to the previous step<10>
4. Disconnect the card cable between connector(BN19-15P) on the the iPod PCB(39-2)
and connector(CN19) on the Input PCB(39-1).
5. Disconnect the card cable between connector(BN44-11P) on the iPod PCB(39-2)
and connector(CN42) on the Video PCB(41).
6. Disconnect the card cable between connector(CN47-7P) on the iPod PCB(39-2)
and connector(CN47) on the RS232 PCB(37-7).
7. Disconnect the board to board connector between and connector(CN23) on the XM PCB(39-4)
and connector(BN17-12P) on the iPod PCB(39-2).
8. Remove 2 screws(S13) and then remove the iPod PCB(39-2).
<12>XM PCB(39-4) REMOVAL
1. Remove the Top-cabinet, referring to the previous step<1>.
2. Remove the Hudson PCB(42), referring to the previous step<9>.
3. Remove the Video PCB(41), referring to the previous step<10>
4. Disconnect the card cable between connector(BN21-7P) on XM PCB(39-4)
and connector(CN21) on the input PCB(39-1).
5. Disconnect the lead wire(BN85-2P) on the XM PCB(39-4) from connector(CN85) on the Regulator PCB(A)(40-2).
6. Disconnect the board to board connector between and connector(CN23) on the XM PCB(39-4)
and connector(BN17-12P) on the iPod PCB(39-2).
7. Remove 1 screws(S15) and then remove the XM PCB(39-4).
 Loading...
