7
OVERVIEW
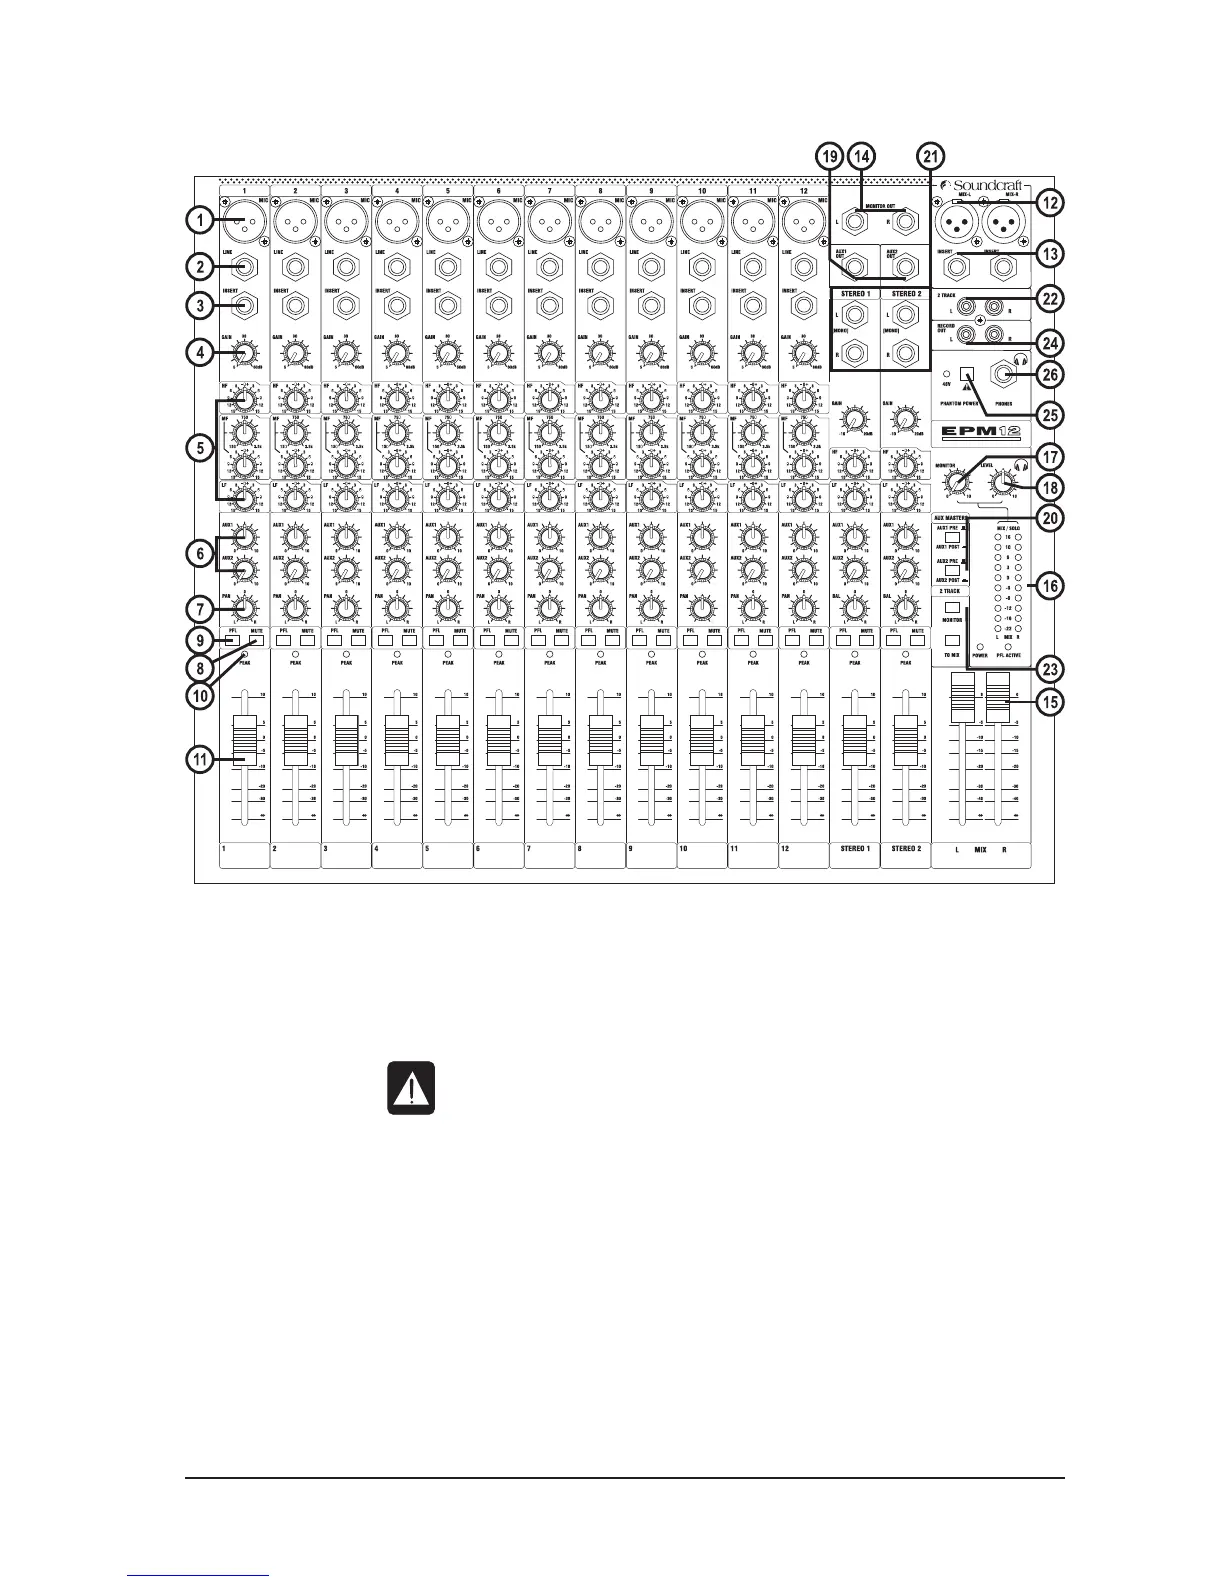
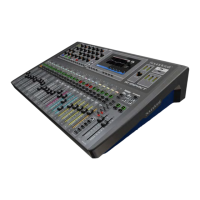
THE 60-SECOND GUIDE
1 MIC INPUT (XLR) Connect Microphones here. If you are using a condenser mic, ensure phantom power is
supplied by pressing the switch at the top of the master section.
WARNING: Do Not apply Phantom Power before connecting a microphone.
2 LINE INPUT (¼” Jack) Connect Line level sources here, e.g. Synth, Drum Machine, DI etc.
3 INSERT POINT (¼” Jack) Connect Signal processors here, e.g. Compressor, Gate etc.
4 GAIN CONTROL Adjust this to increase or decrease the level of the incoming signal.
5 EQ STAGE Adjust these controls to change the signal tone (the character of the signal).
6 AUX SENDS Adjust these controls to change the level of the signal to an FX unit or an artist’s monitors
(headphones/in-ear/stage monitors). Aux 1&2 are switchable pre/post fade.
7 PAN CONTROL Use this control to position the signal within the stereo field.
8 MUTE SWITCH When this is pressed you will hear no signal from the channel (post-mute signals).
9 PFL When pressed the signal will appear on the monitor and headphone outputs - use this to
monitor the post-EQ signal from the channel.
To get you working as fast as possible, this manual begins with a 60-second guide. Here you can find quick information on any
feature of the console.