31
Save These Instructions 3-90-775R36_09/15
WARNING! RISK OF FIRE! Keep combustible materials,
gasoline and other ammable vapors and liquids clear of
the appliance.
• Do NOT store ammable materials in the vicinity of the
appliance.
• Do NOT use gasoline, lantern fuel, kerosene, charcoal
lighter uid or similar liquids to start or "freshen up" a re
in this appliance.
Keep all such liquids well away from the heater while it is in
use, as combustible materials may ignite.
WARNING! RISK OF FIRE!
Do NOT store fuel:
• Within the required clearance areas of the appliance.
• Within the space required for fueling or ash removal.
5. Cleaning Area Beneath Burn Pot Grate
• Frequency: Monthly or more frequently depending on
fuelqualityand/orashbuildup.
• By: User
5. Cleaning Heat Exchanger & Exhaust
• Frequency: Monthly or after each ton of fuel is burned.
• By: User
It is recommended that you use a vacuum that is designed
forash,asashesmayblockconventionalvacuumlters.
NOTICE: For optimal performance of your pellet burning
appliance, you must perform regular cleaning and
maintenance as directed in this manual. Not doing so will
result in:
• Poor performance
• Smokespillageintotheroom
• Overheatingofcomponents
Failure to perform regular cleaning on your pellet burning
appliance will void the warranty.
a. Make sure the re is out and cool. Disconnect power
cord prior to servicing.
b. Scrape the majority of ashes into the ash pan. Begin with
thebackandroofabovetheburnpot.
c. Scrape the ashes from both sides, into the ash pan.
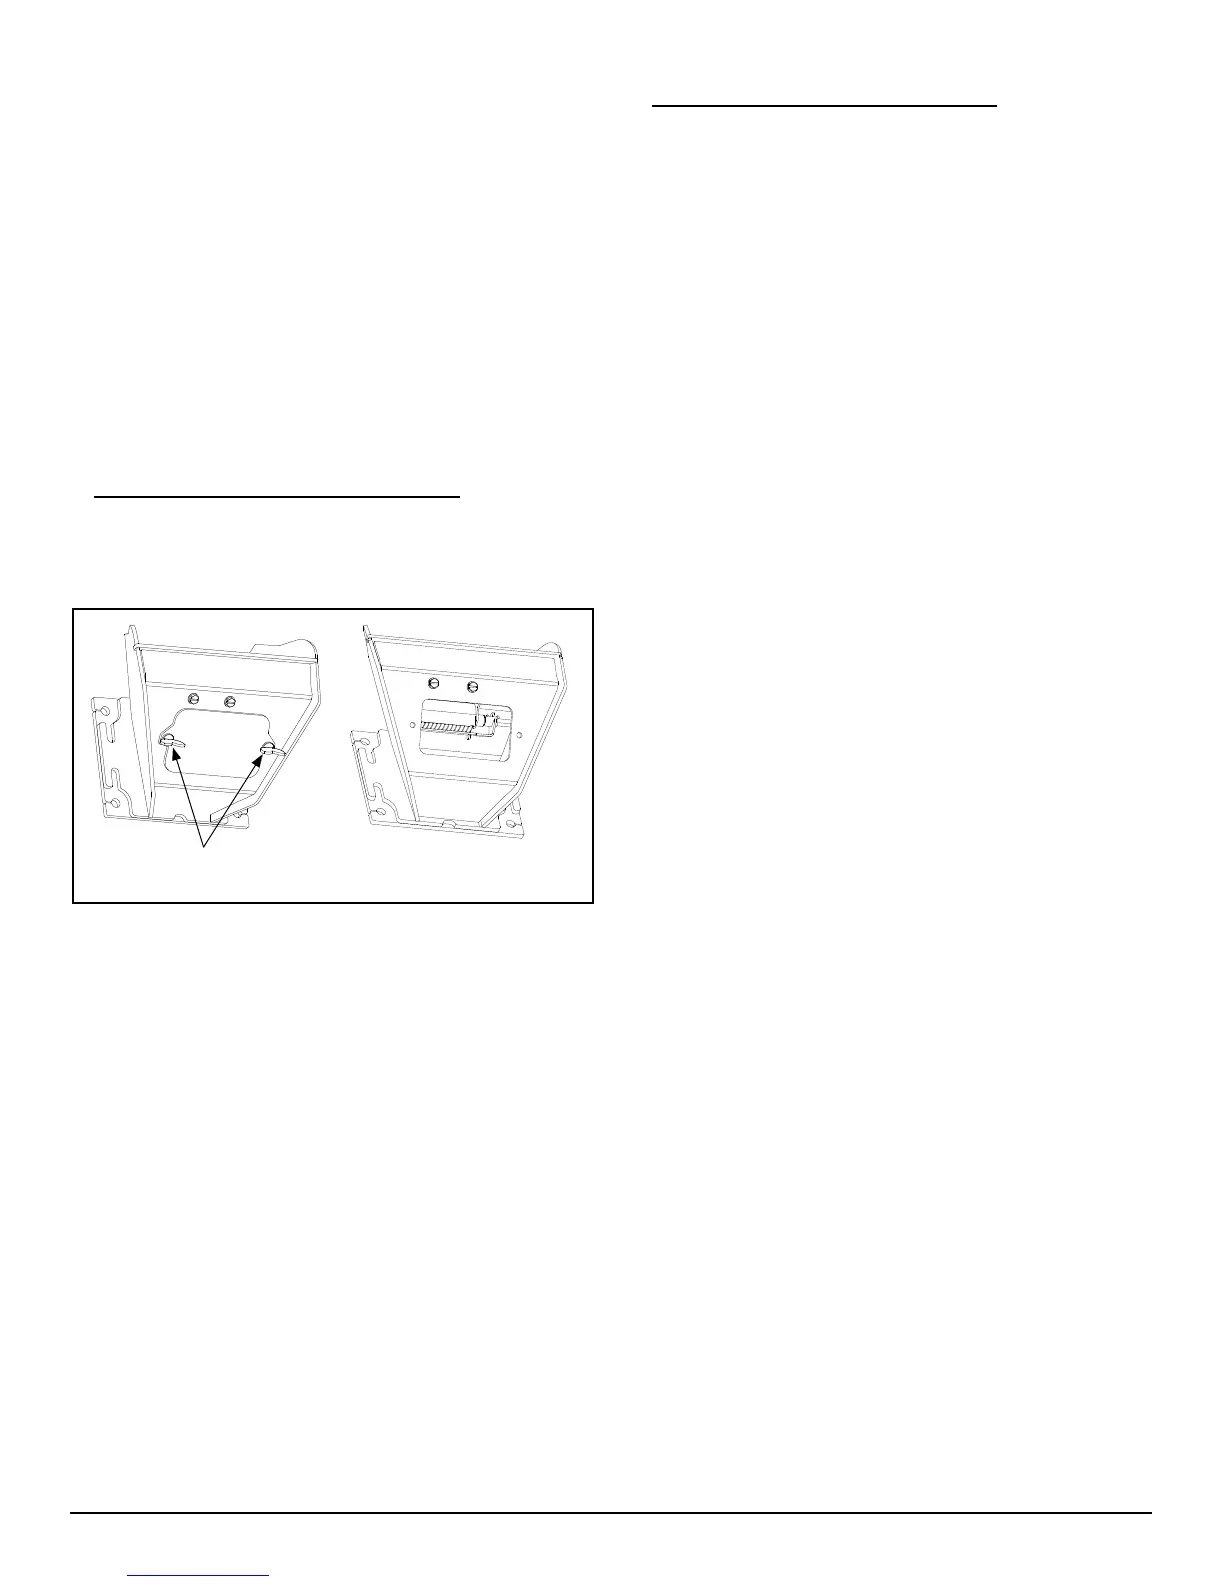
a. Loosen the two wingscrews located on the front of the
burn pot housing.
b. Lift the cover off of the wingscrews and set aside.
c. Usingyourash-vac,removeanyashesordebrisfromthe
air chamber.
d. You can tap on the igniter, located above the cleanout
hole. This will help to remove any accumulation on the
igniter element.
e. Re-installthecleanoutcoverandtightenthewingscrews.
Be sure that the cover is completely covering the hole, as
airleakageheremayleadtoincompletecombustionor
poor ignition.
Loosen the two wingscrews
on the front of the burn pot.
Lift the cover off of the
wingscrews.
 Loading...