ter and then sliding the circuit breaker
panel forward. Terminal board TB1 is
located on the floor of the transmitter di-
rectly below the AC Power panel. Termi-
nals are numbered left to right.
Ifyou choosetowireyourtransmitterwith
separatelowvoltageand high voltagefeeds,
you will need to remove the factory in-
stalledjumperwiresfrom TB1,andconnect
a10ampservicetoTB1terminals5and6.
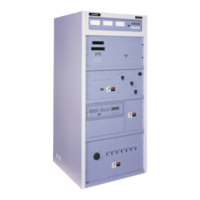
For the 3 phase GATES FIVE, ensure that
the Phase Monitor relay A19K3 is installed
in the AC Power panel and is adjusted to
MIN.SeeNotebelow.
NOTE
To adjust the Phase Monitor, remove all
power from transmitter and rotate the voltage
adjustment screw to your approximate AC
line voltage. The actual setting will have to be
determined by trial and error. Refer to para-
graph 2.7.1.g for adjustment information.
2.6.2. RF Output Connection
Connect the output transmission line from
theantennatotheRFOUTPUTconnectorjack
J1 located on top of the transmitter cabinet.
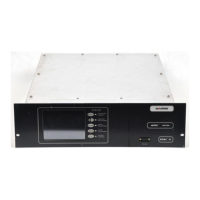
A GATES ONE requires a male type N
connector. Specific type N connectors are
available for various types of coax.
TheGATESTWOandGATESFIVErequire
a 7/8 EIA flange. Specific connectors of this
type are available for various kinds of coax.
2.6.3. Battery Installation
The purpose of the battery on the Controller
board (on the swing out panel) is to maintain
transmitter operational status during a power
interruption. It is not important to install it until
you are nearly ready to put the transmitter
into regular operation. The transmitter will
operate properly without the battery, how-
ever, power interruptions lasting more than
a few seconds will result in an OFF condi-
tion, and all overload lights lit.
A standard 9 volt battery will last about 2
weeks of continuous running with no AC
powerapplied.Alkalinebatterieswill givethe
longest shelf life. It is a good idea to change
the battery after a long outage or yearly.
2.6.4. Audio Input
Route the audio cable up from the base of
the transmitter to the Interface board. The
Interface board is located in the lower left
portion of the transmitter in the front. Con-
nectthe audioinput wires to terminalsTB2-
26 and TB2-27 on the Interface Board.
TB2-28 is groundfor the audio cable.Refer
to Table 2-4 and Figure 2-3.
2.6.5. Remote Control
Allremotecontrolconnectionsaremadeatthe
Interfaceboard.Cabling forremote controlmay
be routed up from the base of the transmitter.
CONTROL
INPUTS TERMINAL
Low TB2-1
Two TB2-2
Three TB2-3
Four TB2-4
Five TB2-5
High TB2-6
Off TB2-7
Raise TB2-8
Lower TB2-9
Ext Kill (RF mute) TB2-10
FAILSAFE TB1-1 and TB1-2
METERING
OUTPUTS TERMINAL
PA Volta ge TB2-11
PS Current TB2-12
Power Output TB2-13
STATUS TERMINAL
Low TB2-15
Two TB2-16
Three TB2-17
Four TB2-18
Five TB2-19
High TB2-20
OVERLOAD
STATUS TERMINAL
Overload Ind Reset TB2-14
Auto Cutback TB2-21
Supply Voltage TB2-22
Supply Current TB2-23
Underdrive TB2-24
VSWR TB2-25
Audio TB2-26
Audio TB2-27
Ground TB2-28
Table 2-4. Interface Board Connections
Figure 2-3. Making Connections to WAGO Block
To prepare wire, strip insulation back approximately 1/4" and twist strands back into
their natural position.
A small flat blade screwdriver is an appropriate tool to use to make the connection.
To make connection, align wire in side opening “B” and depress clamp down from
opening “A” with tool. Insert wire or component in opening “B” andsecurebywithdraw-
ing tool.
2-4 888-2314-001 Rev. AC: 2/29/00
WARNING: Disconnect primary power prior to servicing.
 Loading...

