10411 80th Avenue Pleasant Prairie, WI 53158 | Customer Care: 1-866-616-1270|Fax: 1-866-616-1271|HarrisPoolProducts.com
I. POOL PREPERATION
Before assembling and installing your cleaner, your
pool should be clean and algae-free so as not to inhibit
the cleaner’s traction. If necessary, make the following
preparations before proceeding:
1. Chemically balance the pool water.
2. Brush pool and let the debris settle.
3. Hand vacuum thoroughly.
4. Cleanlterandpumpstrainerbasket.
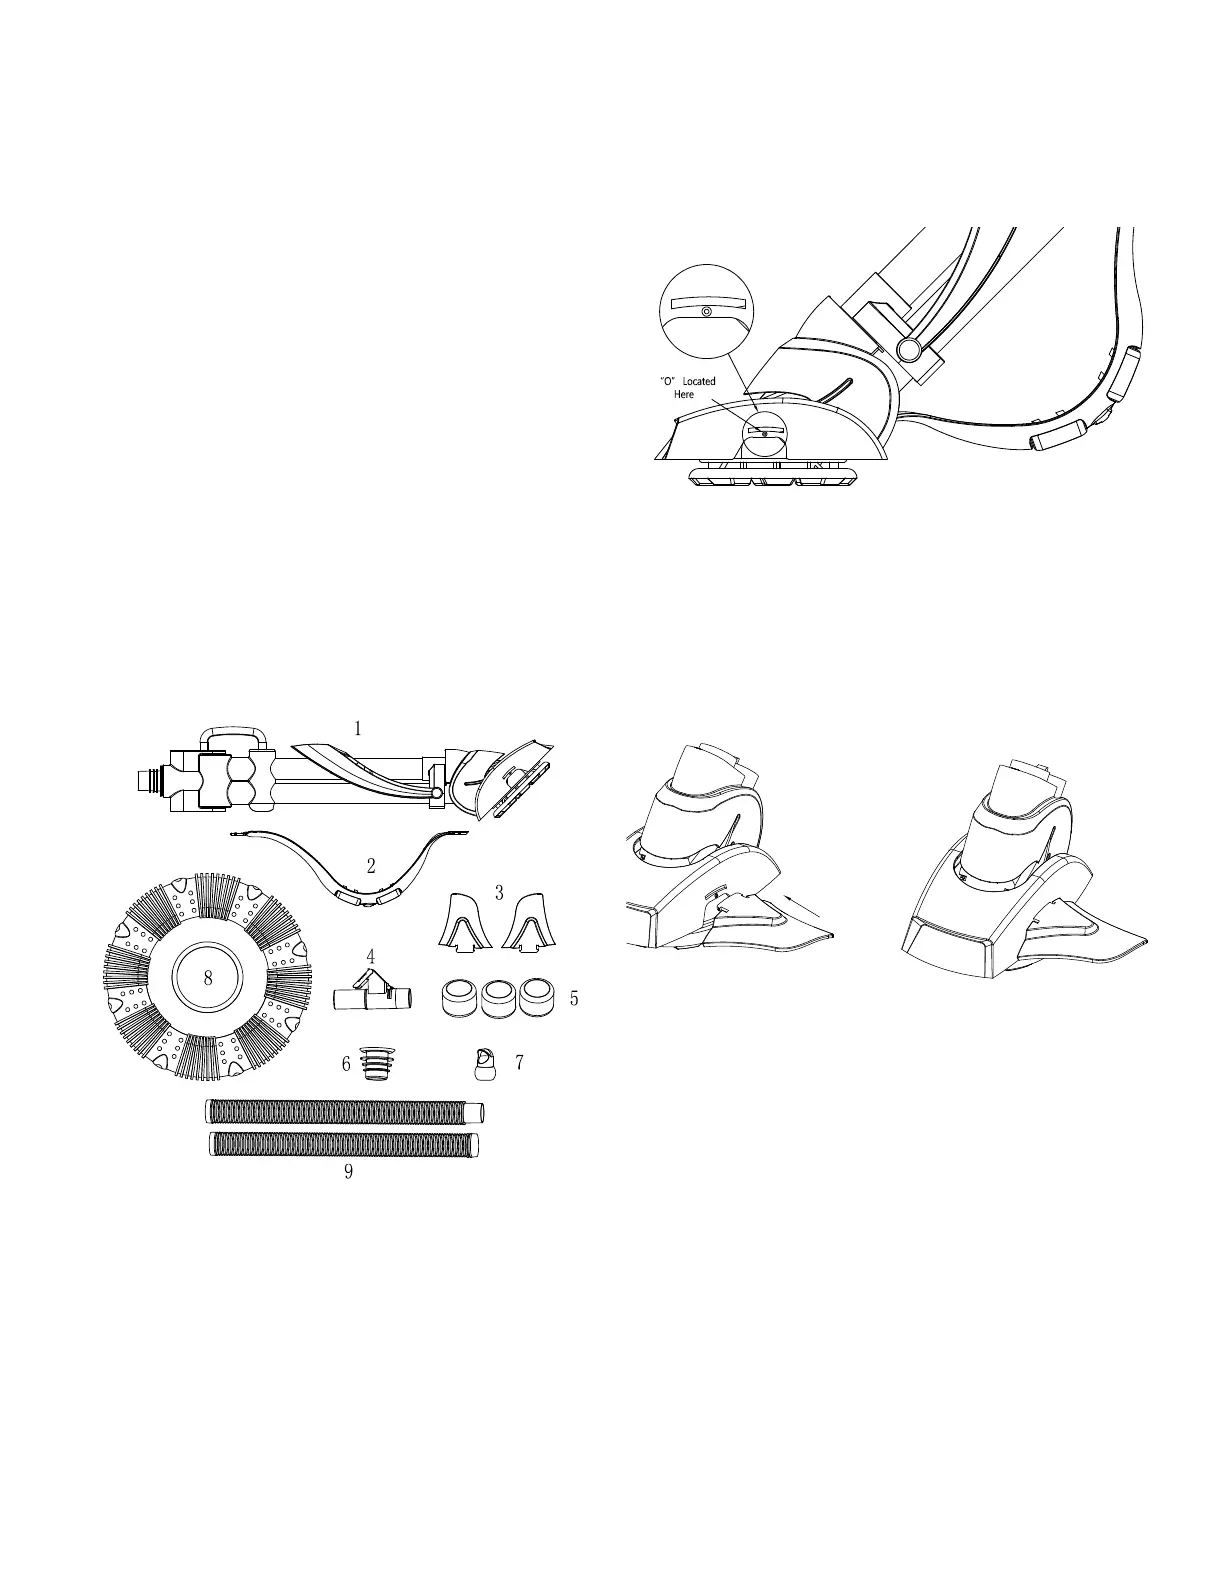
Cleaner Components
Remove the body and all parts from the box. Check to
be sure that all components are included.
1. Cleaner Main Body
2. Bumper Assembly
3. Wings
4. Automatic Regulator Valve
5. Hose Weights
6. Hose Can
7. Eyeball Diverter
8. Pleated Seal
9. Hoses 3.28 ft per section
(11 Male/Female, 1 Female/Female)
II. ASSEMBLING THE CLEANER
Step 1. Attach the Wing
1. Looking at the front right of the cleaner main body,
locate the + on the right side of the body.
2. Lay cleaner on its side so the + is facing upward.
3. Locate the wing on the + on the right inner wall of
the wing.
4. Hold wing at an angle and place the left side into
the slot on cleaner, then the right side into slot,
being sure to hook the wing securely in the tab
inside the body of the cleaner.
5. Gently pull on wing to ensure it’s secure.
6. Turn over cleaner to the left side and repeat steps 4
& 5 by inserting the left wing marked ‘o’ to the left
side of body marked ‘o’.
 Loading...