10411 80th Avenue Pleasant Prairie, WI 53158 | Customer Care: 1-866-616-1270|Fax: 1-866-616-1271|HarrisPoolProducts.com
Step 4. Assemble Hose & Hose Weights
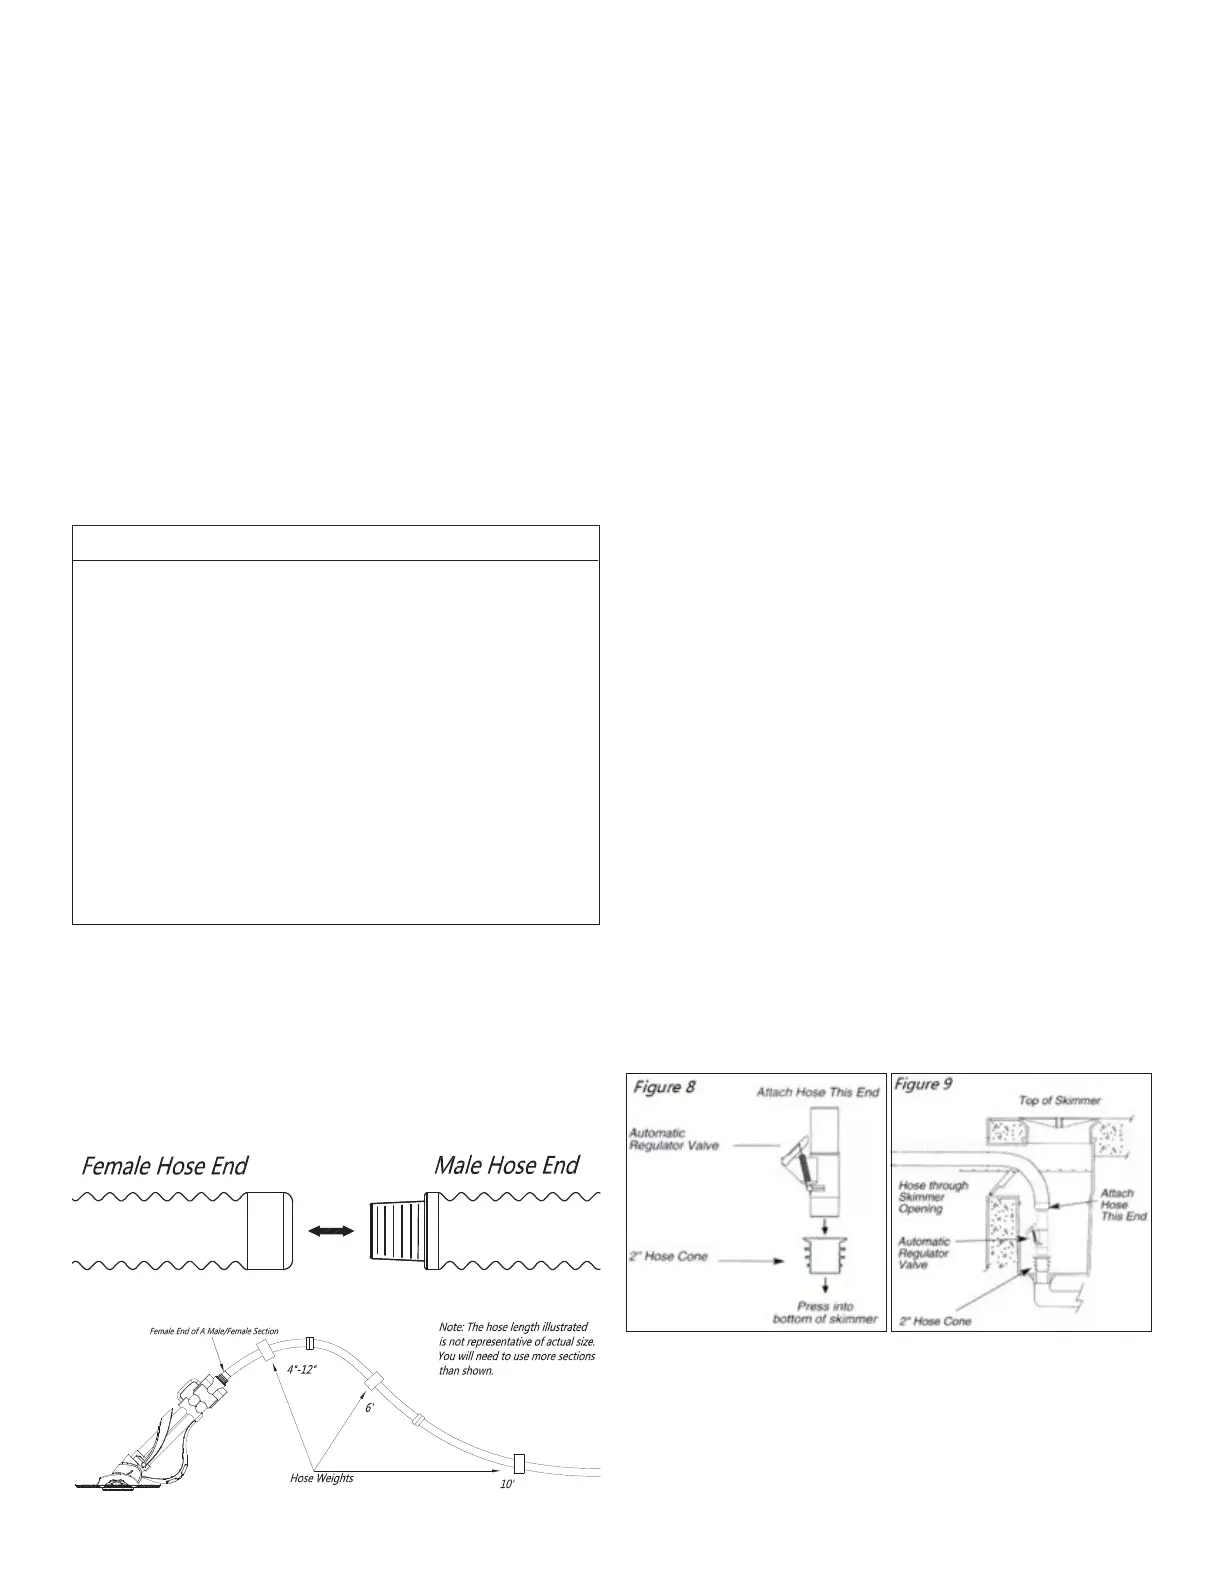
1. To connect the hose sections, wet the ends in the
pool water, then twist and push the female ends
onto the male ends.
Note: One of the hose sections has two (2) female
ends.Thissectionshouldbettedlastandattached
to pool vacuum connection.
2. The hose should reach from where the suction pool
cleaner is connected to the farthest point of the
pool, plus one section.
3. Your cleaner comes with three hose weights.
Attach hose weights to the hose based on Table
A. The number of hose weights is determined by
the maximum depth of your pool. The hose weights
help to neutralize the hose’s buoyancy in water.
4. Connect the hose to the cleaner.
5. Install the hose protector on the female/female
hose section. Then connect the female/female end
to the vacuum connection.
Note: May substitute 4 inch Female/Female hose.
III. INSTALLING THE CLEANER
Standard Installation
The cleaner is designed to work in a wide variety of
swimming pools. For pools with one skimmer, use the
automatic regulator valve. During this installation, the
automatic regulator valve automatically balances the
water ow between the skimmer and cleaner. The
valve automatically adjusts to changes in the amount
of water ow to provide the cleaner with the power
necessary to ensure proper cleaning performance. We
strongly recommend the use of the automatic regulator
valve for maximum safety and performance.
1. Turn the pool pump off.
2. Close the main drain and all suction lines, except
the line from the skimmer to which the cleaner will
be connected.
3. Remove skimmer basket.
4. Pressthe2″hoseconeintothevacuumconnection
in the bottom of the skimmer, as shown in Figure 9.
5. Press the automatic regulator valve into the 2” hose
cone. The end of the valve that is marked with
arrow must point down, as shown in Figure 8.
6. Place cleaner into the pool and allow it to sink to
theoor.Continuetofeedthehoseverticallydown
intothepooluntilitiscompletelylledwithwater
and purged of air.
7. Slide the hose protector into position on the hose
to prevent the hose body from rubbing against the
skimmer wall.
8. Insert the end of the hose through the skimmer
opening and connect the hose directly onto the
automatic regulator valve.
TABLE A
Pool Depth Weight Placement
4 feet or less 1 weight: 4 to 12 inches from
body’s swivel head
More than 4 feet, 2 weights: 4 to 12 inches,
less than 7 feet one 6 feet from the swivel head
More than 7 feet, 3 weights: one 4 to 12 inches,
less than 12 feet one 6 feet and one 10 feet
from the swivel head
More than 12 feet 4 weights: one 4 to 12 inches,
one 6 feet, one 10 feet, and
one 12 feet from the swivel head
 Loading...