12 – English
MAINTENANCE
REPLACING THE CUTTING BLADE
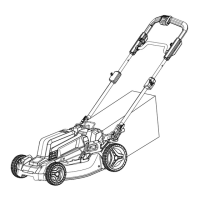
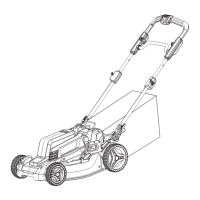
See Figures 16 - 17.
NOTE: Onlyuseauthorizedreplacementblades.
Stopthemotorandremovethestartkey.Allowtheblade
tocometoacompletestop.
Removethebatterypackfromthebatteryport.
Turnthemoweronitsside.
Wedgeablockofwoodbetweenthebladeandmower
decktopreventthebladefromturning.
Loosenthebladenutbyturningitcounterclockwise(as
viewedfrombottomofmower)usinga15mmwrenchor
socket(notprovided).
Removethebladenut,spacer,bladeinsulator,andblade.
Do not removethehubortheadaptor.
WARNING:
Ifthehuband/ortheadaptorhavebeenremoved,re-
placethembeforeplacingbladeontheshaft.Failure
todosocouldcausethebladetodetachorbecome
unbalancedsincebladewillnottightenproperly,which
canresultinseriouspersonalinjury.
Placethenewbladeontheshaftagainstthebladeposts
onthehub.Ensurebladeisproperlyseatedwithshaftgo-
ingthroughcenterbladeholeandthetwobladepostson
thehubinsertedintotheirrespectiveholesontheblade.
Makesureitisinstalledwiththecurvedendspointingup
towardthemowerdeckandnotdowntowardtheground.
Whenseatedproperly,thebladeshouldbeflat.
Replacethebladeinsulatorandspacer,thenthreadthe
bladenutontheshaftandfingertighten.
NOTE:Makecertainallpartsarereplacedintheexact
orderinwhichtheywereremoved.
Torque the blade nut down clockwise using a torque
wrench(notprovided)to ensure the bolt is properly
tightened.Therecommendedtorqueforthebladenutis
310–360in.lbs.
WARNING:
Ensurebladeisproperlyseatedandthebladenutis
tightenedtothetorquespecificationsabove.Failureto
properlyattachthebladecouldcauseittocomeloose
andresultinpossibleseriouspersonalinjury.
STORING THE MOWER
See Figures 18 - 20.
WARNING:
Removeallbatterypacksfromthebatteryportandbat-
terystoragecompartmentandstartkeyandstoreina
securelocationoutofthereachofchildrentoprevent
unauthorizeduseofthelawnmowerandpossibleseri-
ouspersonalinjury.
Beforestorage,wipeanydirtordebrisfromthebattery
area.
Turnmoweron itssideand cleangrassclippings that
haveaccumulatedontheundersideofthemowerdeck.
Wipethemowercleanwithadrycloth.
Checkallnuts,bolts,knobs,screws,fasteners,etc.,for
tightness.
Inspectmovingpartsfordamage,breakage,andwear.
Haverepairsmade onanydamaged ormissing parts.
Checkbladefordamage,uneven,orexcessivewearand
replacebladeiftheseconditionsexist.
Storemowerindoorsinaclean,dryplaceoutofthereach
ofchildren.
• To storethe mower in a horizontal position, lower
thehandleassembly.Avoidpinchingortrappingany
cables.
• Tostorethemowerinaverticalposition,removethe
grass bag, then lower the handle assembly. Avoid
pinchingortrappinganycables.Raisethemower90°
torestonitsrearsupport.
NOTE:Makesurethepinsonthehandleadjustment
knobsarefullylockedbeforeattemptingtoraisethe
mowertothestandingposition.
NOTICE:
Donotallowthestartercabletobecomepinchedor
trappedwhenloweringthehandle.
Donotstorenearcorrosivematerialssuchasfertilizeror
rocksalt.
 Loading...