9 - English
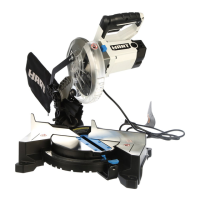
OPERATION
OPERATING THE SAW
See Figures 12 - 14, pages 13 - 14.
Itisimportanttounderstandthecorrectmethodforoperat-
ingthesaw.Refertothefiguresinthissectiontolearnthe
correctandincorrectwaysforhandlingthesaw.
DANGER:
Whenliftingthesawfromtheworkpiece,thebladeis
exposed on the underside of the saw until the lower
bladeguardcloses.Makesurethelowerbladeguardis
closedbeforesettingthesawdown.
WARNING:
To make sawing easier and safer, always maintain
propercontrolofthesaw.Lossofcontrolcouldcause
anaccidentresultinginpossibleseriousinjury.
Tomakethebestpossiblecut,followthesehelpfulhints.
Holdthesawfirmlywithbothhands.
Avoidplacingyourhandontheworkpiecewhilemaking
acut.
Supporttheworkpiecesothatthecut(kerf)isalwaysto
yourside.
Supporttheworkpiecenearthecut.
Clamptheworkpiecesecurelysothattheworkpiecewill
notmoveduringthecut.
Alwaysplacethesawontheworkpiecethatissupported,
notthe“cutoff”piece.
Placetheworkpiecewiththe“good”sidedown.
Drawa guideline along the desired line of cut before
beginningyourcut.
CROSS CUTTING/RIP CUTTING
See Figure 15, page 14.
Whenmakingacrosscutorripcut,alignthelineofcutwith
the0°bladeguidenotchonthebase.
Sincebladethicknessesvary, alwaysmakeatrial cutin
scrapmaterialalongaguidelinetodeterminehowmuch,if
any,youmustoffsettheguidelinetoproduceanaccurate
cut.
NOTE:Thedistancefromthelineofcuttotheguidelineis
theamountyoushouldoffsettheguide.
TO RIP CUT WITHOUT EDGE GUIDE
See Figure 16, page 14.
NOTE :Youmayalsouseaedgeguidetomakeripcuts.
Refer to OPTIONAL EDGE GUIDE laterinthismanual.
Useaguidewhenmakinglongorwideripcutswiththesaw.
Securetheworkpiece.
Clamp a straight edge to the workpiece using
C-clamps.
Sawalongthestraightedgetoachieveastraightripcut.
NOTE:Donotbindthebladeinthecut.
WIDTH OF CUT SCALE
See Figure 17, page 14.
Awidthofcutscalehasbeenprovidedonthebaseofthe
saw.Whenmakingstraightcrosscutsorripcuts,thescale
canbeusedtomeasureupto4-1/2in.ontherightsideof
theblade,andupto1in.ontheleftsideoftheblade.
BEVEL CUTTING
See Figures 18-19, page 14.
Alignthelineofcutwiththe45°bladeguidenotchonthe
basewhenmaking45°bevelcuts.
Makeatrial cutinscrap materialalonga guidelineto
determinehowmuchyoushouldoffsettheguidelineon
thecuttingmaterial.
Adjusttheangleofthecuttoanydesiredsettingbetween
zeroand50°.Referto Adjusting the Bevel Settingnext.
ADJUSTING THE BEVEL SETTING
See Figure 18, page 14.
Removethebatterypack.
Loosenthebevellockknob.
Raisethemotorhousingendofthesawuntilyoureach
thedesiredanglesettingonthebevelscale.
Tightenthebevellockknobsecurely.
WARNING:
Attempting a bevel cut without having the bevel
adjustmentknobsecurelytightenedcanresultinserious
injury.
MAKING A BEVEL CUT
See Figure 19, page 14.
Holdthesawfirmlywithbothhandsasshown.
Restthefrontedgeofthebaseontheworkpiece.
Startthesawandletthebladereachfullspeed.
Guidethesawintotheworkpieceandmakethecut.
Releasethe trigger and allowthe blade to cometo a
completestop.
Liftthesawfromtheworkpiece.
 Loading...