8 - English
WARNING:
When using the saw, always stay alert and exercise
control.Donotremovethesawfromtheworkpiecewhile
thebladeismoving.
SAW BLADES
Thebestofsawbladeswillnotcutefficientlyiftheyarenot
keptclean,sharp,andproperlyset.Usingadullbladewill
placeaheavyloadonthesawandincreasethedangerof
kickback.Keepextrabladesonhand,sothatsharpblades
arealwaysavailable.
Gumand wood pitch hardened onblades will slow the
sawdown.Removesawbladefromthesawandusegum
andpitchremover,hotwater,orkerosenetoremovethese
accumulations.DO NOT USE GASOLINE.
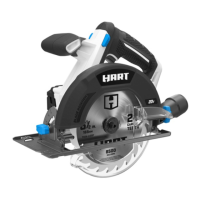
BLADE GUARD SYSTEM
See Figure 8, page 13.
Thelowerbladeguardattachedtothecircularsawisthere
foryourprotectionandsafety.Donotalteritforanyreason.
Ifitbecomesdamaged,donotoperatethesawuntilyou
havetheguardrepairedorreplaced.Alwaysleaveguardin
operatingpositionwhenusingthesaw.
DANGER:
Whensawingthroughwork,lowerbladeguarddoesnot
coverbladeontheundersideofwork.Sincebladeis
exposedonundersideofwork,keephandsandfingers
awayfromcuttingarea.Anypartofyourbodycoming
incontactwithmovingbladewillresultinseriousinjury.
CAUTION:
Neverusesawwhenguardisnotoperatingcorrectly.
Checktheguardforcorrectoperationbeforeeachuse.
Theguardisoperatingcorrectlywhenitmovesfreely
andreadilyreturnstotheclosedposition.Ifyoudrop
thesaw,checkthelowerbladeguardandbumperfor
damageatalldepthsettingsbeforereuse.
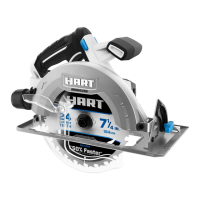
STARTING/STOPPING THE SAW
See Figure 9, page 13.
To start the saw:
Depressthelock-offbutton.
Depresstheswitchtrigger.
Alwaysletthebladereachfullspeed,thenguidethesaw
intotheworkpiece.
WARNING:
Thebladecomingincontactwiththeworkpiecebefore
itreachesfullspeedcouldcausethesawtokickback
towardsyouresultinginseriousinjury.
OPERATION
To stop the saw:releasetheswitchtrigger.
Afteryoureleasetheswitchtrigger,allowthebladetocome
toa complete stop. Do not remove the saw from the
workpiece while the blade is moving.
LOCK-OFF BUTTON
See Figure 9, page 13.
Thelock-off button reduces the possibility of accidental
starting.Thelock-offbuttonislocatedonthehandleabove
theswitchtrigger.Thelock-offbuttonmustbedepressed
beforeyoupulltheswitchtrigger.Thelockresetseachtime
thetriggerisreleased.
NOTE: Youcandepressthelock-offbuttonfromeitherthe
leftorrightside.
ADJUSTING BLADE DEPTH
See Figure 10, page 13.
Alwayskeepcorrectbladedepthsetting.Thecorrectblade
depthsettingforallcutsshouldnotexceed1/4in.below
thematerialbeingcut.Morebladedepthwillincreasethe
chance of kickback and cause thecut to be rough.For
moredepthofcutaccuracy,ascaleislocatedontheupper
bladeguard.
Removethebatterypack.
Loosenthedepthlockknob.
Determinethedesireddepthofcut.
Locatethedepthofcutscaleonthebackoftheupper
bladeguard.
Holdthe base flatagainst the workpieceand raise or
lowerthesawuntiltheindicatormarkonbracketaligns
withthenotchonthebladeguard.
Tightenthedepthlockknobsecurely.
INSTALLING THE OPTIONAL VACUUM
ATTACHMENT
See Figure 11, page 13.
The vacuum attachment provided with the sawmay be
installedforeasydustremovalanddisposal.Itfitsvacuum
hoses1-1/4in.and1-7/8in.
Removethebatterypack.
Unscrewandremovethedepthlockknob.Removethe
washer.Setbothaside.
Insertthevacuumattachmentintothedustport,aligning
theribsontheattachmentwiththegroovesinthedust
portofthesaw.
Reattachthewasheranddepthlockknob.Turntheknob
clockwisetosecurelyfastenthevacuumattachment.
 Loading...