8 – English
WARNING:
Before inspecting, cleaning, or servicing the machine,
shutoffengineormotor,waitforallmovingpartstostop,
anddisconnectsparkplugwireandmoveitawayfrom
sparkplug,disconnectfrompowersupply,orremovethe
batterypack.Failuretofollowtheseinstructionscanresult
inseriouspersonalinjuryorpropertydamage.
WARNING:
Alwaysweareyeprotectionwithsideshieldsmarkedto
complywithANSIZ87.1,alongwithhearingprotection.
Failuretodosocouldresultinobjectsbeingthrowninto
youreyesandotherpossibleseriousinjuries.
WARNING:
When servicing, use replacement parts that meet or
exceedoriginalproductspecifications.Useofanyother
partscouldcreateahazardorcauseproductdamage.
NOTICE:
Periodically inspect the entire product for damaged,
missing, or loose parts such as screws, nuts, bolts,
caps,etc.Tightensecurelyallfastenersandcapsand
donotoperatethisproductuntilallmissingordamaged
partsarereplaced.Pleasecontactcustomerserviceor
aqualifiedservicecenterforassistance.
GENERAL MAINTENANCE
Avoidusing solvents when cleaning plastic parts. Most
plasticsaresusceptibletodamage fromvarious types of
commercialsolventsandmaybedamagedbytheiruse.Use
cleanclothstoremovedirt,dust,oil,grease,etc.
WARNING:
Donotatanytimeletbrakefluids,gasoline,petroleum-
basedproducts,penetratingoils,etc.,comeincontact
with plastic parts. Chemicals can damage, weaken or
destroyplasticwhichmayresultinseriouspersonalinjury.
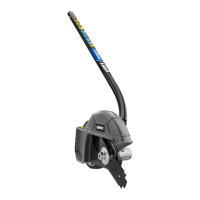
REPLACING THE BLADE
See Figures 6 - 8.
Replacebladeswhenworndowntoindicatorholeonblade.
Use only recommended or equivalent replacement parts
when servicing the product. Use identical replacement
bladesonly.
Stoptheengineormotorandremovethesparkplugwire,
disconnectfromthepowersupply,orremovethebattery
pack.
Aligntheslotintheflangewasherandgearcasewiththe
slotintheflange;placetheholdingpinthroughallthree
slotstosecureinplace.
Usinga3/4in.(19mm)socketwrench,turnthebladenut
clockwisetoloosen.
Removetheoldbladefromtheedgershaft.
Cleandebrisfromtheedgershaftandflangewashers.
Centerthenewbladeontheflangewasher,makingsure
thebladesitsflat.
Installthecuppedwasherwiththeholeoffoftheblade
surface.
Installthebladenutontotheedgershaft.
Usinga3/4in.(19mm)socketwrench,turntheblade
nutcounterclockwiseontotheedgershaftandtighten
securely.Torquenutto11ft.lbs.
Thisreplacementpartisavailablefromtheplaceofpur-
chase,orbycallingcustomerservice.
NOTE: Always make sure the blade is correctly installed
andsecurelyfastenedbeforeeachuse.
ATTACHING THE STORAGE HANGER
See Figure 9.
Therearetwowaystohangtheattachmentforstorage.
Tousethehangercap,pushinthebuttonandplacethe
hangercapovertheendoftheattachmentshaft.Slightly
rotatethecapfromsidetosideuntilthebuttonlocksinto
place.
Thesecondaryholeintheattachmentshaftcanbeused
forhangingpurposesaswell.
STORING THE ATTACHMENT
Store the attachment indoors in a dry, well-ventilated
placethatisinaccessibletochildren.
Keepawayfromcorrosiveagentssuchasgardenchemi-
calsandde-icingsalts.
MAINTENANCE
 Loading...