Han
®
GigaBit
8
Ⓓ
Ⓔ
Ⓕ
Ⓖ
Han
®
S
Ⓓ
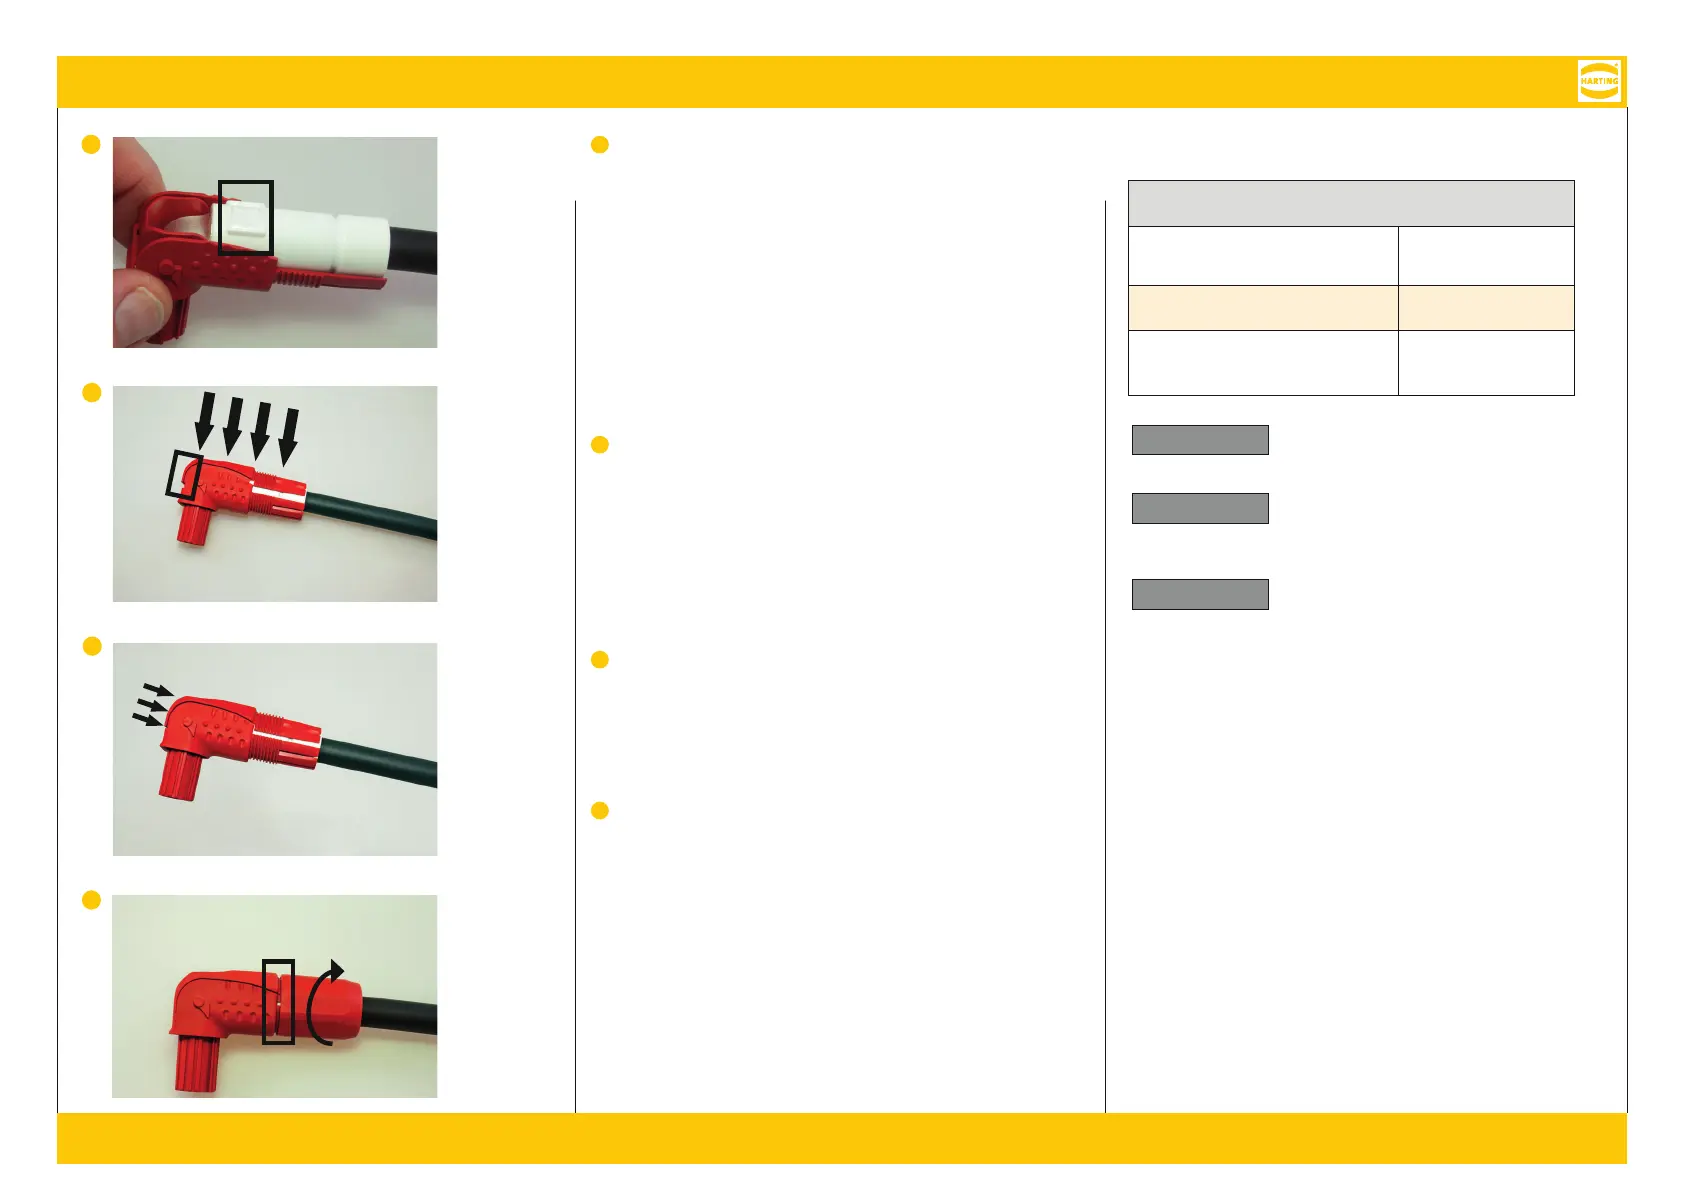
Slide the rubber sleeve ⑤ in the direction of the female contact ④
until it comes to a hold. Then, place the contact and the rubber
sleeve in the carrier hood ①, making sure that the mark displaying
the crimp cross-section is turned to the top (⇨ black frame).
S S G ⑤ A R
B ④. L S K
G T ①. S ,
M C
(⇨ R).
Poussez le manchon en caoutchouc ⑤ dans la direction du contact
femelle ④ , jusqu’à ce qu’il ne puisse plus être déplacé. Placez
maintenant le contact et le manchon en caoutchouc dans le support
de capot ①, en veillant à ce que le marquage soit tourné la section de
sertissage vers le haut (⇨ cadre noir).
Ⓔ
Put the shell ② over the rubber sleeve ⑤ and press it down against
the carrier hood ① . A narrow gap between both parts will show up
in the front part of the hood.
S S H② G⑤
S T①. A
F H B
S.
Placez la coquille ② sur le manchon en caoutchouc ⑤ et pressez-la
contre le support de capot ① . Il y a un espace étroit entre les deux
composants à l‘avant du capot.
Ⓕ
Push the forehead of the shell ② in the direction of the arrows to
eliminate the narrow gap and bring it to the final position.
S S F H ② P,
S H
P .
Poussez la face de la coquille ② dans le sens des flèches pour
éliminer l’étroit écart, afin qu’elle soit amenée à la position finale.
Ⓖ
Screw the cable gland ➂ using the Han
®
S wrench adapter AF 23
and the appropriate wrench tool, applying a tightening torque of
2.5 N m. In order not to overstress the hood, depending on the
cable construction a gap no wider than 1.5 mm might remain.
B S K H
®
S
S-A SW23
S . V S D 2,5 N. U
G , ,
K, R 1,5 .
Fixez le presse-étoupe avec l’adaptateur de clé Han
®
S, SW 23,
combiné à la clé correspondante. Utilisez un couple de serrage de
2,5 N m. Selon la structure du câble, un espace résiduel de 1,5 mm
peut subsister afin de ne pas surcharger le boîtier.
Screwing information / A S /
Informations sur les vis
Cable gland / K / Presse-étoupe
Recommended tightening torque /
E A /
Couple de serrage recommandé
2.5 N m
Maximum gap / M A-
/ Écart maximal
1.5 mm
Han
®
S Wrench adapter A/F 23 /
H
®
S
S-A,SW23/
Han
®
S Adaptateur de clé de 23 mm
09 93 000 9951
(part no. / A.-N./
référence)
Notice
It is also possible to screw the cable gland
by hands as long as no gap remains.
Hinweis
E , K-
H ,
S .
Avis
Il est aussi possible de serrer le presse-
étoupe à la main tant qu’il n’y a pas de fente.


 To Next Page
 Loading...