Han
®
GigaBit
9
Han
®
S
Assembly of screw mounted housing / M E / Assemblage d’embase à visser (components / K / composants ⑥⑦)
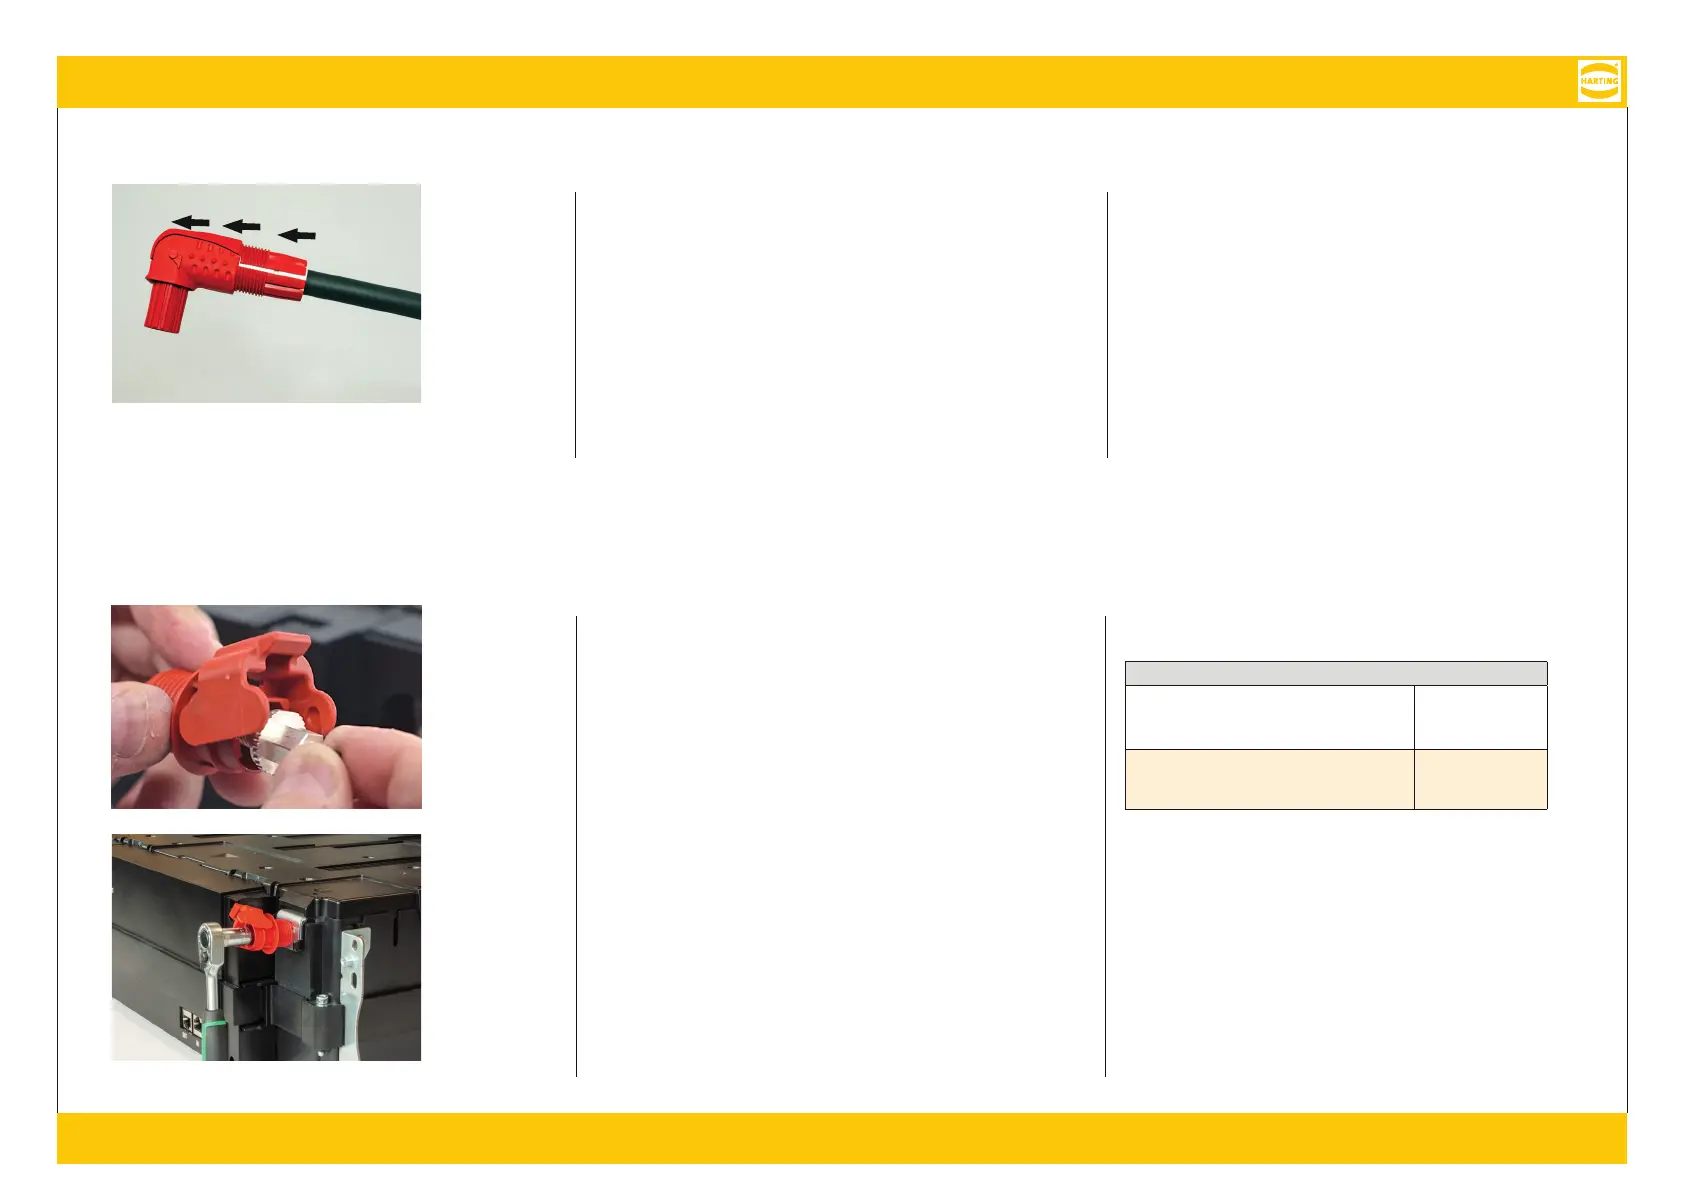
Dissassembly of the hood / D T / Démontage du capot (components / K / composants ①②③④⑤)
Unscrew the cable gland ③ and push the shell ② in the direction of the
hood’s forehead, so that a narrow gap between the shell ② and the carrier
hood ① reappears. Move up the shell ② and remove the female contact ④
from the carrier hood ① .
S S K③ S
H② R S T,
S H ② T① . H-
S H② S B-K④
T ① .
Dévissez le presse-étoupe ③ et poussez la coquille ② en direction de
l’avant du capot, de sorte qu’un espace étroit de nouveau entre la coquille et
le support de capot ①. Poussez maintenant la coquille vers le haut et retirez
le contact femelle ④ du support de capot ①.
Screwing information / A S A S /
Informations sur les vis
Male contact / S / Contact mâle
Han
®
S Socket hex ¼" / A/F 9 //
H
®
S I ¼"/SW //
Han
®
S clé Allen de ¼ " / 9
09 93 000 9952
(part no. / A.-
N./ référence)
Recommended tightening torque /
E A/
Couple de serrage recommandé
11.0 N m
Place the male contact ⑦ into the screw mounted housing ⑥, making
sure that the flat contours of both parts are aligned during the insertion.
Position the screw mounted housing ⑥ directly above the threaded hole
and screw-in the male contact ⑦ from the front – using the appropriate
tools and applying a tightening torque of 11.0 N m!
S S S ⑦ E⑥
S , K T
E . P S
E⑥ G. S
S S ⑦ W . V-
S A 11,0N
Insérez le contact mâle ⑦ dans l’embase à visser ⑥ et assurez-vous que les
contours plats de ces deux parties sont alignés lors de l’insertion.
Positionnez l’embase à visser ⑥ directement au-dessus du trou fileté. Vis-
sez le contact mâle ⑦ par l’avant à l’aide d’outils appropriés. Appliquez le
couple de serrage recommandé de 11,0 N m !
 Loading...