#'(!!($#
>7<9C8
EHC'E((,-+&6'
Electrical
Knockout
Electrical
Knockouts
Electrical
Knockout
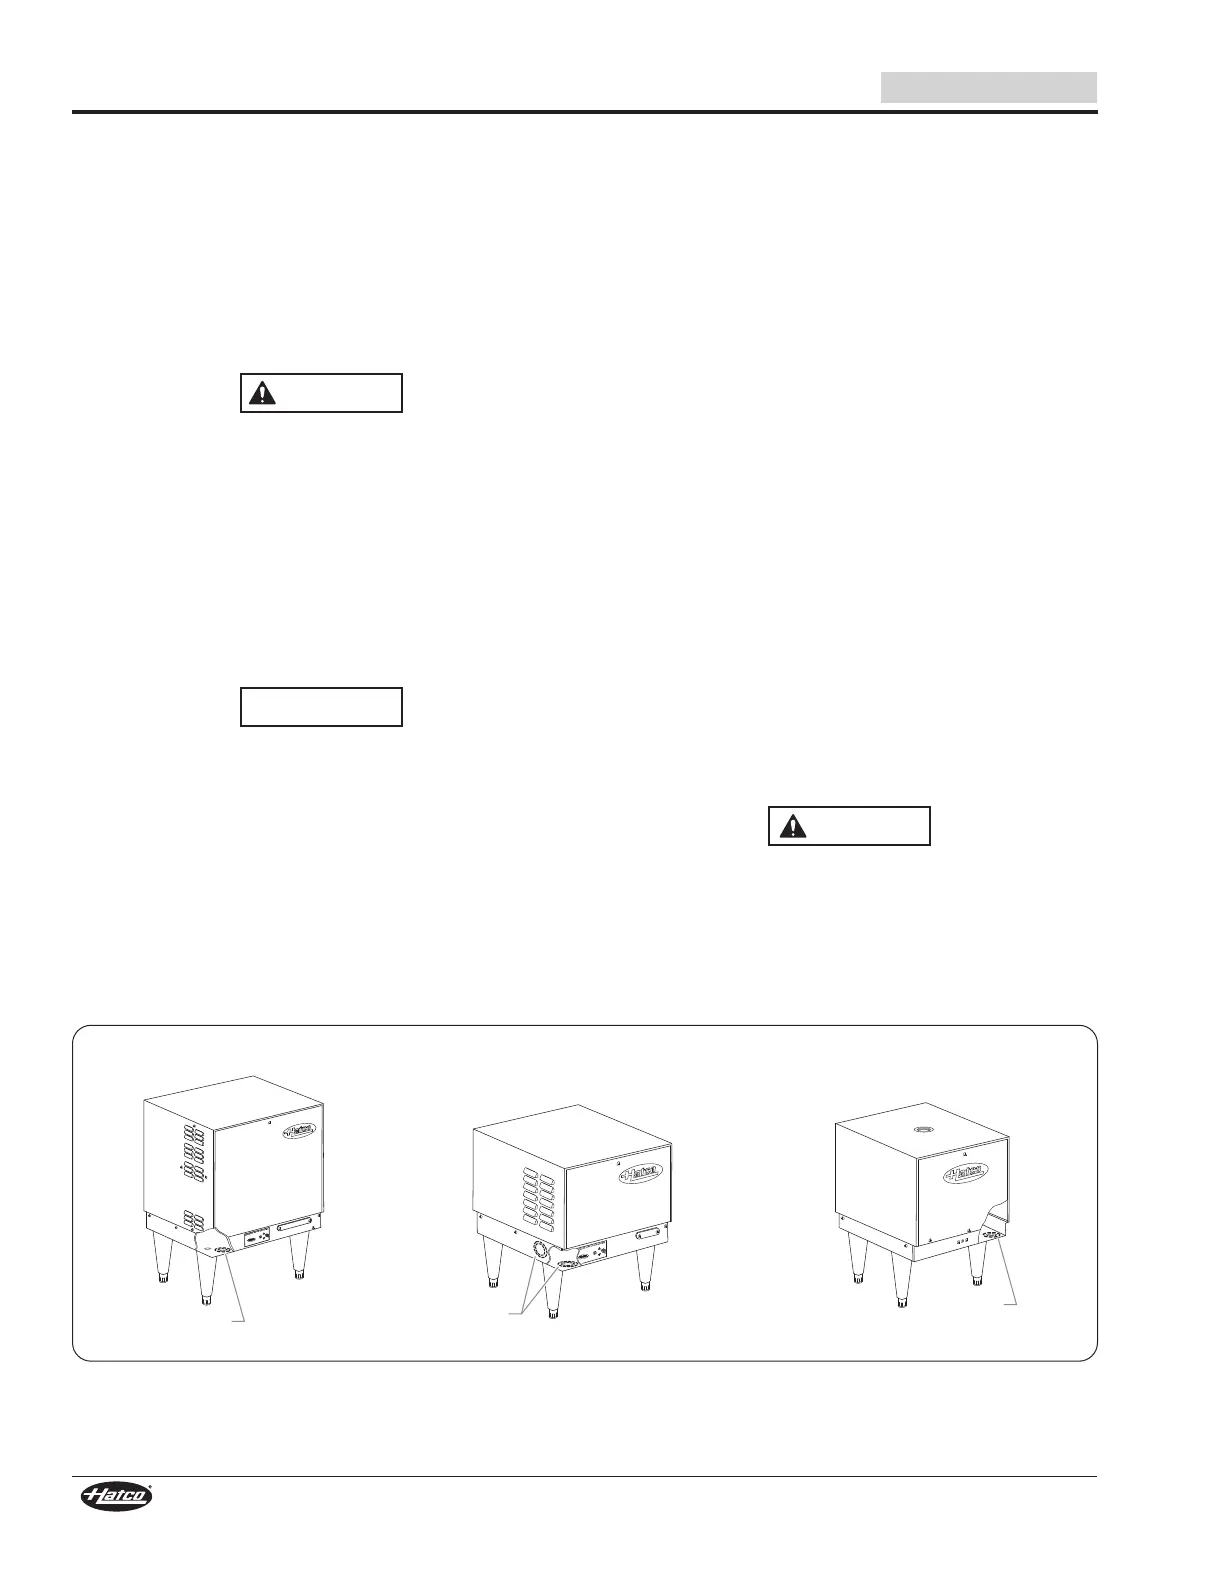
Compact Series
Imperial Series
Mini-Compact Series
<53DB931<M <<'9J5C1>4*?<D175C
5>5B1<
!7J9EB;9JH?9EEIJ;H07J;H!;7J;HI7H;7L7?B78B;<EHEF;H7J?ED
EDIJ7D:7H:FEM;HIOIJ;CI>;9AJ>;IF;9?<?97J?EDB78;B<EH
J>;FHEF;HFEM;HIKFFBO
BB ?DJ;HD7B ;B;9JH?97B 9EDD;9J?EDI >7L; 8;;D C7:; 7J J>;
<79JEHO,;;"+."-+$+'.,,"3"' !+-
<EH IKFFBO M?H; I?P; <KI; 8H;7A;H 7D: 9ED:K?J
H;9ECC;D:7J?EDI EDIKBJ BE97B 9E:;I <EH L;H?<?97J?ED 7D:
9ECFB?7D9;
!(&'$ .&
L (89C E>9D =ECD 25 9>CD1<<54 2I AE1<96954 DB19>54
9>CD1<<5BC >CD1<<1D9?> =ECD 3?>6?B= D? 1<< <?31<
5<53DB931<1>4@<E=29>73?45C853;G9D8I?EB<?31<
@<E=29>7 1>4 5<53DB931< 9>C@53D?BC 6?B @B?@5B
@B?354EB5C1>43?45C
L (EB>@?G5B$1D49C3?>>53DCG9D3839B3E9D2B51;5B
1>4 1<<?G E>9D D? 3??< 256?B5 @5B6?B=9>7 1>I
=19>D5>1>35?B3<51>9>7
L ?>CE<D 1 <935>C54 5<53DB931< 3?>DB13D?B 6?B @B?@5B
5<53DB931< 9>CD1<<1D9?> 3?>6?B=9>7 D? <?31< 5<53DB931<
3?45C1>4D85#1D9?>1<<53DB931<?45#
?>>53D1D3?<53DB93??CD5B+1D5B51D5BCD?D85C1=5
@?G5BCE@@<I1C9>4931D54?>D85C@5396931D9?>4531<?><I
)>9DC 3?>>53D54 D? 1> 9>3?BB53D@?G5B CE@@<I F?94C D85
@B?4E3DG1BB1>DI1>4=1I41=175D855AE9@=5>D
<53DB931<?>>53D9?>C
+;CEL; J>; <HEDJ @79A;J 9EL;H I9H;MI FKBB J>; 9EL;H
<EHM7H:7D:H;CEL;J>;9EL;H
NOTE: On Imperial models, there is a hinged access panel
under the front jacket cover. Remove the bottom screw
and lift the panel up to expose the fuse blocks.
S (D&?D?ECF79JCE:;BIH;CEL;<HEDJ9EL;HI9H;MI
7I;9EL;H<EHM7H:7D:KFM7H:
S (DECF79JCE:;BIJ>;9EDJHEB8EN?IKD:;HJ>;<HEDJ
>?D=;:@79A;J9EL;H
%E97J;J>;>;7J;HJ;HC?D7BEH<KI;8BE9AI?DI?:;J>;KD?J
NOTE: See “Circuit Breaker and Fused Disconnect Switch”
chart in the ,)""-"(', section for proper
connections and wire size.
NOTE: Only 6, 7, and 9 kW models, in 208 or 240 volt, can be
converted to single or three phase in the field. Refer to
the wiring diagram for proper wiring connections at the
terminal block.
H?D=FEM;HB;7:I<HEC7FHEF;HBOI?P;::?I9EDD;9JIM?J9>
EH9?H9K?J8H;7A;HJ>HEK=>J>;ADE9AEKJFHEL?:;:EDJ>;
KD?J EDD;9J B;7:I JE J>; J;HC?D7B EH <KI; 8BE9AI
)'$%%&+&$#!-((#$##($#'
%&$%&!-($"#")"$#%$)#'
NOTE: Due to the rigors of transportation all connections
should be checked for tightness before heater is put
into operation.
)HEF;HBO9EDD;9J7D;GK?FC;DJ=HEKD:?D=9EDD;9JEHJEJ>;
=HEKD:?D=BK=BE97J;:D;7HJ>;IKFFBOJ;HC?D7BI
$#$( DEB>?>@?G5BD?D852??CD5B851D5BE>D9<D1>;81C
255>69<<54G9D8G1D5B1>41<<19B81C255>F5>D54D8B?E78
D85 49C8G1C85B B9>C5 >?JJ<5 (85 851D9>7 5<5=5>DC G9<<
2EB> ?ED 9> C53?>4C 96 ?@5B1D54 G85> D85I 1B5 >?D
9==5BC549>G1D5B
+;FB79;7D:I;9KH;9EL;HI
?=KH;B;9JH?97B$DE9AEKJ%E97J?EDI