– Check condition of O-ring „1“ and renew it if
necessary (Fig. 36).
– Wet the thread and the O-ring of the screw
plug with lubricant „K“ (see spare parts list).
– Add engine oil up to the „MAX“ mark on the
dipstick (see Chapter 4.1.1.)
– Run the engine for a short period, then check
the oil level again and top up if necessary.
– Check that there is no leakage past screw plug
on the oil filter housing.
5.3.3. Checking and adjusting
valve clearances
– Move the decompression lever to
position „0“; Fig. 16 and 17.
1D41 C, 1D81 C and 1D90 C engines
Take off the enclosure cover (see Chap. 2).
On engines with manual starting only, the de-
compression lever is also taken off when the
cover is removed.
38
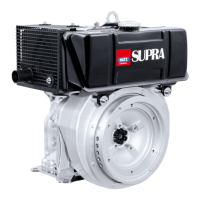
– Unscrew cover „1“ and take off together with
gasket „2“. Never re-use this gasket.
– Turn the engine over in the normal direction of
rotation until compression is felt.
39
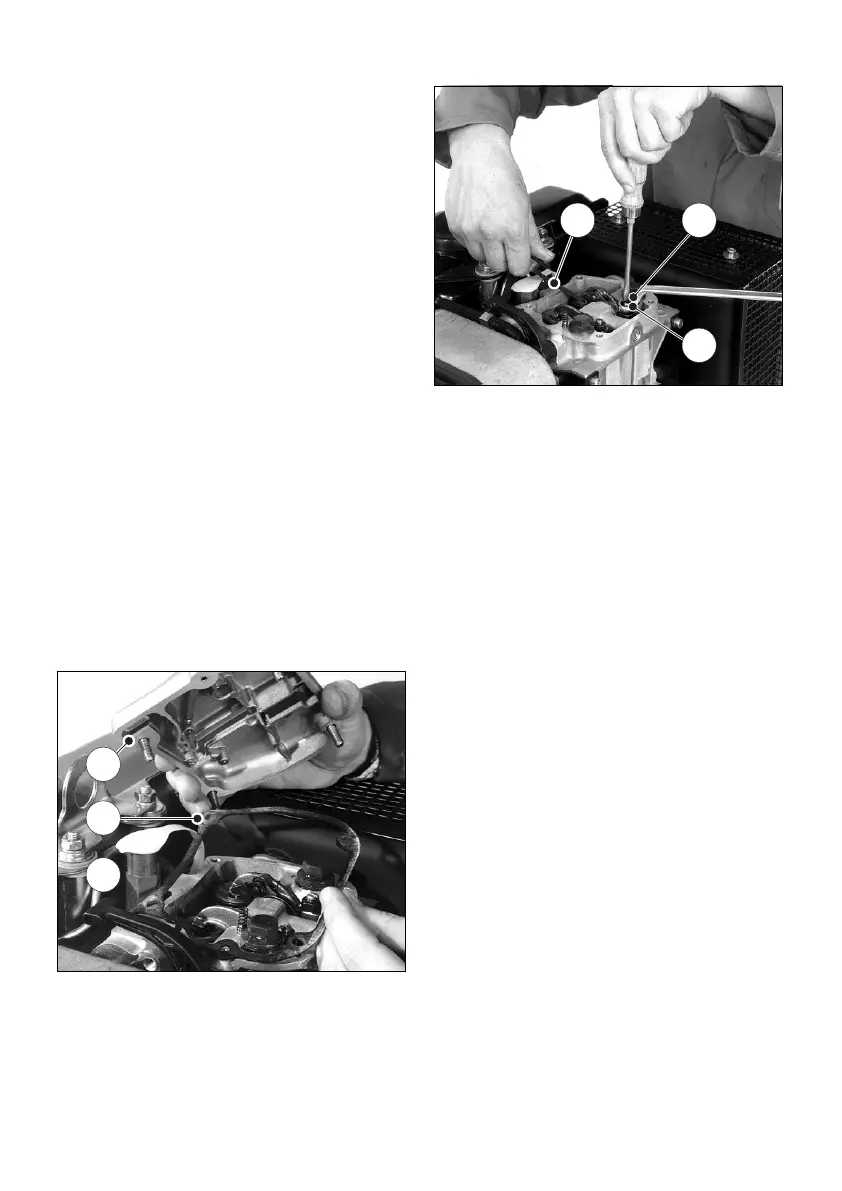
– Check valve clearances between rocker and
valve stem, using feeler gauge „1“; Fig. 39
(see Chapter 3.1.).
– If valve clearance is incorrect, slacken off hex.
nut „2“.
– Turn adjusting screw „3“ with a screwdriver
until feeler gauge „1” can just be pulled
through between the rocker and the valve
stem with slight resistance to its movement
after nut „2“ has been retightened.
– Attach the cover at the cylinder head again and
tighten down uniformly.
– Depending on version mount parts of air duct.
– Run the engine briefly and check that the
cover is not leaking.