Overview
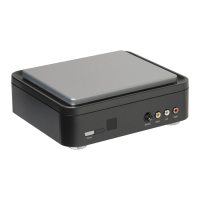
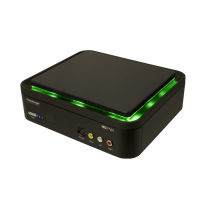
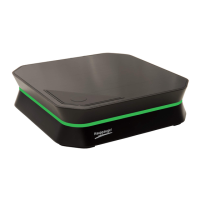
The Hauppauge HD PVR 2 model 1512 records video in HD from a cable or satellite set top
box, PC or video game console. There are two video recording applications which come
with HD PVR 2 model 1512. WinTV v8 is used to schedule TV recordings from a set top box.
Hauppauge Capture was designed to record video from game consoles and has a conve-
nient one-click upload to YouTube plus includes Hauppauge’s StreamEez to stream on
Twitch and YouTube.
The software which comes with HD PVR 2 only runs on Windows PCs, but there are third
party applications which run on the Mac. Please see our website for more information.
HD PVR 2 recordings are made onto a computer’s hard drive in a compressed H.264 for-
mat. It records from HDMI or Component Video (also called YPrPb). You can also record
S-Video or composite video using and optional A/V cable (you can purchase this on the
Hauppauge Webstore). It will record at 1080p30, 720p or 480p at datarates from 1Mbit/sec
up to 13.5Mbits/sec.
N
ote: if you are recording from a cable or satellite box, it is recommended that
you use Component Video. Many cable and satellite set top boxes (though not
all) do not allow recording from the HDMI port.
Audio can be supplied to the HD PVR 2 from stereo audio connectors on the Hauppauge
AV cable, optical audio cable or HDMI. Audio can be recorded through HDMI and optical
audio as surround sound (AC3) if your video source includes surround sound audio.
There are two types of HD PVR 2 record formats:
TS: this is a native H.264 format used by WinTV v8 and Hauppauge Capture. TS files are
often used to burn Blu-ray discs. The TS files recorded with the HD PVR 2 can be edited
with Sony Vegas (all versions).
MP4: this is similar to the TS file but has an index at the beginning of the file. In the Edit
tab of Hauppauge Capture, click ‘Export to MP4’ to create an MP4 file without losing
video quality.
HD PVR 2
model 1512
Quick Installation Guide
Hauppauge Inc.
909 Motor Parkway, Hauppauge, NY 11788 USA
tel: 1-6310434-1600 • email: support@hauppauge.com
www.hauppauge.com
QI-HDPVR_1512-V2.2-ENG 10/2018
Included with HD PVR 2 model 1512
Included with HD PVR 2 model 1512:
• HD PVR 2 recorder: H.264 high definition video recorder, USB
• HDMI cable
• Hauppauge A/V adapter for Component video
• Component Video cable set to connect to your set top box
• IR blaster cable to control the channels on your set top box
• USB 2.0 cable
• 6v 1.66 amp Power Supply
• Hauppauge Capture (download)
• WinTV v8 application (download)
Using Hauppauge Capture
After restarting your PC, you will see the Hauppauge Capture icon on your Windows desktop.
Click this icon to start Hauppauge Capture. For more information on Hauppauge Capture,
how-to videos and the latest version of Hauppauge Capture, please look here:
www.hauppauge.com/capture
(HDMI might or might not be able to record, depending upon your TV provider). The Com-
ponent Video cable set (supplied) has Red/Green/Blue video and White/Red audio con-
nectors at the end. Plug these colored cables into the corresponding Green/Blue/Red
(video) and White/Red (audio) RCA connectors of the Hauppauge A/V adapter.
Plug the Hauppauge A/V adapter into the AV In connector on the back of the HD PVR 2.
Plug the other end of the Component Video cable set into the YPrPb or Component video
output of your set top box (Red/Green/Blue connectors). Now connect the Red and White
audio connectors.
3b. HDMI connection
Connect your PC or game console to HD PVR 2 using HDMI. Plug the HDMI cable (sup-
plied) into the HDMI out of your PC’s graphics card or your game console into the HDMI in
on the HD PVR 2.
N
ote: your PC or game console must be set to 1080p, 720p or 480p at 50 or
60Hz. Please see this page for setting up the video and audio on a PC gaming
system: www.hauppauge.com/pcsetup
Step 4: Install the HD PVR 2 Windows driver and applications
There are two applications provided with the HD PVR 2 model 1512: Hauppauge Capture
and WinTV v8.
• Hauppauge Capture is used to record, trim, upload and stream your HD video.
• WinTV v8 allows you to watch HD video in a window (or full screen) on your PC screen.
You can also record a video manually or set up a scheduled automatic recording in high
definition from a cable or satellite TV box.
For more information, please see the Hauppauge HD PVR 2 support page:
http://www.hauppauge.com/pages/support/support_hdpvr2.html
4a: Download and install Hauppauge Capture
You can find Hauppauge Capture at: www.hauppauge.com/capture
Hauppauge Capture is normally downloaded to your Downloads directory. It will be called
hauppaugecapture_1_1_zzzzz.exe where zzzzz is the version number.
Run this file to start the installation.
4b Download and install WinTV v8 application
The WinTV v8 application includes a TV scheduler which allows you to record TV programs
from a cable or satellite set top box.
Once comp lete, you will be asked to restart. Please do so.
Using WinTV v8 to watch and record TV programs from your set top box
Please go to our Internet website for instructions on the setup and use of the WinTV v8 appli-
cation:
www.hauppauge.com/wintv8
Using Hauppauge Capture
After restarting your PC, you will see the Hauppauge Capture icon on your Windows desktop.
Click this icon to start Hauppauge Capture.
For more information on Hauppauge Capture, how-to videos and the latest version of Haup-
pauge Capture, please look here:
www.hauppauge.com/capture
Installing the HD PVR 2
Step 1: Boot into Windows on your PC
HD PVR 2 works with laptops or desktop PCs with Windows 10, 8 and 7.
Step 2: Plug the power supply and USB cable into HD PVR 2
After your PC has booted to Windows, plug the supplied Power Supply into the Power input
on HD PVR 2 . The power supply is 6V @ 1.66A.
N
ote: you will not see video on your PC screen or on your TV set until you install
the software from the HD PVR 2 Installation CD.
USB connection: Plug one end of the supplied USB cable into the HD PVR 2’s USB cable
connector. Plug the other end into your PC’s USB 2.0 and USB 3.0 port.
Step 3: Connect the HD PVR 2 audio and video cables
3a. Component Video connection
If you are using a cable or satellite set top box, you can use Component video to record
Capture:
to record videos
Edit:
trim the beginning and
end of your videos
YouTube:
to upload your videos
StreamEez:
stream your videos with
Twitch and YouTube
Settings menu:
Personal Logo setup
Facecam setup
Recording directory
Logo:
insert your logo while
recording and streaming
Preview window:
you can see your video here
Input Resolution:
this is the video resolution
of your video source