9. Hold the operating handle (3) firmly and squeeze the switch trigger (16).
Allow the blade to reach maximum speed and slowly lower the blade into
and through the workpiece.
10. Release the switch trigger (16) and allow the saw blade to stop rotating
before raising the blade out of the workpiece. Wait until the blade stops
before removing the workpiece.
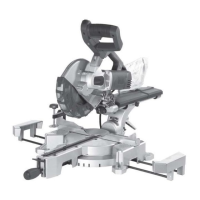
COMPOUND MITRE CUT
WARNING. When making any adjustment to your work, ensure that the
blade is stationary and keep your hands away from the area of the switch.
If possible, always use a clamping device such as a ‘G" clamp to secure your
workpiece.
When cutting your workpiece, keep your hands well away from the blade area.
Do not remove a cut-off piece on the right-hand side of the blade using your
left hand.
A compound mitre cut involves using a mitre angle and a bevel angle at the same
time. It is used in making picture frames, to cut mouldings, making boxes with
sloping sides and for roof framing. Always make a test cut on a piece of scrap
wood before cutting into the good material.
1. Pull on the release knob (2) and lift the saw arm to its full height.
2. Loosen the mitre locks (15).
3. Rotate the mitre table (12) until the pointer aligns with the desired angle on
the mitre scale (13).
4. Retighten the mitre locks (15).
WARNING. Be sure to tighten the mitre lock before making a cut. Failure
to do so could result in the table moving during the cut, causing serious
personal injury.
5. Loosen the bevel lock (7) and move the saw arm (1) to the left to the
desired bevel angle (between 0º and 45º). Tighten the bevel lock (7).
6. Place the workpiece flat on the table with one edge securely against the
fence (11). If the board is warped, place the convex side against the fence.
If the concave side is placed against the fence, the board could break and
jam the blade.
7. When cutting long pieces of timber, support the opposite end of the timber
with the side support bars, a roller stand or a work surface that is level with
the saw table.
8. Before turning on the saw, perform a dry run of the cutting operation to
check that there are no problems such as a clamp interfering with the
cutting action.
9. Hold the operating handle (3) and firmly and squeeze the switch trigger (16).
Allow the blade to reach maximum speed and slowly lower the blade into
and through the workpiece.
10. Release the switch trigger (16) and allow the saw blade to stop rotating
before raising the blade out of the workpiece.
Wait until the blade stops before removing the workpiece.
OPERATING INSTRUCTIONS OPERATING INSTRUCTIONS
MAINTENANCE
1. Store the tool, instruction manual and accessories in a secure place. In this
way you will always have all the information and parts on hand.
2. Keep the tool’s air vents unclogged and clean at all times.
3. Remove dust and dirt regularly. Cleaning is best done with compressed air
or a rag.
4. Never use caustic agents to clean plastic parts.
CAUTION. Do not use cleaning agents to clean the plastic parts of the
tool. A mild detergent on a damp cloth is recommended. Water must
never come into contact with the tool.
GENERAL INSPECTION
1. Regularly check that all the fixing screws are tight. They may vibrate loose
over time.
Thank you for investing in a HAUSSMANN power tool. These products have
been made to demanding, high-quality standards and are guaranteed for
domestic use against manufacturing faults for a period of 36 months from the
date of purchase.
This guarantee does not affect your statutory rights. In case of any malfunction of
your tool (failure, missing part, etc.), please contact one of our service technician
at our toll free service line at 1-866-599-5916 Ext 2 from 8 AM to 6 PM, Monday
to Friday, Eastern time. RONA reserves the right to repair or replace the defective
tool, at its discretion.
Normal wear and tear, including accessory wear, is not covered under guarantee.
The product is guaranteed for 36 months if used for normal trade purposes. Any
guarantee is invalid if the product has been overloaded or subject to neglect,
improper use or an attempted repair other than by an authorized agent. Heavy-
duty, daily professional or hire usage are not guaranteed. Due to continuous
product improvement, we reserve the right to change the product specification
without prior notice.
GUARANTEE
 Loading...