Headboard Bracket Assembly
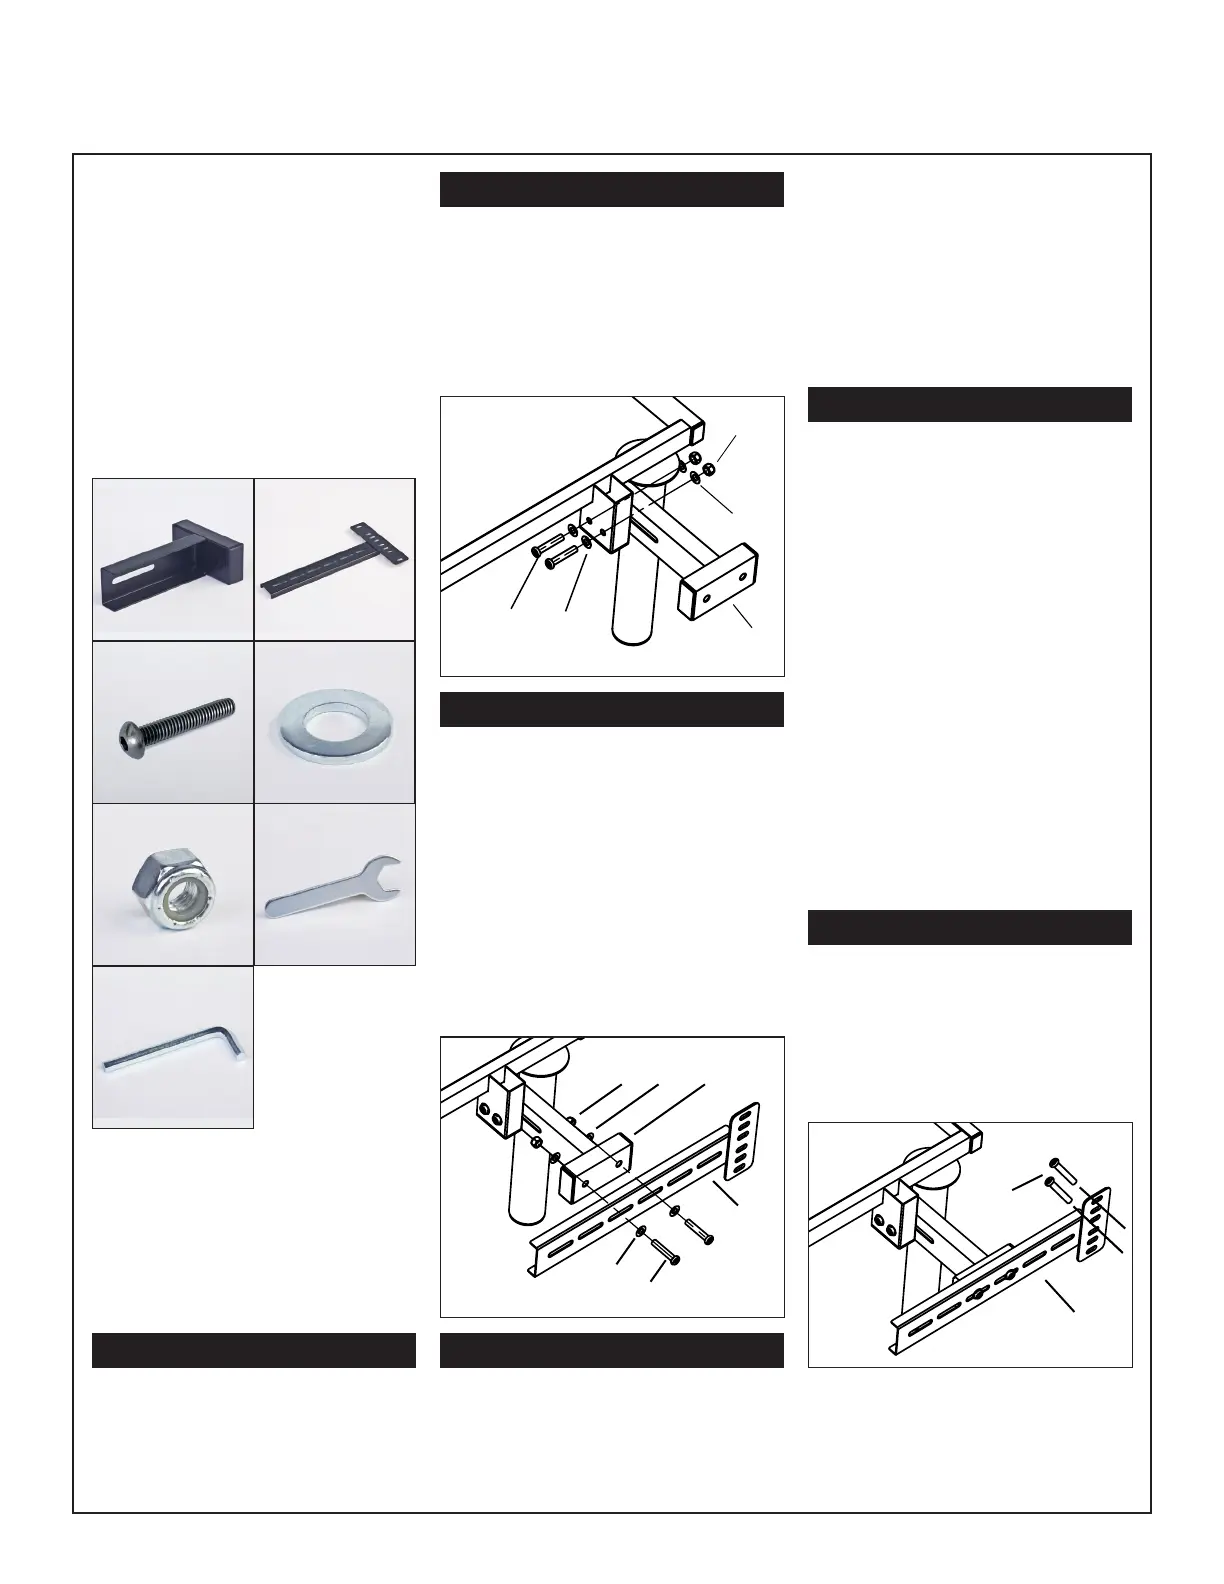
PARTS LIST
A. Inner Headboard Brackets (2)
B. Outer Headboard Brackets (2)
C. Headboard Bracket Bolts (12)
D. Washers (24)
E. Lock Nuts (12)
F. Wrench (1)
G. Allen Key (1)
Place the open side of the Outer
Headboard Bracket (B) onto the
exposed square tube of the Inner
Headboard Bracket (A). This will
create a tight t between (A) and (B).
Place 2 Headboard Bracket Bolts (C)
with a Washer (D) through the Outer
Headboard Bracket (B) and into the
Inner Headboard Bracket (A). Thread
a Lock Nut (E) with a Washer (D) onto
the bolts. Do not tighten the bolts to
allow for adjustment later.
Bolt an Inner Headboard Bracket (A)
to the headboard mount tube (located
on the steel frame crossbar) using
2 Headboard Bracket Bolts (C), 4
Washers (D), and 2 Lock Nuts (E).
Do not tighten the bolts to allow for
adjustment later.
Use the remote control to raise the
head of the base in order to gain
access to the power base frame.
STEP 1
STEP 2
STEP 3
STEP 4
STEP 5
On the Outer Headboard Brackets
(B), measure the distance between
the center of each bracket’s
mounting holes. Write down this
measurement.
The measurement from the Outer
Headboard Bracket (B) holes must
be equal to the measurement from
the headboard’s leg mounting holes.
If needed, adjust the position of the
Outer Headboard Brackets (B) so
that the mounting holes are equal to
the legs. Now tighten the bolts from
step 3.
On your headboard’s legs, measure
the distance between the center of
each leg’s mounting holes. Write
down this measurement.
Through the mounting holes in
your headboard, fasten your
headboard to the Outer Headboard
Brackets (B) using the Headboard
Bracket Bolts (C). Assembly is now
complete.
Lower the head section of your power
base. Check that there is sufcient
distance between the edge of the
power base and the Outer Headboard
Brackets (B).
Repeat steps 2-4 for the opposing
side’s brackets, making the distance
equal to the one above.
Prepare the headboard brackets for
installation onto your power base by
placing one set of brackets on the
left-hand side of the base, and one
set of brackets on the right-hand side
of the base.
STEP 6
B.
D.
C.
A.
E.
F.
G.
E
D
A
C
D
B
A
D
D
C
E
C
B
If the distance needs to be adjusted,
make an adjustment to the position
of the Inner Headboard Bracket (A).
Now tighten the bolts from step 2,
attaching it to the frame.
 Loading...