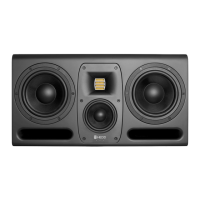
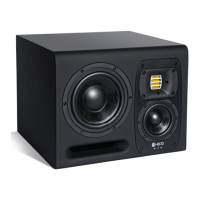
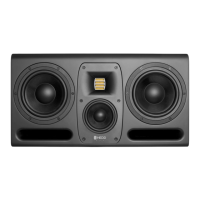
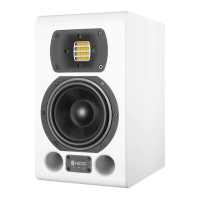
The HEDD Type 20 MK2 and Type 30 MK2 are high-precision active studio monitors designed for professional audio environments. These monitors offer a rich feature set, including the ability to operate in either a closed or ported system, and integrate the on-board HEDD Lineariser® for phase correction. As active speakers, they feature an integrated amplifier, allowing direct connection to a digital interface or an analog pre-amplifier. The manual covers both the Type 20 MK2 and Type 30 MK2 due to their similar nature, though illustrations may vary in color or size from the user's specific version.
Function Description
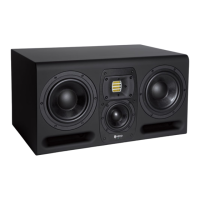
The primary function of the HEDD MK2 monitors is to provide accurate and high-fidelity audio reproduction for studio monitoring. They are designed to deliver precise sound with a wide frequency response, suitable for critical listening, mixing, and mastering applications. The monitors utilize a HEDD Air Motion Transformer (AMT) for higher frequencies and HEDD Honeycomb Woofers for lower frequencies, ensuring a balanced and detailed sound across the spectrum.
A key feature is the "Closed or Ported" (CoP) system, which allows users to switch between two fundamentally different operating modes. In "Ported Mode," the bass reflex ports are open, enabling powerful low-end reproduction with higher efficiency and access to lower bass regions. This is the default operating mode. In "Closed Mode," the bass reflex ports are sealed with included plugs, transforming the speaker into an infinite baffle design. This results in a cleaner sound and increased resolution, though it comes with a 6-10 dB reduction in maximum sound pressure level for low frequencies, depending on the audio material. This flexibility allows users to optimize the monitor's performance for their specific environment and listening preferences.
The integrated HEDD Lineariser® is another significant function. It provides complex phase-correction, addressing the natural occurrence of phase differences during multi-component sound reproduction. This ensures that all frequencies arrive "right in time," improving transients and imaging. While the Lineariser® introduces a latency of approximately 15 ms, it can be switched off for applications like live recordings or instrument playing where delay is undesirable. By default, the Lineariser® is turned on.
The monitors also feature a comprehensive control board on the rear panel for various settings adjustments, including volume, shelving filters, LF range, input sensitivity, and a desk filter. Input selection allows for both analog XLR and AES digital input, with AES passthrough capability.
Usage Features
Getting Started:
To begin, ensure the main power switch is in the "0" (off) position before connecting the power cord. Set the power switch to "1" (on); the front LED will turn green, and the monitors will power up within 15 seconds. Users are advised to lower the volume initially to prevent hearing damage. Audio sources can be connected via the balanced XLR socket, and the desired input (ANALOG/AES) can be selected using the rotary switch on the back plate. For digital AES input, users can choose between left, right, or mono signals. It is recommended to start with all control knobs in the "Up" position, which corresponds to the factory setting.
Status LED:
The front LED indicates the monitor's operational status:
- Green Light: Power on.
- Red Light: Overload; indicates the input sensitivity should be decreased.
- White Light: Stand-by mode. The monitors automatically enter stand-by after 30 minutes of inactivity and wake up when audio is played.
Speaker Setup:
Optimal speaker placement is crucial for achieving the best sound quality.
- Horizontal Setup: The speakers are designed to be placed horizontally on a solid surface or stand.
- Vertical Setup: If placed vertically in a stereo or surround setup, ensure the tweeters are aligned symmetrically (both facing outwards or inwards) to maintain a correct acoustical image.
- Height Positioning: Position the speaker so the tweeter matches ear height at the listening position. If not possible, tilt the speaker to aim the tweeter at the ears, avoiding muffled or undefined sound from tweeters placed too low or too high.
- Stereo Positioning: For optimal stereo imaging, place the two speakers and the listening position to form an equilateral triangle. Adjust distances while listening to known records to achieve an authentic stereo panorama.
- Surround Positioning: For surround setups, place speakers in a circle around the listening position at specific angles (Center 0°, Front Right 30°, Rear Right 110°, Rear Left 250°, Front Left 330°). The circle radius should be between 0.7m and 2m, with surrounding walls at least 40cm away to prevent early reflections. Using the same type of speaker for all channels (except subwoofer) is preferred to avoid frequency and phase coloration.
Switching Between Closed and Ported Mode:
- Insert Plugs: Use the included HEDD plugs and screw to seal the bass ports. Ensure the screw faces outwards for easy removal. Push the plugs deep enough until resistance increases, but not so deep that the bass port bends. Unwind and remove the screw once the plugs are inserted.
- Switch Knob: Change the knob on the back panel to "Closed" mode.
- Note: Headroom in Closed Mode is limited; lower the volume before switching.
To switch back to "Ported Mode," stop audio playback, wind the screw back into the plug, gently pull the plug out, and change the rotary switch on the back panel to "Ported."
Control Settings:
- Volume: A rotary switch adjusts the output volume by ±12 dB. Fine-tuning volume through the connected source (interface, control board, mixing board, or pre-amp) is recommended. The default setting is 0 dB, allowing matching speakers to the audio chain and potentially lowering SNR or THD.
- HEDD Lineariser®: By default, this is on for phase correction. It can be switched off if the 15ms latency is an issue.
- Closed or Ported (CoP): Switches the internal system layout. Ensure plugs are correctly inserted for closed mode.
- Shelving Filter:
- Low Shelf: Adjusts frequencies between 30 Hz and ~200 Hz by ±4 dB in 1 dB steps. Useful for compensating for boosted bass response when speakers are near walls or corners, or for balancing sound in bright rooms.
- High Shelf: Adjusts frequencies between 3 kHz and ~20 kHz by ±4 dB in 1 dB steps.
- Low Frequency Range: The default LF range can be extended by ~20%, moving the -3dB point from 32 Hz down to 26 Hz for Type 20 and 30 MK2. This extended bass response requires higher woofer amplitudes, reducing maximum SPL by 6-10 dB for low frequencies and increasing the risk of mechanical overload. When used in a Satellite-Subwoofer system with HEDD BASS series subwoofers, the switch should be set to "for SUB." This ensures a linear phase Satellite-Sub-system, especially when using analog outputs from the subwoofer, which also incorporates a Lineariser® and introduces a 30 ms delay.
- Input Selection: A 4-position rotary switch selects the signal source. "Analog" takes a symmetrical analog signal. The other three positions (Left, Right, Mono) extract signals from an incoming digital AES input. For multi-channel audio beyond stereo (e.g., 5.1 surround), monitors should be fed via the analog XLR input.
- Input Sensitivity: This rotary switch adjusts the voltage of the analog input to optimize the signal-to-noise ratio for the A/D converter. Gain can be added (up to +4 dB) for weak signals or reduced (-4 or -10 dB) for very loud signals (>2 V) to prevent A/D converter overload. This setting does not affect digital AES input.
- Desk Filter: A 3-position Parametric Equaliser (PEQ) designed to minimize early reflections from desk surfaces that can blur sound. Settings (Small, Med., Large) are provided for different desk sizes (up to 80x150 cm, up to 100x180 cm, and larger consoles/desktops, respectively). The optimal setting depends on the acoustical environment.
Maintenance Features
Maintenance and Care:
- Internal Maintenance: HEDD studio monitors do not require internal maintenance such as lubricating or mechanical adjustments. Users should not open the speaker cabinet; any servicing should be performed by qualified service personnel.
- Cleaning: For cleaning the cabinet surface, use a microfiber cloth and warm water. Avoid aggressive detergents, as they can damage the finish.
- Dust Removal: Use a very soft brush to clean dust from the loudspeaker diaphragms.
- Safety Precautions: Always switch off the speaker before cleaning. Ensure no liquids enter the cabinet. Do not use flammable or acidic chemicals for cleaning.
Shipping and Packaging:
- If the speakers need to be shipped, use the original packaging to ensure safe transport. HEDD Audio GmbH is not responsible for damage due to improper packaging.
- All HEDD products comply with RoHS and WEEE directives.
- For seriously broken speakers, consult local authorities for proper disposal information.
Safety Instructions:
- To reduce electric shock risk, do not open the loudspeaker; refer to qualified service personnel.
- Connect with an IEC 60320 AC mains power cord (supplied).
- Switch off the audio system before connecting/disconnecting cables or cleaning.
- Never use flammable/combustible chemicals for cleaning.
- HEDD monitors have universal mains (85-265V), eliminating the need for voltage switches.
- Do not place the unit on unstable surfaces; it may fall and cause injury/damage.
- Do not use outdoors; avoid rain or moisture.
- Do not step on power cords or audio cables.
- Defective cables can harm speakers or cause humming/crackling.
- Keep electrical equipment out of reach of children.
- Unplug sensitive electronic equipment during lightning storms.
- Install the monitor near a socket outlet for easy disconnection.
- Physically disconnect the power cord to completely disconnect from AC mains.
- Avoid touching speaker diaphragms.
- Keep woofer ventilation ports open.
- Do not use at very high or low temperatures.
- Do not expose the back panel to direct sunlight.
- Never operate in an explosive atmosphere.
- High SPLs can cause irreparable ear damage; use caution at high levels.
- Keep magnetic objects away from speaker diaphragms due to strong magnetic fields.
- Ensure air circulation behind the speaker for cooling.
- Mount only onto dry, non-conducting walls (wood, plaster). For other materials, an isolation panel is required. Securely attach according to wall mount bracket instructions to prevent injury.