INSTALLATION INSTRUCTIONS Fan Coils: FEM4X, FEM4P, REM4X, FXM4X
6 496 01 5503 02
Specifications are subject to change without notice.
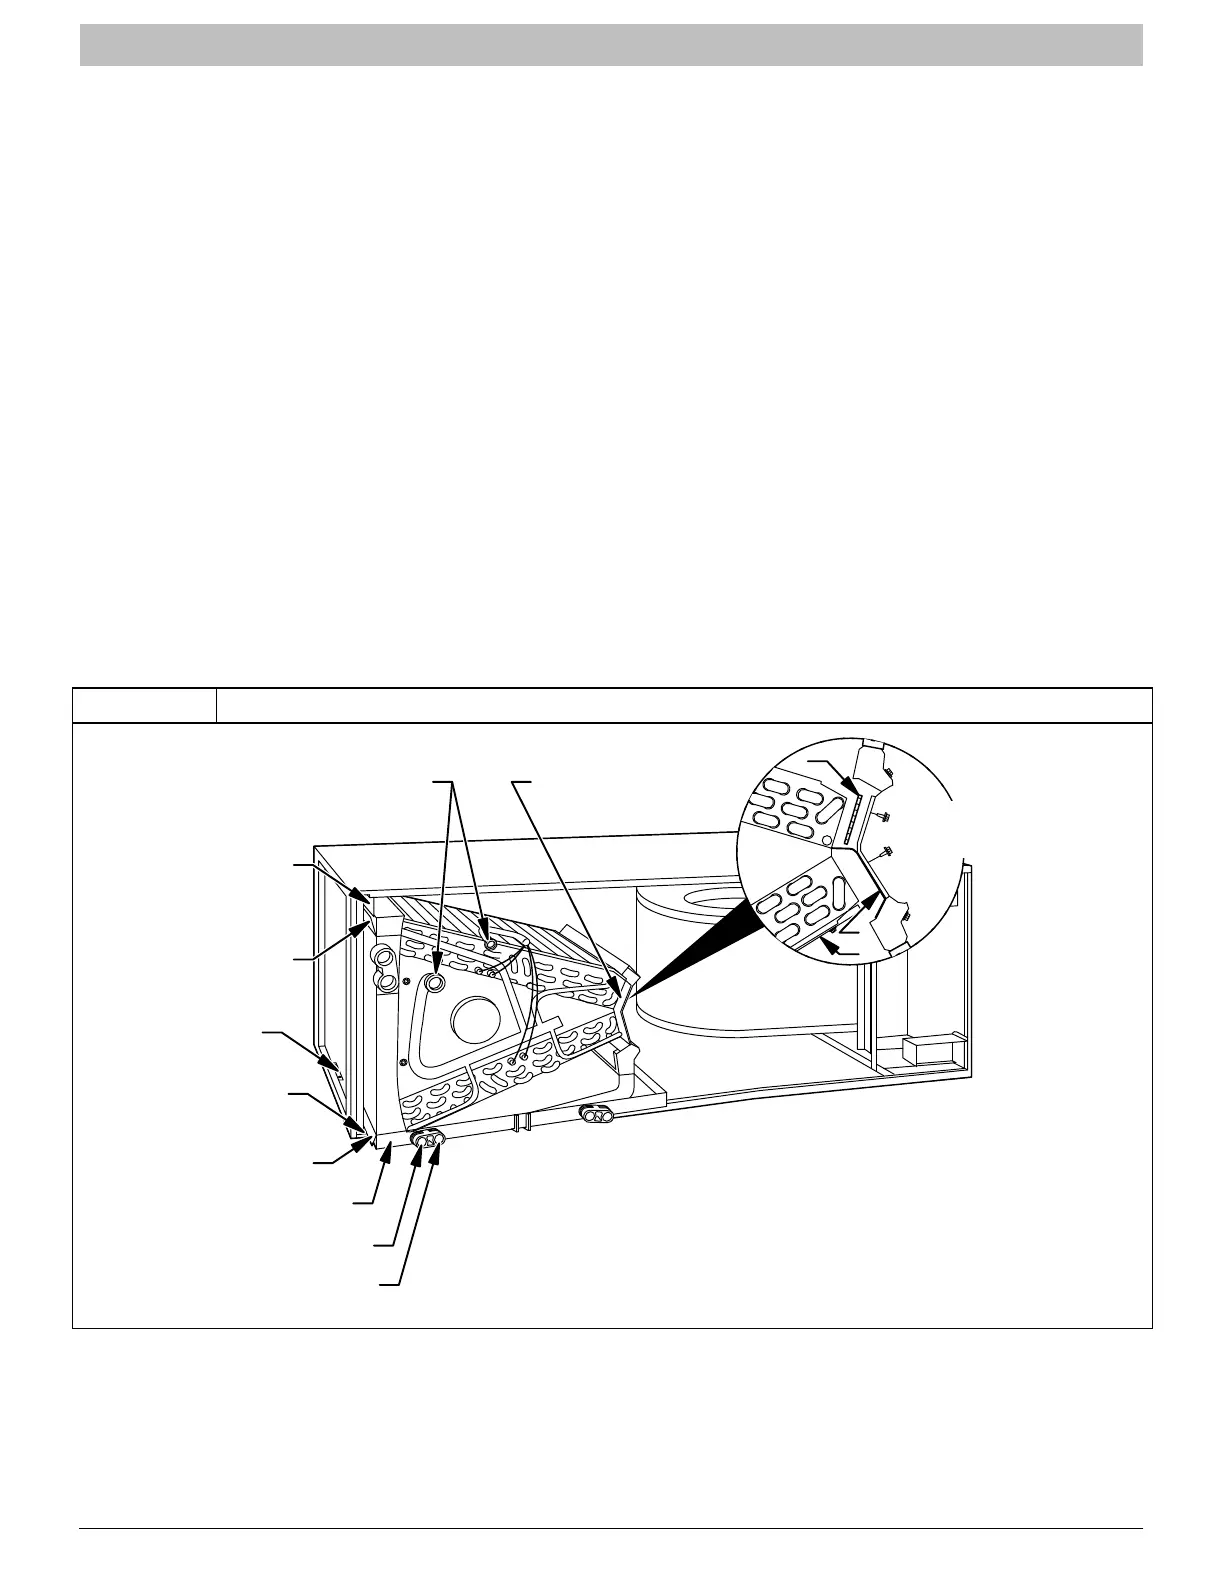
Horizontal Right Conversion of Units With A−Coils
1. Remove blower and coil access panel and fitting panel
(refer to Figure 6).
2. Remove coil mounting screw securing coil assembly
to right side casing flange.
3. Remove coil assembly.
4. Lay fan coil unit on its right side and reinstall coil
assembly with condensate pan down (refer to
Figure 6).
5. Remove horizontal drain pan support bracket from coil
support rail on left side of unit and reinstall on coil
support rail on right side of unit.
6. Convert air−seal assembly for horizontal right (refer to
Figure 6).
a. Remove air−seal assembly from coil by removing 4
screws.
b. Remove coil drip flanges from A−coil and reinstall on
right side of coil (same side as horizontal drain pan).
c. Remove filler plate (A) and install air splitter (B) in
place of filler plate.
d. Install filler plate (A) as shown in horizontal right
application.
e. Remove condensate troughs (C) and install on
opposite tube sheets.
f. Install hose onto plastic spout.
7. Install horizontal pan on right side of coil assembly.
8. Slide coil assembly into casing. Be sure coil bracket on
each corner of vertical pan engages coil support rails.
9. Reinstall 2 snap−in clips to correctly position and
secure coil assembly in unit. Be sure clip with large
offsets is used on right side of unit to secure horizontal
pan.
10. Remove 2 oval coil access panel plugs and reinstall
into holes on left side of coil access panel and fitting
panel.
11. Remove insulation knockouts on right side of coil
access panel.
12. Reinstall access fitting panels, aligning holes with
tubing connections and condensate pan connections.
Be sure to reinstall metal clip between fitting panel and
vertical condensate pan.
13. After brazing, make sure liquid and suction tube
grommets are in place to prevent air leaks and cabinet
sweating.
Figure 6 Conversion for Horizontal Right Applications − A−Coil
COIL
SUPPORT
RAIL
COIL
BRACKET
DRAIN PAN
SUPPORT
BRACKET
COIL
SUPPORT
RAIL
COIL
BRACKET
SECONDARY DRAIN
HORIZONTAL RIGHT
REFRIGERANT
CONNECTIONS
AIR SEAL
ASSEMBLY
A
B
C
HORIZONTAL
DRAIN PAN
PRIAMRY DRAIN
HORIZONTAL RIGHT
HORIZONTAL
RIGHT
APPLICATION