backward, tilting the mast backward until 12 degrees.
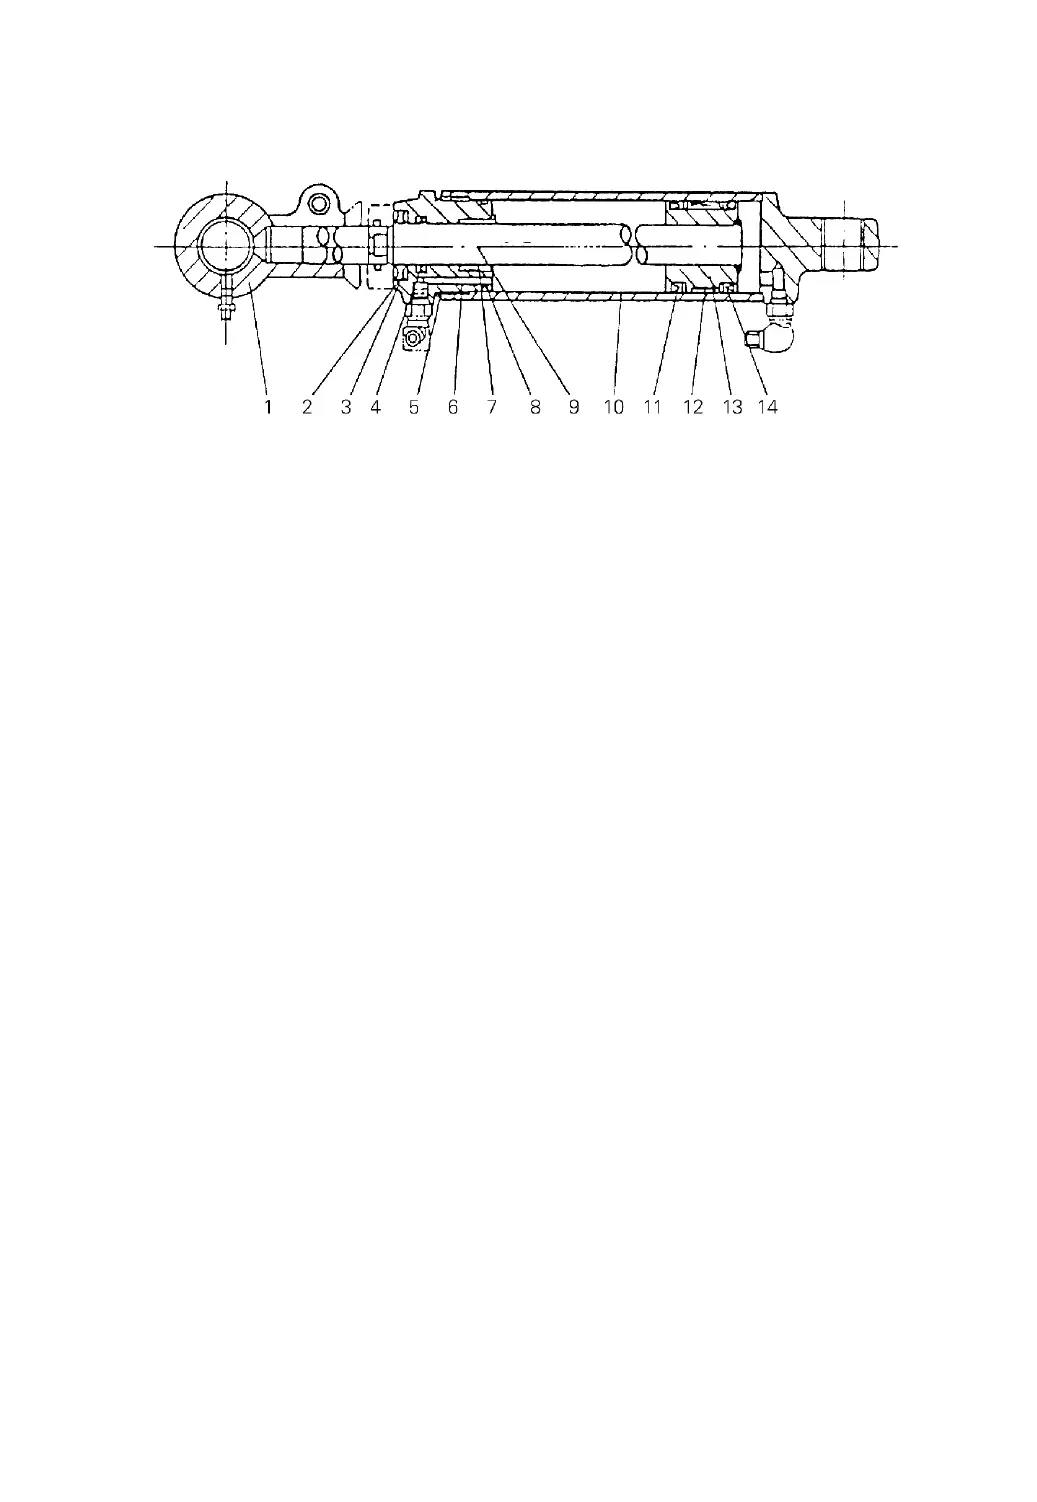
Fig.9-11 Tilt cylinder
(1) Joint (2) Dust seal (3) Snap ring (4) Yx-ring (5) O-ring
(6) Guide sleeve (7) Bushing (8) O-ring (9) Piston rod (10) Cylinder
body
(11) Yx-ring (12) Wear ring (13) Piston (14) Yx-ring
9.8 Maintenance of Main Pump
9.8.1 Disassembly (See Fig.9-18 & 9-19 import pump)
(1) Hold the pump cleaned in a vice by lightly clamping the flange section and
remove bolt(12).
(2) Remove rear cover(1) and packings(8), (9), (10) and (11).
(3) Remove front cover(7) and (8), (9), (10), (11).
(4) Remove bearings(3), (4) and gears(5), (6) out of pump body(2). If it is
difficult to remove the bearings and gears, press a gear in to solve it.
For the convenience of checking, it is recommended to place the disassembled
parts in this order as shown in Fig.9-18 & 9-19.
9.8.2 Inspection and repair
The disassembled parts except rubber parts should be washed with light oil.
These disassembled parts should be checked and repaired or replaced as follows:
(1) Pump body inspection
The gear pump is designed to allow the gear teeth to rotate with slightly touching
the pump body inner surface to give a high efficiency. The inner surface of the pump
-81-
 Loading...