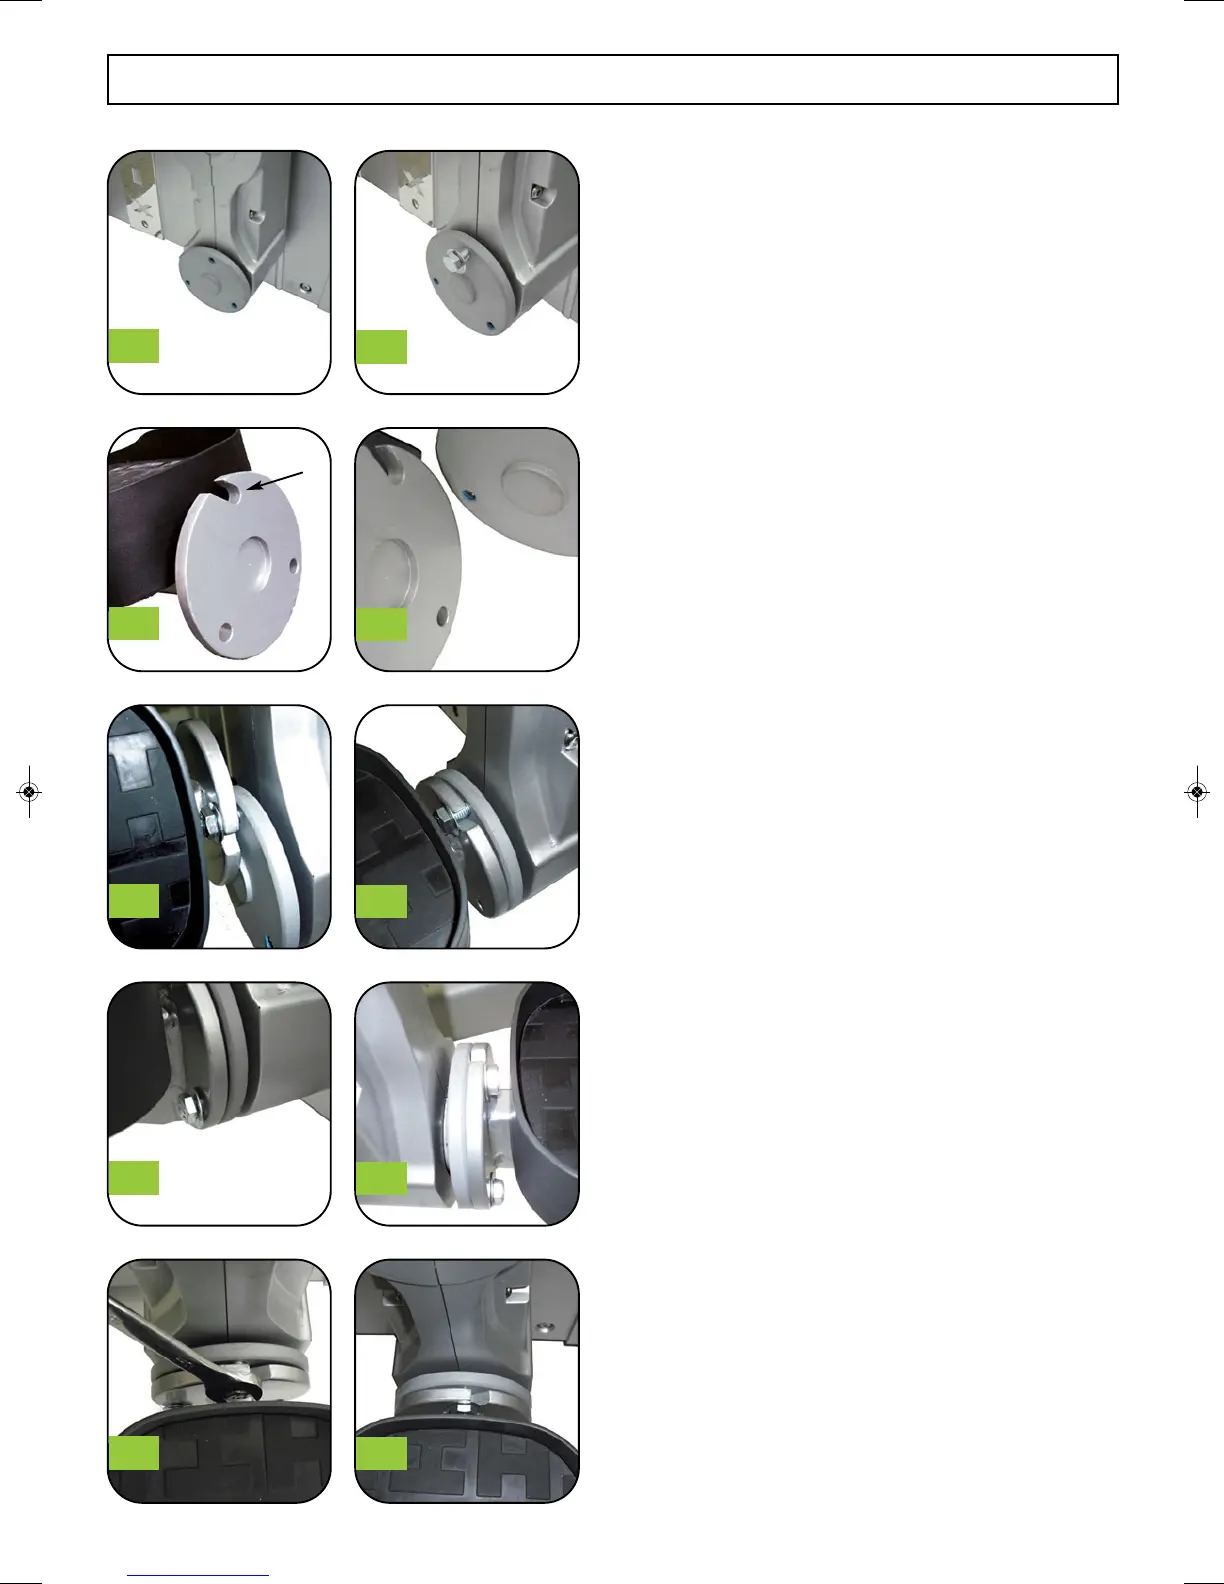
3/ ASSEMBLY - PEDALS
STEP 4:
Using the 6 Hex head bolts and washers from STEP 4
Plastic Parts Bag, install one bolt and one washer in the
top bolt of the plate as shown in Figure #5.
On the Pedal assembly make note of the slot in the
round disk as shown in Figure #6.
This slot is used to slide onto the bolt that you installed
in the round disk on the crank arm. Slide the slot over
the bolt as shown in Figure #8 . Be sure that the washer
is on the side of the bolt head and not between the two
connecting parts.
Turn the Pedal Assembly to align the two round plates
as shown in Figure #9
Next install a hex head bolt and washer on the right side
of the disk as shown in Figure #10. Repeat this again on
the other side of the disk as shown in Figure #11. There
will be a total of three bolts installed.
Note that one round disk has a protrusion and one has
an indentation as shown in Figure #7. These should fit
together evenly when assembled. Do not fully tighten
the hex head bolts until you are sure these two parts are
aligned. Then fully tighten the bolts with a Wrench as
shown in Figure #12.
Repeat the process for the 2nd pedal assembly.
4
5
6
7
8
9
10
11
12
13
- 9 -
Slot
 Loading...