BEFORE FIRST USE
Read and follow the instructions in this user manual even if you feel you are familiar with the product, and
find a place to keep it handy for future reference.
For your convenience record the complete model number (located on the product identification plate) and
the date you received the product, together with your purchase receipt and attach to the warranty and
service information. Retain in the event that warranty service is required.
NOTE: The rating of this product (as marked on the product identification plate) is based on specific loading
tests. Normal use or the use of other recommended attachments may draw significantly less power.
INSTALLATION & LOCATION
The appliance requires no installation; it should be used solely as a portable appliance.
NOTE: Portable appliances are not suitable for use in a bathroom. The Appliance should be placed with a
minimum distance of 1 metre away from flammable objects (e.g. curtains), walls or other structures.
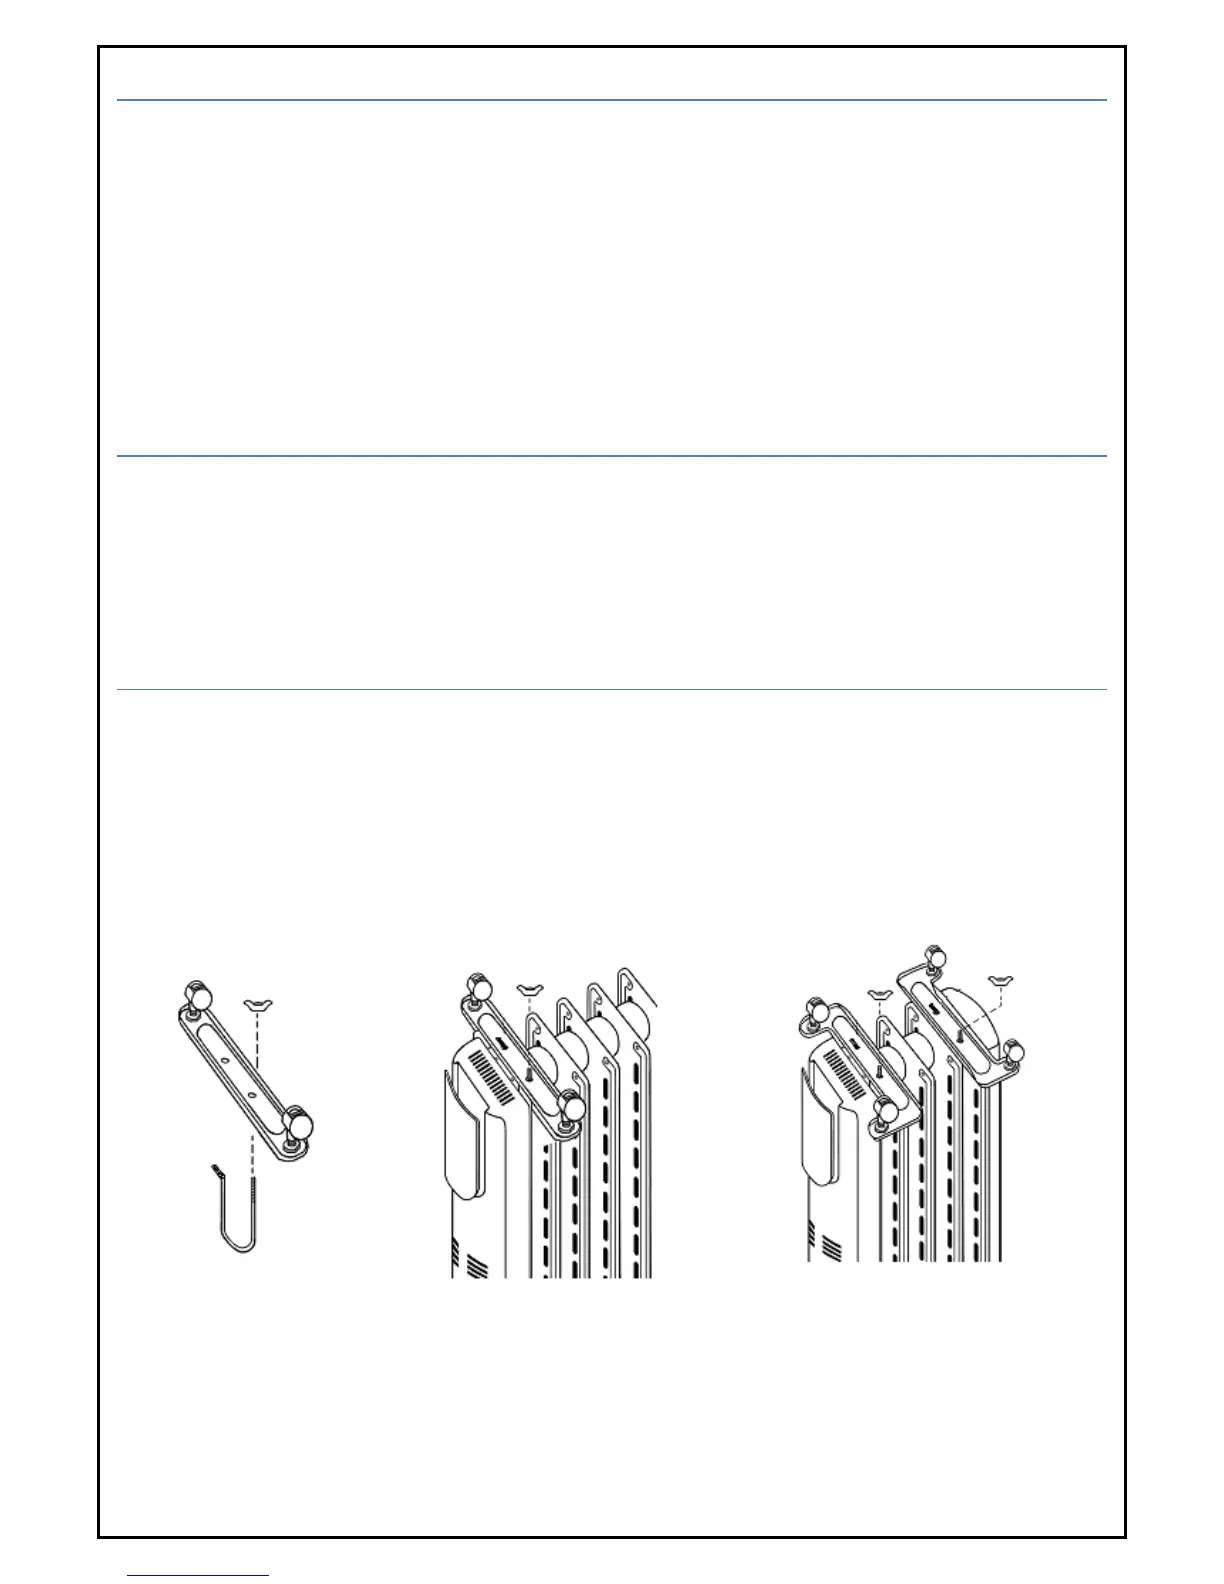
ASSEMBLY INSTRUCTIONS
1. To attach the castors, turn the radiator upside down. Place the castors between the last two panels
on either end. Face the wheels up towards you and attach by means of the U-bolt and wing nuts
supplied. Slide the U-bolt under the radiator frame and attach to the castor brackets. Refer to figs 1
and 2.
2. On the OIL5 models, note the correct position of the anti-topple castors. The wings on the brackets
must be pointing outwards, away from the radiator. Refer to fig.3.
3. Turn the radiator upright before switching on.