6
NL
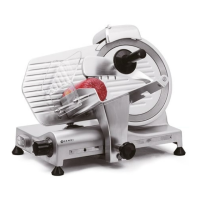
Safe Blade Removal Tool
The blade cleaning must be carried out with metal gloves and a wet cloth!
• Unplug the slicer from the power supply
• Remove the blade guard cover by unscrewing the
pin at the back of the appliance.
• Place and fit the supplied blade removal tool with
the notch at the right top side.
• Rotate and align the 2 screws holes on the blade
with the 2 screw handles of blade removal tool.
• Then, screw and tighten 2 handles of the blade
removal tool into the blade and locking it into
place.
• Unscrew the screws that fasten the blade to the
appliance.
• Lift the blade removal tool with the 2 handles to
remove the blade.
• Keep the blade removal tool in place when clean-
ing. (See ==> Cleaning and maintenance)
• Refit and reinstall the blade in reverse after
cleaning.
Cleaning and maintenance
• Attention: Cleaning must be carried out at least
once a day after using.
• Turn the slice thickness dial in counter clockwise
direction to the “0” position,
• Always pull the plug from the socket before
cleaning the appliance.
• Warning: Never submerge the appliance in water
or other liquids!
• Use a damp cloth to clean surfaces (solution of
water and a mild cleaning agent).
• Never use corrosive or abrasive cleaning agents.
Do not use sharp or pointed objects for cleaning.
Do not use benzene or solvents! Clean with a
damp cloth. Use washing-up liquid if needed, but
never abrasive cleaning agents.
• Clean the blade with alcohol. WARNING! The
blade is extremely sharp.
• If the food carriage stops sliding smoothly, lay the
machine on its side. Clean the slide bar carefully
and lubricate it with Vaseline
EN