Each installation is unique to the property so it is not possible to give details to suit every setting. The installation must comply with Building
Regulations and be made using best practice construction methods. Many fireplace openings have a supporting lintel. Do not remove
without supporting the remaining structure of the building. do not support the structure with the appliance or the flue system.
Take care when installing the appliance. Careless handling and use of tools can damage the nish and/or area.
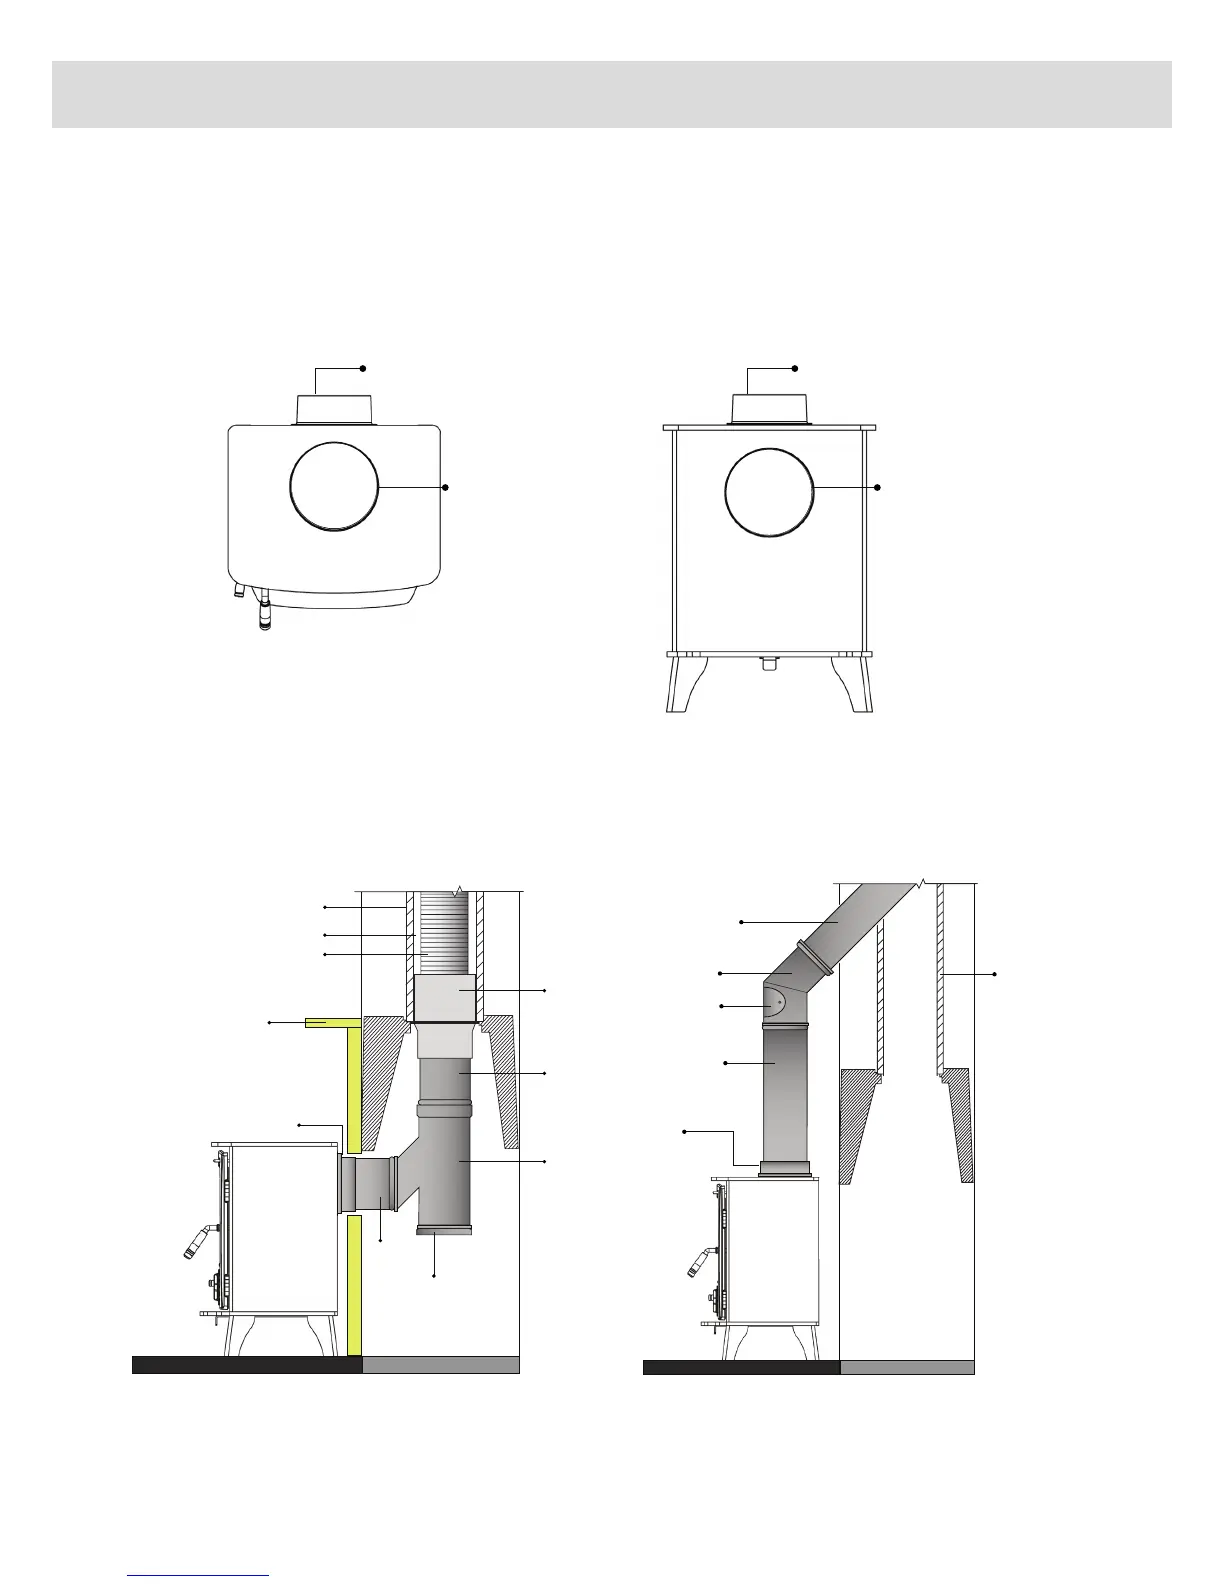
Choose top or rear flue exit and fit flue collar to suit installation. Seal with fire cement.
Installation Instructions
Place collar at top of stove
Option 1 - Flue out the rear of stove
Place collar at rear of stove
Seal top outlet
with plate provided
Seal rear outlet
with plate provided
Option 2 - Flue out the top of stove
Reducer
Straight Pipe
45 degree T Pipe
Straight Pipe
Max 150mm
Cap
8” clay lined chimney
Fill with vermiculite
6” Flexi Flue Liner all the
way to teh top of the chimney
Fireplace
Collar sealed with
fire cement
Ensure you comply with all Building Regulations when installing your appliance.
Choose how you are going to connect to the chimney and what pipes you require. Please ensure you comply with all Building Regulations
when installing your stove and connecting it to the chimney.
Connecting to the chimney using flue at rear of the stove
Straight Pipe
45 degree Pipe
with door
600mm Straight Pipe
(Max 1000mm)
Pipe Door
8” clay lined chimney
Collar sealed with
fire cement
Ensure you comply with all Building Regulations when installing your appliance.
Connecting to the chimney using flue at top of the stove
Please ensure you comply with Building Regulations when installing your appliance
www.henleystoves.com | 7
 Loading...