Page 5For technical questions, please call 1-888-866-5797.Item 57285
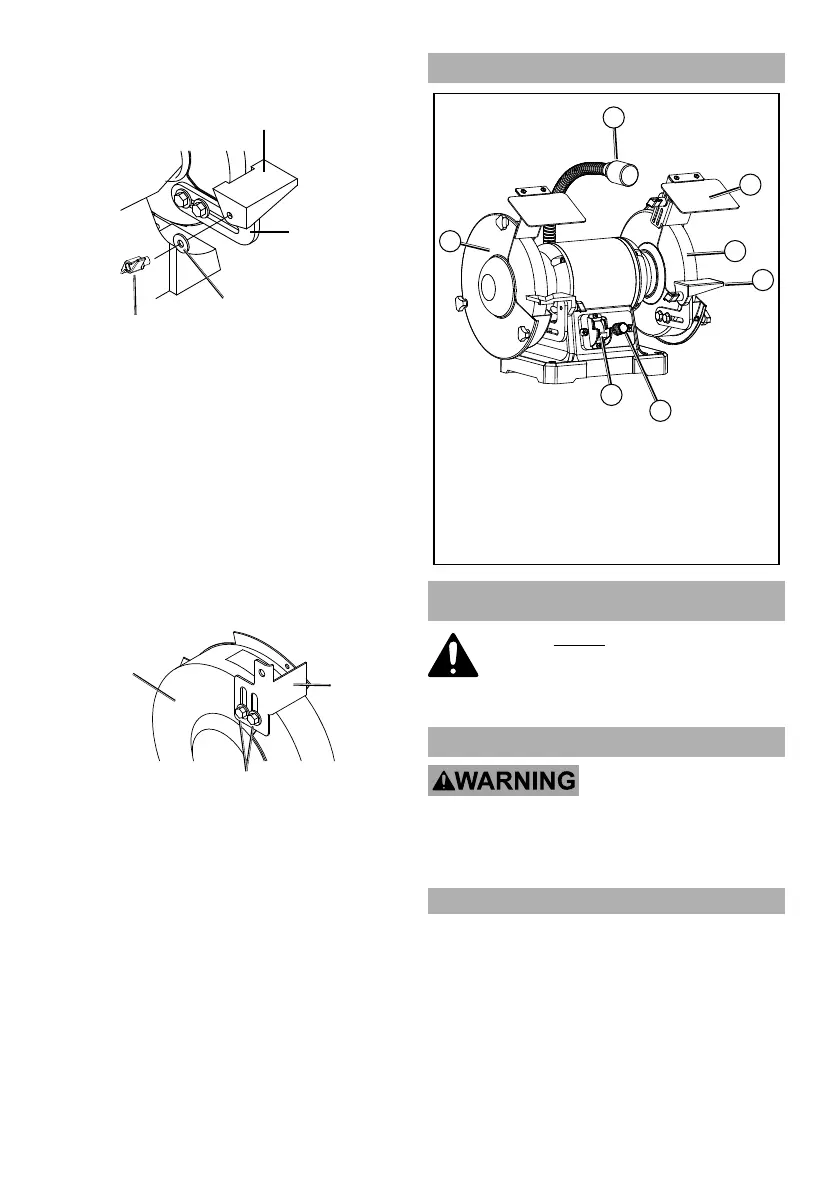
2. Install Right Work Rest (64) to the Right Work
Rest Support using Washer (54) and a Work
Rest Locking Knob (65). See below.
Work Rest (64)
Washer (54)
Locking
Knob (65)
Work Rest
Support
3. Install Left Work Rest Support (68) to the Left Inner
Wheel Guard (39). Use two Hex Bolts (72) and
two Flat Washers (73) to secure it in place.
4. Install Left Work Rest (69) to the Left
Work Rest Support using Washer (54)
and a Work Rest Locking Knob (65).
5. Adjust the Work Rests to within 1/16″ of the
Grinding Wheel. To adjust this distance,
loosen Bolts (72) and move Work Rests (64/69).
6. Attach a Spark Guard (60,67) to each
Inner Wheel Guard (39,62) using two
Bolts, Spring Washers, Flat Washers (59)
on each side. See below.
Spark
Guard (60)
Inner Wheel
Guard
Bolt (59)
7. Adjust each Spark Guard to within 1/16″
(0.0625″) of the Grinding Wheel (32,35)
and tighten each Bolt (59).
8. Attach Eye Shield (55) to the Right Spark Guard (60)
using a Neck Screw (61), Eye Shield Locking
Knob (53) and Flat Washer (54).
9. Attach the other Eye Shield (55) to the Left
Spark Guard (67) using a Neck Screw (61), Eye
Shield Locking Knob (53) and Flat Washer (54).
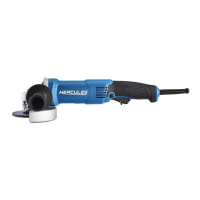
Functional Description
2
4
5
3
1
7
6
1. Wheel Cover
2. Eye Shield
3. Work Rest
4. Power Switch
5. Grinding Wheel
6. LED Light
7. Variable Speed Knob
OPERATION
Read the ENTIRE IMPORTANT
SAFETY INFORMATION section at the
beginning of this manual including
all text under subheadings therein
before set up or use of this product.
Tool Set Up
TO PREVENT SERIOUS INJURY FROM
ACCIDENTAL OPERATION:
Make sure that the Switch is in the OFF position and
unplug the tool from its electrical outlet before
performing any procedure in this section.
Replacing a Grinding Wheel
1. The Grinding Wheel MUST be:
• rated to at least 2,000 - 3,400 RPM.
• no larger than 8″ (203.2 mm) in diameter.
• fitted with a 5/8″ round arbor hole.
• 1″ thick.
• suitable for edge grinding, not surface grinding.
• dry and clean.
• proven undamaged by inspection and
by the ring-test explained below.