Page 7For technical questions, please call 1-888-866-5797.Item 58474
SETUP - BEFORE USE
Read the ENTIRE IMPORTANT SAFETY
INFORMATION section at the beginning of
this manual including all text under
subheadings therein before set up or use
.
TO PREVENT SERIOUS INJURY FROM ACCIDENTAL
OPERATION: Release the Trigger and remove the
Battery Pack before performing any procedure in
this section.
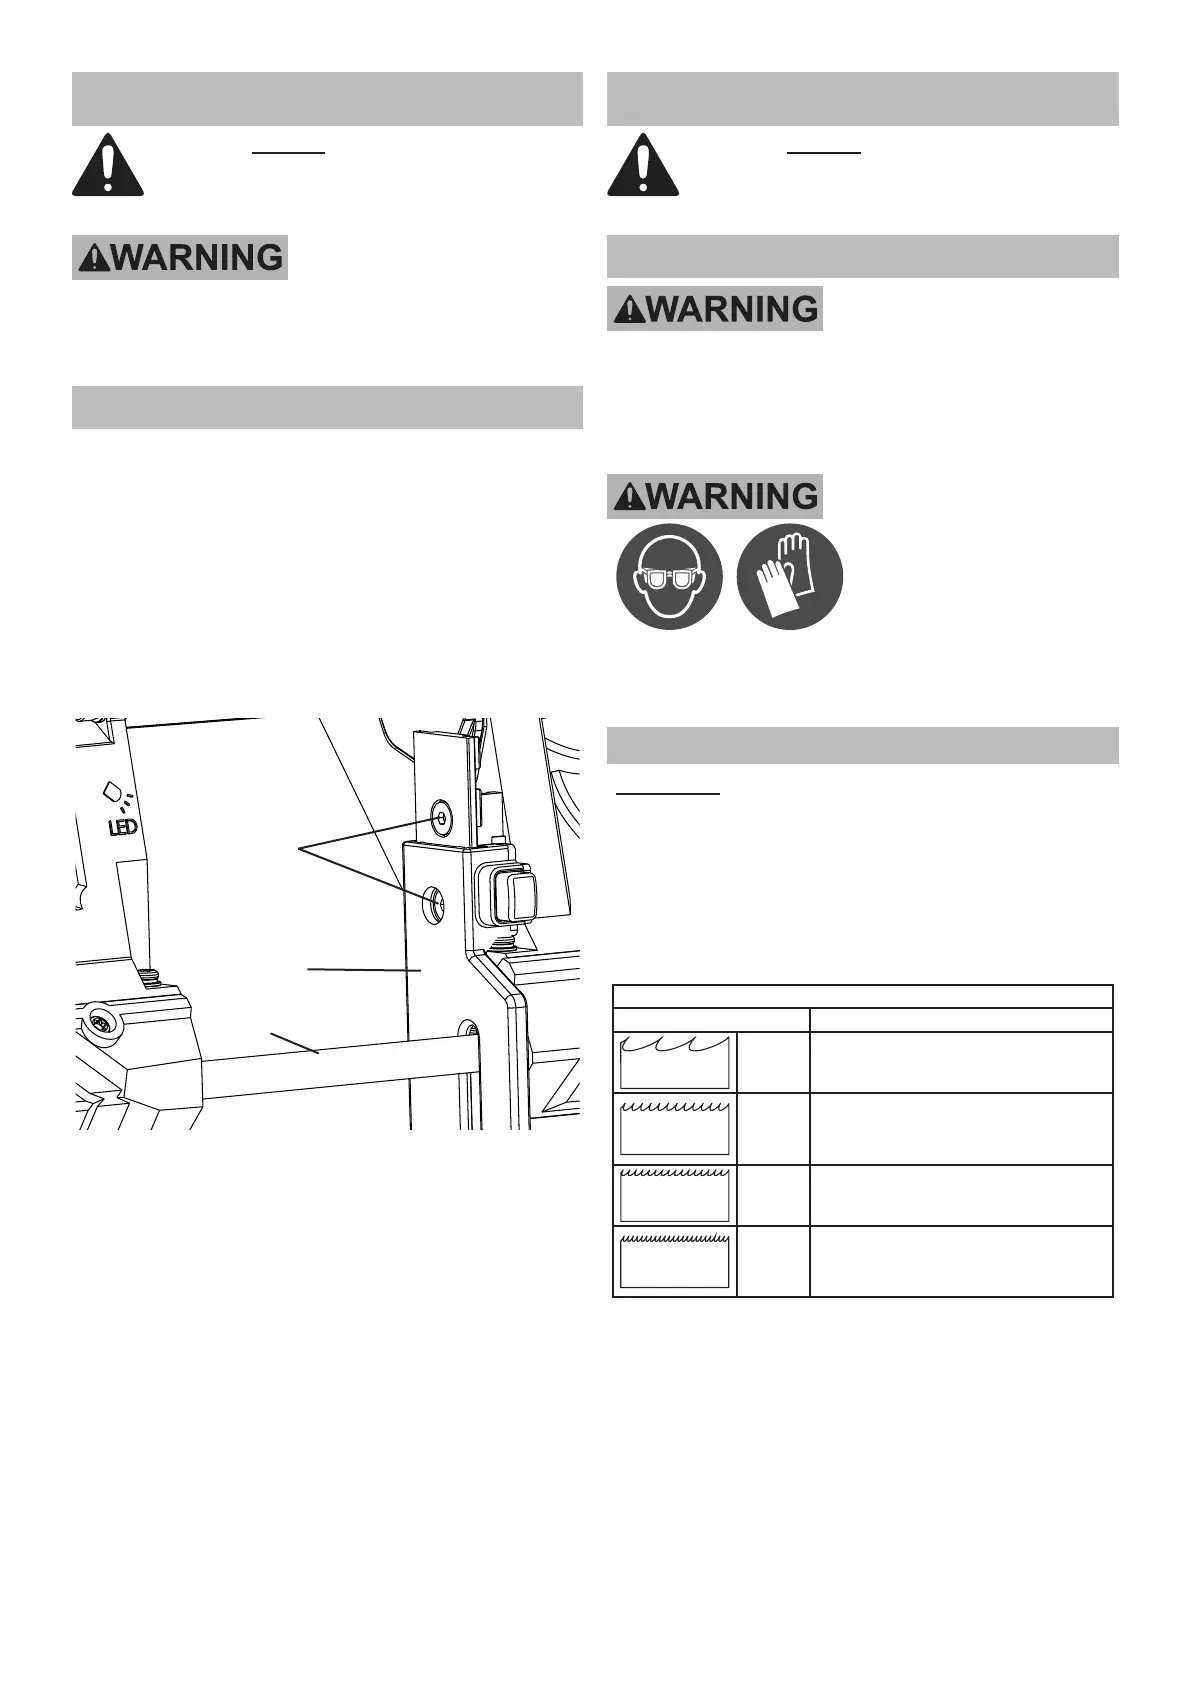
Guide Bar Assembly
1. Assemble the Guide Bar to the
Band Saw before operation.
a. Remove the two Screws from the
frame of the Band Saw.
b. Position the Guide Bar around the Blade
as shown, aligning the mounting holes
on the Guide Bar with the tapped holes
on the frame of the Band Saw.
c. Secure the Guide Bar to the Band Saw
frame with the two Screws. See Figure A.
Guide
Bar
Screws
Blade
Figure A: Guide Bar Assembly
OPERATION
Read the ENTIRE IMPORTANT SAFETY
INFORMATION section at the beginning of
this manual including all text under
subheadings therein before set up or use
.
Tool Set Up
TO PREVENT SERIOUS INJURY FROM
ACCIDENTAL OPERATION:
Make sure that the Trigger is in the off-position
and remove its Battery Pack before
performing any procedure in this section.
TO PREVENT
SERIOUS INJURY:
Wear ANSI-approved
safety goggles, heavy-duty
work gloves, and heavy-
duty long-sleeved shirt or coat whenever
handling or working near the Blade.
The Blade can suddenly spring out during service.
Blade Selection
WARNING! TO PREVENT SERIOUS INJURY
FROM BLADE COMING LOOSE, ONLY USE
BLADES OF THE SPECIFIED SIZE.
Select the proper Blade according to the cutting
material and the diameter or size of the workpiece.
This Band Saw accepts 44-7/8″ x 1/2″ x .025″ Blades.
(Blade sold separately.)
Common Blade Applications
Teeth Per Inch Use
3 - 4 Wood, resawing (ripping).
10 - 14
Stainless steel, angle iron,
pipe, tubing, plastic,
wood 1/4" or thicker.
14 - 18
Stainless steel, angle iron, pipe,
tubing, plastic, wood 1/8" to 1/4".
24
Stainless steel, angle iron,
pipe, tubing, plastic,
wood 1/8" or thinner.