Page 9For technical questions, please call 1-888-866-5797.Item 56790
Setting and Testing
TO PREVENT SERIOUS INJURY FROM ACCIDENTAL
OPERATION: Make sure that the Trigger is in the off
position and unplug the tool from its electrical outlet
before performing any procedure in this section.
Using the Depth Stop
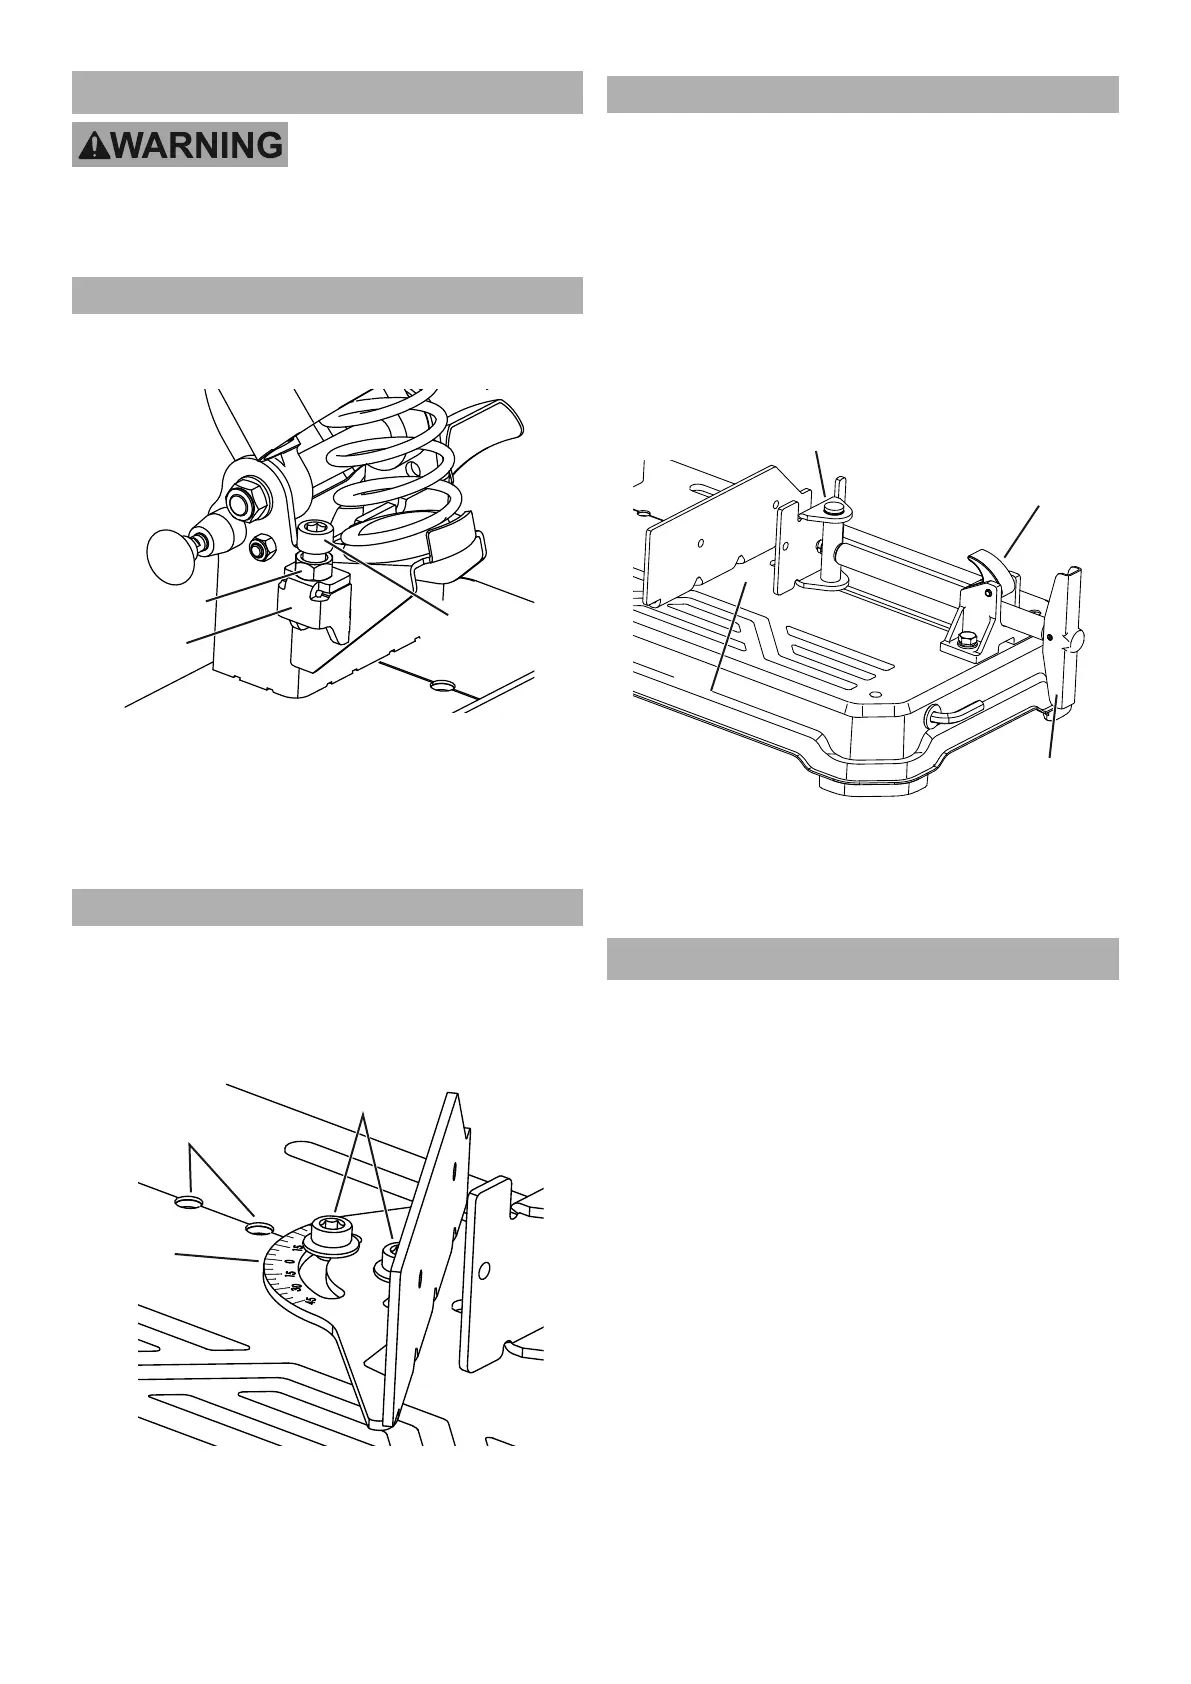
1. Loosen the Nut on the Depth Adjustment
Bolt shown in Figure D.
Depth Depth
Adjustment Adjustment
BoltBolt
Nut
BracketBracket
Figure D: Depth Adjustment
2. Turn the Depth Adjustment Bolt to change
the depth so that the Cut-Off Wheel will not
contact the base at any time during cutting.
3. After adjustment, tighten the Nut down against
the bracket to lock the adjustment in place.
Setting Up an Angle Cut
1. To cut at various angles (up to 45º),
adjust the Angle Scale by loosening the
two Bolts as shown in Figure E.
2. Adjust the Angle Scale to the desired
setting and then tighten both Bolts.
Angle
Scale
Upper Two
Screw Holes
Bolts
Figure E: Angle Scale
3. To reposition the Angle Scale for a wider
workpiece, remove both of the Bolts and reattach
the Angle Scale at the upper two screw holes.
Using the Vise
1. After setting the cutting angle, secure
loose work pieces using the Vise to
prevent movement while working:
a. Lift up the Quick Release to the released
position and push the Vise Handle until the
Vise Clamp is up against the workpiece.
b. Put the Quick Release in the engaged
position shown and tighten the
Vise Handle to secure the workpiece.
Note: To cut the workpiece at an angle,
see Setting Up an Angle Cut.
Place Workpiece Place Workpiece
HereHere
Quick
Release
Vise Clamp
Vise Handle
Figure F: Vise Components
2. To release the workpiece, loosen the Vise Handle
a few turns, lift up the Quick Release and pull the
Vise Handle out to release the Vise Clamp.
Workpiece and Work Area Set Up
1. Designate a work area that is clean and well lit.
The work area must not allow access by children
or pets to prevent distraction and injury.
2. Route the power cord along a safe route to reach
the work area without creating a tripping hazard or
exposing the power cord to possible damage. The
power cord must reach the work area with enough
extra length to allow free movement while working.
3. Allow room on both left and right of
saw for extended workpieces.
4. There must not be objects, such as utility lines,
nearby that will present a hazard while working.
5. Secure workpieces to the saw table using
the Vise to prevent movement during the
cutting operation. Securing the workpiece will
provide safety by removing the need to hold
workpieces near the Cut-Off Wheel by hand and
also improve cutting accuracy by preventing
the workpiece from moving when cutting.