7
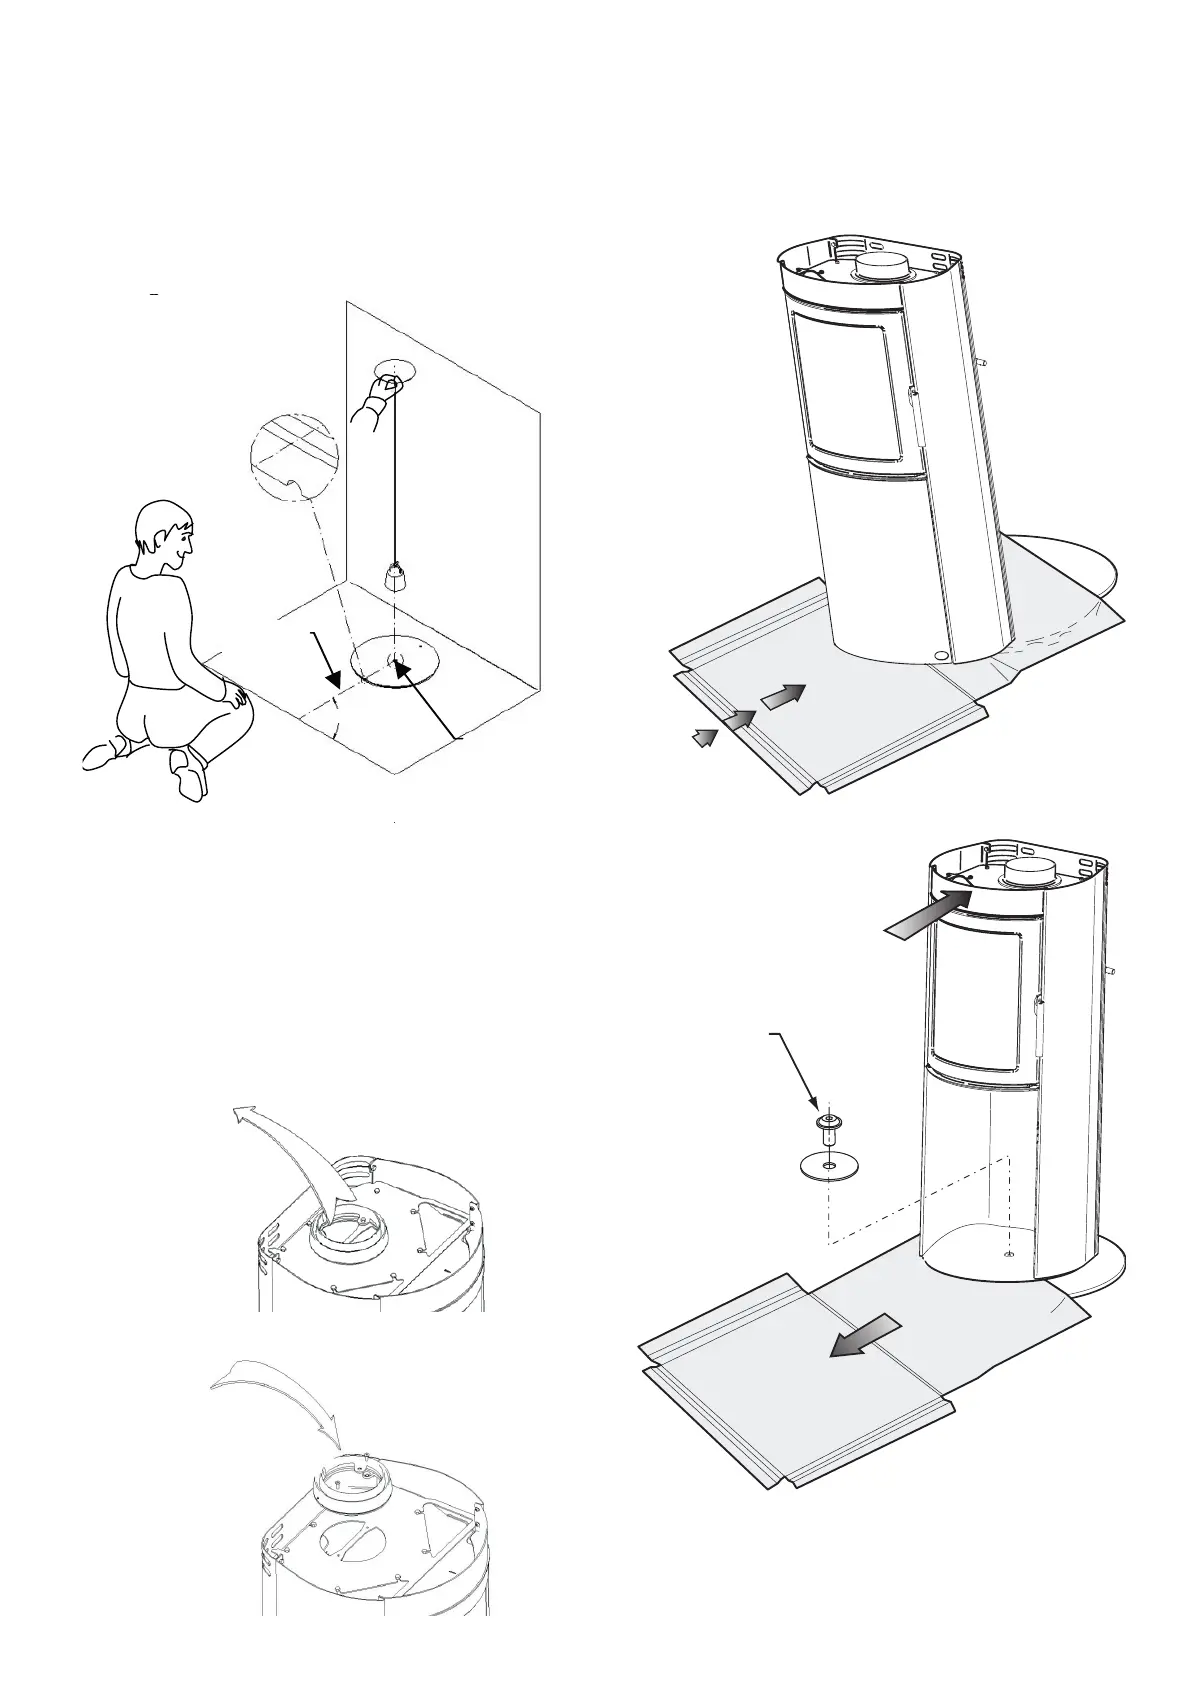
Positioning the rotating base.
Place the rotating base on the floor. Turn it to the
neutral position. See Fig. 4. Position the stove with the
door facing in the same direction as the neutral line.
Check that the safety distances for the stove are met
when the stove is turned all the way to the end stops.
Please refer to the instructions for the use of your
stove.
Hole in ceiling for the ue.
After positioning the rotating base in accordance with the
pivot centre, mark the hole for the flue on the ceiling. See
Fig. 4.
Figure 5
Figure 6
Fitting the turn spigot
Remove the factory fitted spigot. Fig. 5. Replace this
with the turn spigot with ball bearings that is supplied
with the rotating base. Fig. 6.
Placing the stove on the rotating base.
Unscrew the centre screw. See Fig. 2.
Use the transport case as protection to prevent scratching
the rotating base. Place the box approx. 15 cm from the
rear edge of the rotating base. Then “walk” the stove up
onto the rotating base. See Fig. 7.
Place the stove approximately in position, so that it is
centred on the rotating base. Then tilt the stove back-
wards and pull the transport packaging out.
Position the stove over the centre and refit the centre
screw. See Fig. 8.
Centre screw
Figure 7
Figure 8
Neutral-
line
90°
Pivot
centre
en
Figure 4