7
3.4 Setting hours of operation for external devices
In order to select the option of changing the controller's parameters, go to the main menu by pressing . Next, using buttons or
, select the option „Parameters” , confirm the selection by pressing . The screen will display the menu of editing various parameters.
Using buttons and , select the "Time programme C" option. By pressing the controller will enter the option of editing
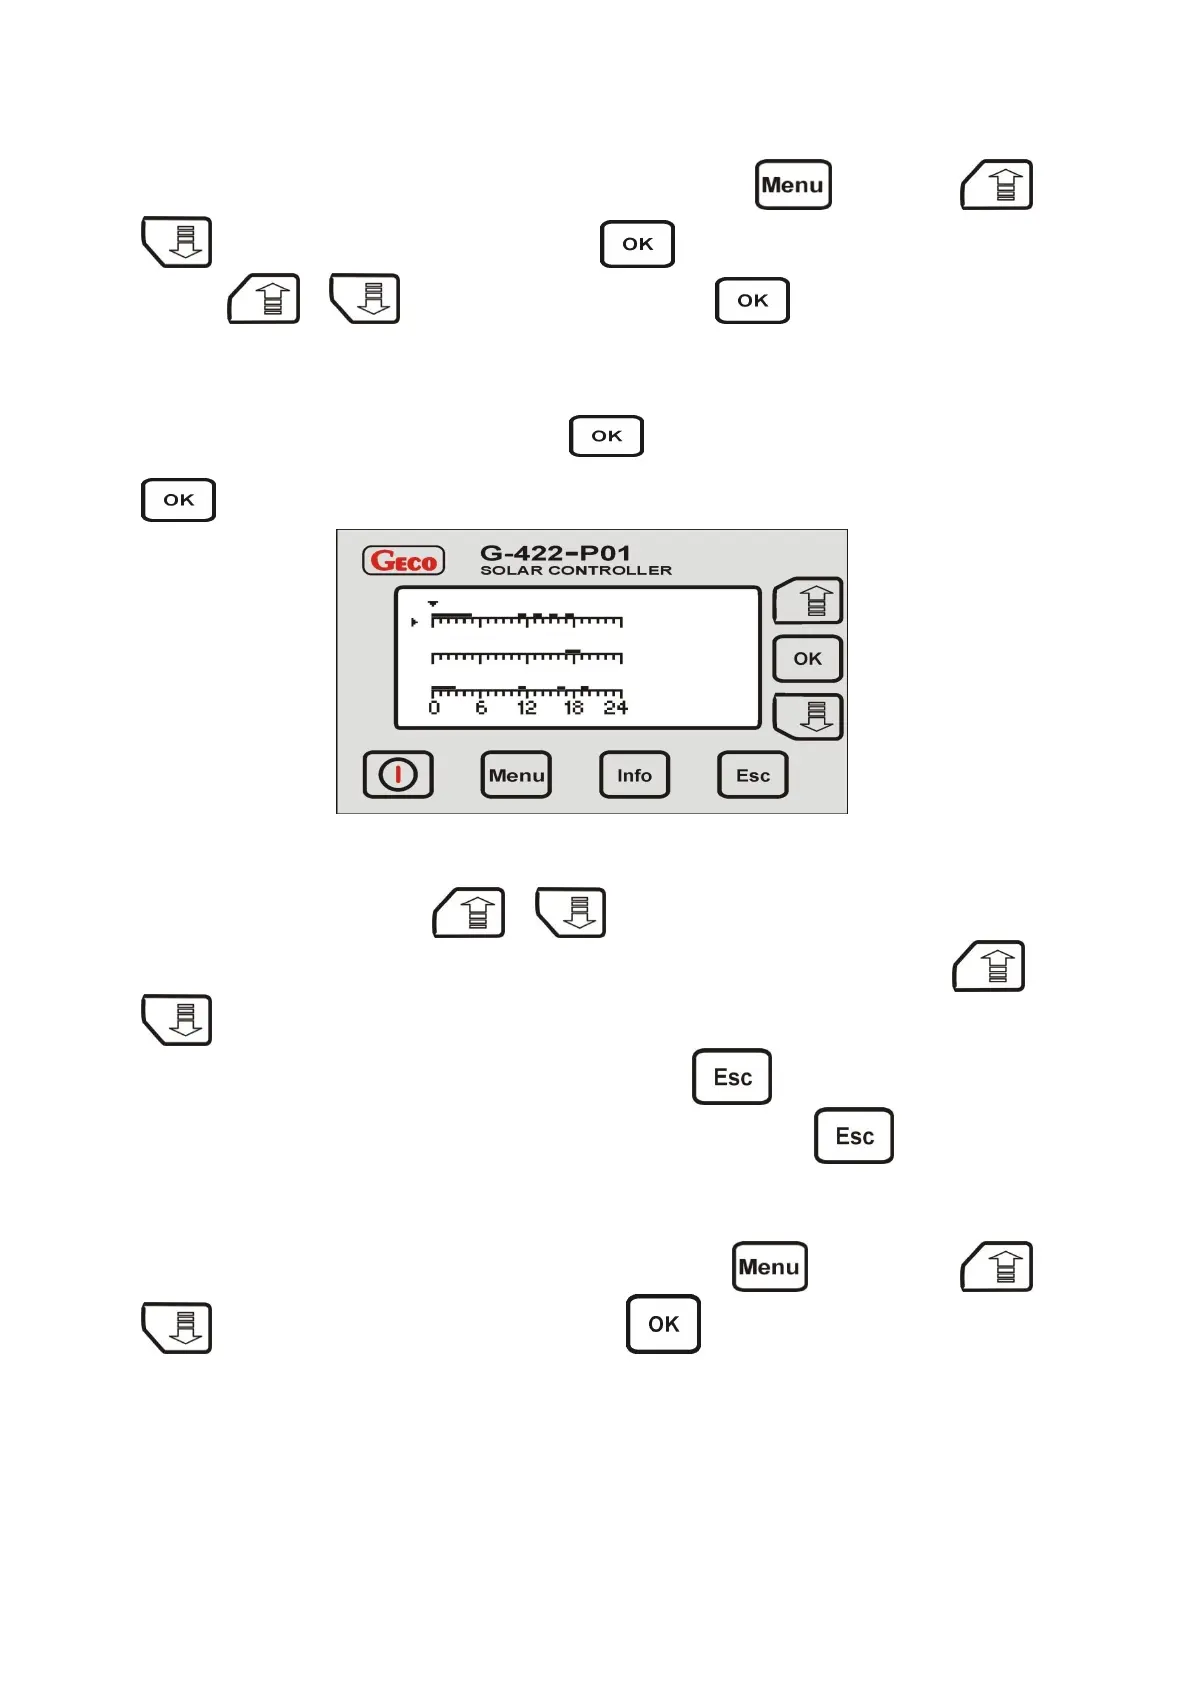
hours of operation, as shown in picture 6.
The mode of setting hours of operation of external devices let's you set the time for weekdays (Monday to Friday), and separately for Saturday and for
Sunday. A horizontal arrow, located above the scale at the top of the screen, indicates the time period being currently edited. In order to activate or
deactivate the operation of an external device for a given hour, press . If a device is programmed to operate in the given hour, it will be
indicated on the time scale with a white space. If a device is not supposed to operate in a given hour, erase the white space on the time scale by pressing
.
Pic. 6. LCD screen display during while editing hours of operation for external devices.
The selected hour can be changed using buttons and . Pressing and holding the arrow buttons will move the arrow further without
the need to keep continuously pressing the button. In order to select the hours of operation for Saturday or Sunday, keep pressing or
, until the horizontal arrow on the left side of the screen moves to the lines indicating those days. After setting the hours of operation for all
required days, changes need to be stored in the controller's memory, do so by pressing . After storing the changes, the controller will
automatically switch to the „Parameters"” menu. In order to return to the main screen through the main menu, press twice.
3.5 Setting the current date and time
In order to select the desired collector installation configuration, select the main menu by pressing . Next, using the buttons or
to select the option „Date and time”, confirm the selection by pressing . The screen will display the option of editing date and time,
as shown in picture 7:
Sa
Su
 Loading...