Do you have a question about the Hiboy S2 Pro and is the answer not in the manual?
This document is a user manual for the Hiboy S2/S2 Pro Electric Scooter, providing comprehensive instructions on its assembly, operation, maintenance, and safety.
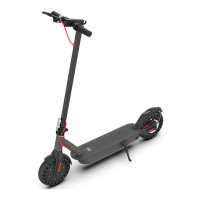
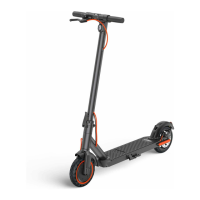
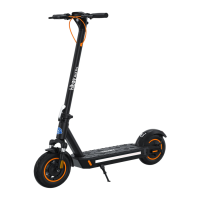
The Hiboy S2/S2 Pro Electric Scooter is designed as a leisure device for personal transportation. It features a control panel with a power button, battery indicator, light control, mode selection (sports and comfort), temperature warning, and cruise control. The scooter is equipped with a front light, rear brake light, electric brake, disk brakes, and a bell for safety. It also includes a folding mechanism for easy storage and transport, a kickstand for stability, and a charging port. The scooter can be connected to a "Hiboy S2" app via Bluetooth, available on both App Store (iPhone) and Google Play (Android), to view current speed, remaining power, real-time riding statistics, and receive firmware updates.
To start, the scooter needs to be assembled by unfolding the stem until it clicks, then unfolding the kickstand. The handlebar is slid onto the stem and secured with four screws using the provided Allen wrench. Before riding, ensure the scooter powers on and off correctly.
Charging the scooter involves opening the rubber plug, inserting the charging plug, and then sealing it with the rubber plug after charging. The LED light on the charger indicates the charging status (red for charging, green for fully charged). The manual advises against charging the scooter for extended periods or when the charging port is wet.
Riding the scooter safely is emphasized. Always wear a helmet and safety gear. To begin riding, turn on the power and check the electricity indicator. Stand on the base with one foot and propel yourself with the other. Once the scooter glides, place both feet on the deck and press the accelerator, maintaining a speed above 3.1 mph (5 km/h) to engage the throttle. To reduce speed, release the throttle slowly, and for a sudden stop, squeeze the brake lever. Turning is achieved by tilting the body in the desired direction and slowly turning the handlebar.
The manual outlines several riding notices and dangerous actions to avoid. Riders should not ride in the rain, through speed bumps, elevator door sills, bumpy roads, or uneven surfaces at high speeds. When encountering such surfaces, maintain a medium or low speed (5 mph) and slightly bend the knees to absorb shock. Do not press the throttle while walking with the scooter. Always steer clear of obstacles and be aware of doors, elevators, and overhead obstacles. Avoid accelerating downhill, hanging bags or heavy items on the handlebar, and always keep both feet on the deck.
Dangerous actions explicitly prohibited include riding in traffic lanes or residential areas shared with vehicles and pedestrians, turning the handlebar violently at high speeds, keeping feet on the rear mudguard, touching the disc brake, riding in puddles higher than 0.79 inches, riding with passengers (including children), keeping hands off the handlebar, and attempting to ride up or down stairs or jump over obstacles.
For folding and carrying, ensure the scooter is turned off. Unlock the folding mechanism, bend the handlebar stem to hook the buckle on the rear fender. To unfold, press the bell trigger to release it from the buckle, erect the handlebar, and lock the folding structure. The scooter can then be carried by holding the handlebar stem with one or both hands.
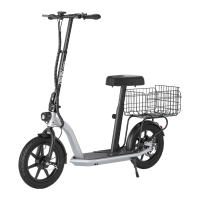
An optional seat assembly is detailed with a step-by-step process:
Daily care and maintenance instructions are provided to ensure the longevity and optimal performance of the scooter. For cleaning, wipe stains off the body with a damp cloth. For stubborn stains, use toothpaste and a toothbrush, then wipe with a damp cloth. Do not use alcohol, gasoline, kerosene, or other corrosive chemical solvents. Avoid washing the scooter with a high-pressure water spray. During cleaning, ensure the scooter is off, the charging cable is unplugged, and the rubber flap is closed to prevent water leakage. Store the scooter indoors in a dry and cool place (between 14°F and 104°F) when not in use, and avoid prolonged exposure to sunlight, overheating, or overcooling.
Battery maintenance is crucial. Use only original battery packs and power adapters. Do not touch the battery contacts, dismantle, or puncture the casing. Keep contacts away from metal objects to prevent short circuits. Properly dispose of used batteries according to local regulations. Fully charge the battery after every use to prolong its lifespan. For storage, charge the scooter every other month. Avoid completely exhausting the battery before recharging; charge it as soon as possible when the battery is low.
The manual also covers brake adjustment. If the brake is too tight, use an Allen wrench to loosen the screws on the caliper, slightly send back the brake cable to shorten the exposed length, then tighten the screws. If the brake is too loose, loosen the screws, slightly pull out the brake cable to lengthen the exposed length, then tighten the screws. If the handlebar and stem sway during riding, tighten the screws on the folding mechanism.
Before each use, check for loose parts, low battery alerts, excessive wear, strange sounds, or other malfunctions. If any are noted, stop riding immediately. The manual also includes a warning about the risk of fire and states that there are no user-serviceable parts.
The document also provides information on warranty, return policy, and contact details for customer service, including email and social media handles. It addresses common questions such as missing accessories, seat attachment, and component replacement, advising users to contact support with photos for assistance. It also explains how to address error codes and issues with the rear brake, suggesting contacting support or searching for tutorial videos.
| Motor Power | 350W |
|---|---|
| Max Load | 220 lbs (100 kg) |
| Water Resistance | IP54 |
| Foldable | Yes |
| Max Speed | 19 mph |
| Range | 25 miles |
| Brakes | Dual braking system |
| Display | LED display |
| Tires | 8.5-inch solid tires |
| Lights | Front and rear LED lights |