9
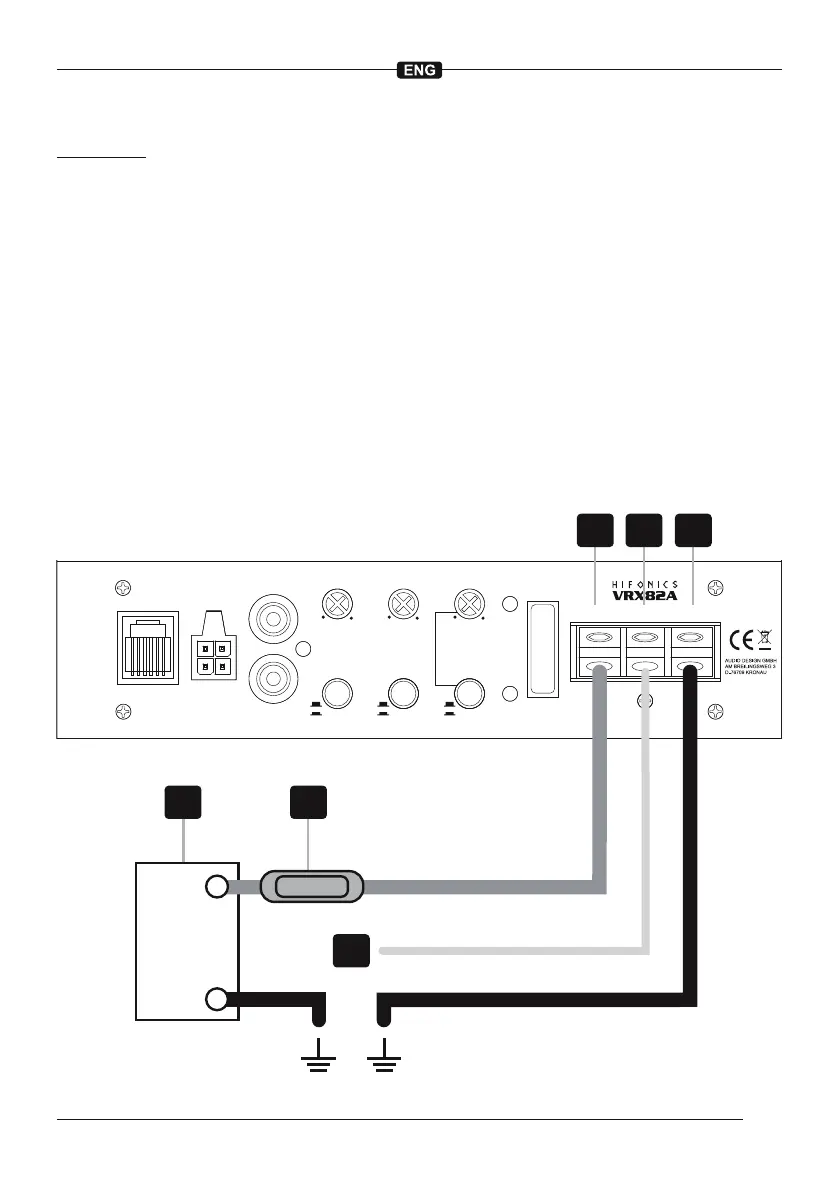
POWER SUPPLY AND TURN-ON-CONNECTION
ATTENTION: Before you start with the installation, disconnect the ground connection from the ve-
hicle’s battery in order to prevent short circuits.
The power wiring which is usually installed in on-board car networks is not sufcient for a power amplier‘s
demands. Make sure that the power wires to GND and to the +12 V terminal has been sufciently specied.
First connect the GND terminal [ 6 ] of the amplier to an appropriate ground connection at the chassis. To
ensure a good connection, residue dirt and dust from the connection point. A loose connection may cause
malfunctions or interferences noise and distortion.
Then connect the +12 V terminal [ 4 ] of the amplier with the battery by using an appropriate cable including
an in-line fuse. This fuse [ 2 ] should be located very close to the battery [ 1 ]; for safety reasons not more than
30 cm away. Only insert the fuse when the installation, including the connection of the loudspeakers, has been
accomplished.
Then connect the remote turn-on-wire [ 3 ] from the head unit with the amplier‘s REM terminal [ 5 ]. A cable
with a cross-section of 0.5 mm
2
is adequate.
If the device fuse [ FUSE ] is defective, it must be replaced with an equivalent one.
LPF
BASS BOOSTLEVEL
PHASE
SHIFT
X-OVER
SLOPE
AUTO
TURN ON
FUSE
MIN MAX 0dB 12dB 50Hz 150Hz
REM GND+12V
POWER
PROTECT
AUDIO INPUT
HI LEVEL INPUT
BASS LEVEL
––
++
ON
OFF
180°
0°
18dB
12dB
L
L L
R
R
R
CONTROLLER
+
–
3
2
4 65
1
 Loading...