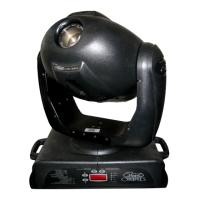
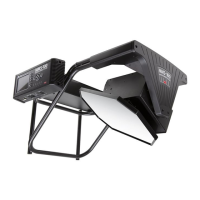
EasyManua.ls Logo

High End Systems Studio Spot 250 - User Manual

High End Systems Studio Spot 250
180 pages
Print Icon
To Next Page IconTo Next Page
Loading...
Studio Spot
®
250 / Studio Color
®
250 User Manual page i
User Manual
© High End Systems, Inc. 1999-2004 All Rights Reserved
Information and specifications in this document are subject to change without notice. High End Systems,
Inc. assumes no responsibility or liability for any errors or inaccuracies that may appear in this manual.
The system software for the Status Cue
®
lighting console described in this manual is furnished under a
license agreement and may be used or copied only in accordance with the terms of the agreement.
Trademarks used in this text: Lightwave Research, High End Systems, Status Cue, Studio Color,
Technobeam, Intellabeam, Dataflash AF1000, Emulator, Laser Aiming Device, and LithoPatterns are
registered trademarks; and Studio Spot, Studio Color 250, Studio Spot 250, LAD, the Lightwave Research
logo, and the High End Systems globe logo are trademarks of High End Systems, Inc. Belden is a
registered trademark of Belden, Inc. Philips is a registered trademark of Philips Lighting Company. Fram
is a registered trademark of Allied Signal. ETL and C-ETL are registered trademarks of Intertek Testing
Services. Other trademarks and trade names may be used in this document to refer to either the entities
claiming the marks and names or their products. High End Systems disclaims any proprietary interest in
trademarks and trade names owned by others.
For patent information, see the inside of the back cover of this manual.
Studio Spot
®
250 / Studio Color
®
250 User Manual
P/N 60600131 Version 1.1 May 2004
Printed in the USA
®
TM

Table of Contents

Questions and Answers

Summary

Introduction

Studio Spot 250 Features

Key features of the Studio Spot 250 fixture.

Studio Color 250 Features

Key features of the Studio Color 250 fixture.

Specifications

Technical specifications including physical, electrical, and environmental data.

Optional Accessories

List of available optional accessories for the fixtures.

Chapter 1 Setup and Installation

Unpacking the Fixture

Instructions for safely unpacking and inspecting the fixture.

Setting the Fixture Voltage

Procedure to change the fixture's input voltage and frequency settings.

Homing the Fixture

Explanation of the automatic homing procedure upon power-up.

Linking the Fixtures

Instructions on how to connect multiple fixtures using data cabling.

Mounting the Fixture

Safety warnings and general guidance for mounting the fixture.

Chapter 2 Configuring the Fixture

Fixture Types

Explanation of different fixture types and their DMX channel requirements.

Selecting a Control Method

Guidance on choosing between DMX start channel or fixture number control.

Assigning a Fixture Address

Process for assigning a DMX start channel or fixture number to each fixture.

Determining the Unique DMX Start Channel

Method for calculating DMX start channels for multiple fixtures.

Chapter 3 Operating the Fixture

Programming Overview

Introduction to programming terms, scenes, sequences, and loops.

Fixture Constructs

Overview of available fixture features and their DMX channel assignments.

Pan and Tilt

Explanation of Pan and Tilt constructs and their DMX channel control.

Color Function

Controls the movement of color wheels based on selected function.

Color Position

Allows selection of specific color wheel positions for Studio Spot 250.

Litho Function

Controls the movement of the litho wheel for Studio Spot 250.

Effects

Allows selection of effects wheel positions for Studio Spot 250.

Focus

Controls the focus of the light beam for both fixture types.

Iris

Controls the iris for beam size adjustment in Studio Spot 250.

Shutter

Controls the shutter for strobe and open/close effects.

Dim

Controls the dimming level of the fixture.

MSpeed (Motor Speed)

Sets motor movement time for smooth transitions between positions.

Macro;LAD

Controls factory-programmed macros and the Laser Aiming Device.

Control

Provides remote control options, including homing the fixture.

Updating Software

Procedures for updating the fixture's software.

Chapter 4 Understanding the Menu System

Navigational Buttons

Explanation of how to use the fixture's menu navigation buttons.

Accessing the Menu System

Steps to enter and exit the fixture's menu system.

Menu Maps

Overview of the menu structure for fixture configuration.

Fixture Options

Accessing and configuring various fixture settings through the menu.

Mode Menu (MODE)

Sets fixture type, user settings, and manages software.

Test Menu (TEST)

Accesses functions for homing, lamp control, and self-tests.

Information Menu (INFO)

Accesses fixture status information and allows resetting hours.

Preset Menu (PRST)

Manages on-board scenes, playback, and copying.

Chapter 5 Preset Programming

Programming Overview

Introduction to programming terms, scenes, sequences, and loops.

Preset Programming Example

Step-by-step guide to creating a scene using the menu system.

Creating a Loop

Forms a continuous sequence of programmed scenes.

Playing Back a Loop

Starts playback of programmed scenes or loops.

Synchronizing Preset Playback

Synchronizes playback across multiple fixtures in a link.

Chapter 6 Laser Aiming Device (LAD) Operation

Safety Precautions

Crucial safety guidelines for using the laser aiming device.

Aligning the Laser

Procedure for aligning the laser beam with the fixture's light beam.

Chapter 7 General Maintenance

Replacing Parts

General warnings and guidance before replacing fixture components.

Replacing Fuses

Step-by-step instructions for replacing the fixture's fuses.

Replacing the Lamp

Detailed procedure for safely replacing the fixture's lamp.

Replacing Studio Spot 250 Wheel Components

Instructions for replacing components in the color, litho, and effects wheels.

Replacing a Studio Color 250 Wheel

Instructions for replacing color or beam shaping wheels.

Replacing the Lens

Procedure for replacing the fixture's lens.

Optimizing the Lamp

Procedure to optimize lamp brightness and beam uniformity.

Cleaning the Glass Components

Instructions for cleaning internal glass components like lenses and wheels.

Chapter 8 Troubleshooting

LED Display Error Messages

Lists and explains error messages displayed by the fixture.

Status LEDs

Explains the meaning of various status LEDs for diagnostics.

General Troubleshooting

Solutions for common fixture problems not related to specific errors.

Upload and Crossload Troubleshooting

Solutions for issues encountered during software uploads or crossloads.

Laser Aiming Device (LAD) Troubleshooting

Troubleshooting steps for problems with the LAD.

Appendix A DMX Control

DMX Start Channels

Table listing DMX start channels for linked fixtures.

Studio Spot 250 Construct Parameters

DMX values for Studio Spot 250 constructs.

Studio Color 250 Construct Parameters

DMX values for Studio Color 250 constructs.

MSpeed Times

Table of MSpeed movement times and corresponding DMX values.

Appendix B Macros

Macro Descriptions

Describes factory-programmed macros and their affected constructs.

Appendix C Important Safety Information

Warning: For Continued Protection Against Fire

Safety warnings related to fire prevention.

Warning: For Continued Protection Against Electric Shock

Safety warnings related to electrical shock prevention.

Warning: For Continued Protection Against Injury To Persons

Safety warnings related to preventing personal injury.

High End Systems Studio Spot 250 Specifications

General IconGeneral
BrandHigh End Systems
ModelStudio Spot 250
CategoryLighting Equipment
LanguageEnglish

Related product manuals