EasyManua.ls Logo

Highlander iP-1 User Manual

Highlander iP-1
4 pages
To Next Page IconTo Next Page
Page #1 background imageLoading...
Page #1 background image
The information and graphics contained in this document are the property of Highlander Musical Audio Products. Copying of any kind is prohibited, except for personal use only.
©
Highlander Musical Audio Products 1991-2009
For more information please visit our web site.
email: hmap@highlanderpickups.com
Contact us at:
USA & Canada Toll Free: 888.658.1819, Phone: 805.547.1410, Fax: 805.547.1228
870 Capitolio Way, Unit 3, San Luis Obispo, CA 93401
Integrated Pickup and Preamplifier for Acoustic Guitar and Bass
h
ighlanderpickups.com
Thank you for purchasing the Highlander iP-1 Integrated Pickup System.
At Highlander we appreciate that it takes years of practice, dedication and personal growth
for an acoustic musician to develop the skills and spirit necessary to express themselves fully
through their music. Through years of practice, dedication and personal growth our highly
skilled team is crafting amplification equipment for these musicians that is so pure, we can all
fully appreciate and be moved by the true spirit of their music.
Built to take the rigors of the road, you can rely on a Highlander.
Question and Answer IconNeed help?

Do you have a question about the Highlander iP-1 and is the answer not in the manual?

Highlander iP-1 Specifications

General IconGeneral
CategoryAccessories For Music Instruments
FoldableYes
Adjustable HeightYes
ColorBlack
MaterialMetal

Summary

iP-1 INSTALLATION

Parts Included

Lists all components provided with the Highlander iP-1 pickup system.

Tools Required

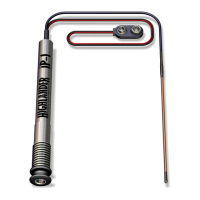
Details the necessary tools for successfully installing the iP-1 pickup system.

About the Output Jack

Explains the innovative screw thread design of the iP-1's output jack.

Preparation

Outlines the initial preparation steps for installing the iP-1 pickup.

Modification

Details drilling and threading the guitar's end block for the strap jack.

Drill Two Holes for the Pickup

Explains how to drill two angled holes in the guitar bridge for the pickup.

Route the Pickup Groove

Describes routing a groove in the bridge for the pickup cable.

Check the 'Saddle Fit'

Ensures correct saddle fit for optimal amplified sound and acoustic tone.

Install the Pickup in the Groove

Guides on passing the pickup through bridge holes and seating it in the groove.

Trim and Install the Saddle

Explains trimming the saddle and seating it correctly with the pickup.

Restringing

Provides instructions on restringing the guitar and testing the pickup installation.