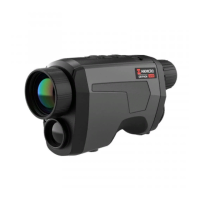
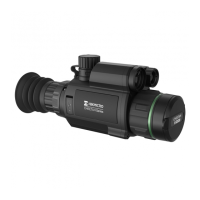
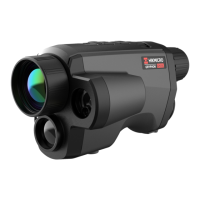
The HIKMICRO Handheld Thermal Monocular Camera is a versatile device designed for observation, target searching, and thermal imaging in various environments, including outdoor settings. It combines both thermal and optical observation functions, allowing users to switch between different viewing modes.
Function Description
The device serves as a handheld thermal monocular camera, offering both thermal observation and target searching capabilities. It utilizes thermal imaging technology to provide clear visibility in low-light or dark environments. The device can also be used for patrolling, searching, rescuing, hiking, and travel.
Key functions include:
- Distance Measurement: The device can detect the distance between the target and the device.
- Highest Temperature Tracking: It can detect and mark the spot with the highest temperature in a scene.
- Client Software Connection: The device allows users to capture snapshots, record videos, and set parameters via the T-Vision App when connected to a smartphone.
- Image Correction: It supports DPC (Defective Pixel Correction) and FFC (Flat Field Correction) to optimize image quality.
- Image Calibration: The device adjusts the thermal view to maintain consistency with the optical view.
- Palette Selection: It supports multiple palettes, allowing users to set the palette mode according to the scene.
- Fusion Mode: The device can display a fusion of thermal view and optical view.
Important Technical Specifications
While specific numerical specifications are not provided in the excerpt, the device's capabilities imply certain technical characteristics:
- Imaging Technology: Thermal imaging and optical imaging.
- Display: Supports various display modes including Optical, White Hot, Black Hot, Red Hot, Fusion, and Image Fusion.
- Digital Zoom: Adjustable digital zoom (1x, 2x, 4x, and 8x).
- Battery: Powered by a rechargeable battery. The battery type is 18650 with a protection board, and the size should be within 65 mm - 70 mm. The rated voltage and capacity are 3.6 VDC/3.35 Ah (12.06 Wh). It supports long-term storage of the battery, which should be fully charged every half year to ensure quality.
- Power Supply: Requires a Limited Power Source (5 VDC, 2A) according to the IEC61010-1 standard.
- Interfaces: Type-C interface for power and data export, CVBS interface for display unit connection, and Wi-Fi for client software connection.
- Operating Temperature: Designed to operate within a range of -30°C to 55°C (-22°F to 131°F).
- Operating Humidity: 95% or less.
- Storage: Supports storing recorded videos and captured pictures.
Usage Features
The device is designed for ease of use with intuitive controls and multiple viewing options:
- Power On/Off: Press and hold the power button for 2 seconds to power the device on or off.
- Menu Navigation: Access the menu by holding the menu button. Navigate through functions using the wheel and confirm selections by pressing the menu button.
- Focus Adjustment: Power on the device, hold it, and make sure the eyepiece covers your eye. Adjust the focus ring until the image is clear.
- Brightness Adjustment: In the menu mode, rotate the wheel to select brightness and press the menu button to adjust. The image effect in white hot mode is shown as a picture below and effect in black hot mode is opposite.
- Contrast Adjustment: In the menu mode, rotate the wheel to select contrast and press the menu button to adjust.
- Scene Mode Selection: Select proper scene mode (recognition or jungle) according to actual usage scene to improve the display effect.
- Palette Selection: Choose from different palettes (Optical, White Hot, Black Hot, Red Hot, Fusion, Image Fusion) to display the same scene in different effects.
- Digital Zoom Adjustment: In the live view interface, rotate the wheel to switch the digital zoom of the device.
- Defective Pixel Correction (DPC): The device can correct defective pixels on the screen. Hold the menu button to show the menu, rotate the wheel to select DPC, and press the menu button to enter the DPC setting interface. Move the cursor and rotate the wheel to correct the defective pixel.
- Image Calibration: This function corrects non-uniformity of display. Hold the menu button to go to the menu, rotate the wheel to select and press the menu button to switch the image calibration mode. Manual FFC corrects non-uniformity, Auto FFC performs FFC automatically, and External FFC covers the lens cover and presses the menu button to correct non-uniformity.
- OSD (On-Screen Display) Settings: Display or hide OSD information on the live view interface. Hold the menu button to show the menu, rotate the wheel to select and press the menu button to enter the OSD setting interface. Rotate the wheel to select the OSD information you want to display or hide. Press the menu button to enable or disable the selected OSD information.
- Time Synchronization: Synchronize the device's time with the current time. Hold the menu button to show the menu, rotate the wheel to select and press the menu button to enter the time setting interface. Press the menu button to switch the time system and rotate the wheel to select the time and date to be synchronized. Press the menu button and rotate the wheel to set the time and date, and press the menu button again to finish the setting. Hold the menu button to save settings and exit.
- Burning Prevention: This function prevents the detector of the thermal channel from being burned. When enabling this function, the shield will close if the grey scale of the detector reaches a certain value.
- Highest Temperature Tracking: The device can detect the highest temperature spot in the scene and mark it on display. When the function is enabled, a crosshair displays in the spot of highest temperature.
- Distance Measurement: The device can detect the distance between the target and the observation position with a laser. When measuring the distance, keep the hand and the position steady. Aim the cursor at the target and hold the measure key to measure the target distance. The laser ranging function is only supported by certain models.
- Capture Picture: In the main live view interface, press the capture button to capture a picture.
- Record Video: In the live view interface, press the record button and the menu button at the same time to start recording. Press them again to stop recording.
- Export Files: Export recorded videos and captured pictures. Connect the device to your PC with a Type-C cable. Open computer disk and select the DCIM folder to find the folder named after the capture year and month. Select and copy the files to PC. Disconnect the device from your PC.
- Client Software Connection: Connect the device to the T-Vision App via hotspot to capture picture, record video, or configure parameters on your phone. Turn on the WLAN of your phone and connect to the hotspot. Scan the QR code to download and install the App.
- CVBS Output: View the device image on the display unit. Connect the device to the display unit via CVBS interface of the aviation plug.
- Language Settings: Select the device language. Hold the menu button to show the menu, rotate the wheel to select and press the menu button to enter the language configuration interface. Rotate the wheel to select the language as required, and press the menu button to confirm.
Maintenance Features
The device includes several features and recommendations for maintenance to ensure longevity and optimal performance:
- General Maintenance:
- If the product does not work properly, contact your dealer or the nearest service center. Do not assume responsibility for problems caused by unauthorized repair or maintenance.
- Wipe the device gently with a clean cloth and a small quantity of ethanol, if necessary.
- If the equipment is used in a manner not specified by the manufacturer, the protection provided by the device may be impaired.
- Clean the lens with soft and dry cloth or wiping paper to avoid scratching it.
- Battery Maintenance:
- Please purchase the charger by yourself. Input voltage should meet the Limited Power Source (5 VDC, 2A) according to the IEC61010-1 standard.
- Make sure the plug is properly connected to the power socket.
- Do not connect multiple devices to one power adapter to avoid over-heating or fire hazards.
- The battery charger is included in the package. The input voltage for the supplied battery charger should meet the Limited Power Source (5 VDC, 2 A).
- Improper use or replacement of the battery may result in explosion hazard. Replace with the same or equivalent type only.
- For long-term storage of the battery, make sure it is fully charged every half year to ensure the battery quality. Otherwise, damage may occur.
- Do not charge other battery types with the supplied charger.
- Do not place the battery near heating or fire source.
- Do not swallow the battery to avoid chemical burns.
- Do not place the battery in the reach of children.
- The battery can not be charged with external power source directly.
- The device can not be charged, please use the supplied charger to charge the battery.
- Please purchase the adapter by yourself. The using environment of the adapter should be consistent with that of the device.
- Upgrade Device: The device's firmware can be upgraded. Connect the device to your PC with a cable. Open the detected disk, copy the upgrade file and paste it to the root directory of the device. Hold the menu button to reboot the device, and the device upgrades automatically. The upgrading process will be displayed in the main interface. During the upgrade, make sure the device is connected to your PC. Otherwise, it may cause unnecessary upgrade failure, firmware damage, etc. Repeat the above steps to upgrade all firmwares one by one.
- Restore Device: Restore the device to default settings. Hold the menu button to show the menu. Select and press the menu button to restore the device to defaults according to the prompt.
- Troubleshooting: The manual includes a section for frequently asked questions to help users diagnose and resolve common issues such as the monitor being off, image clarity, capturing/recording failures, and PC connection problems.