EasyManuals Logo
Home>HIKVISION>Security Camera>DS-2CD4012F-A

HIKVISION DS-2CD4012F-A Installation Manual

HIKVISION DS-2CD4012F-A
131 pages
To Next Page IconTo Next Page
To Previous Page IconTo Previous Page
Page #91 background imageLoading...
Page #91 background image
Installation Manual of Network Camera
90
Screw Hole
Template
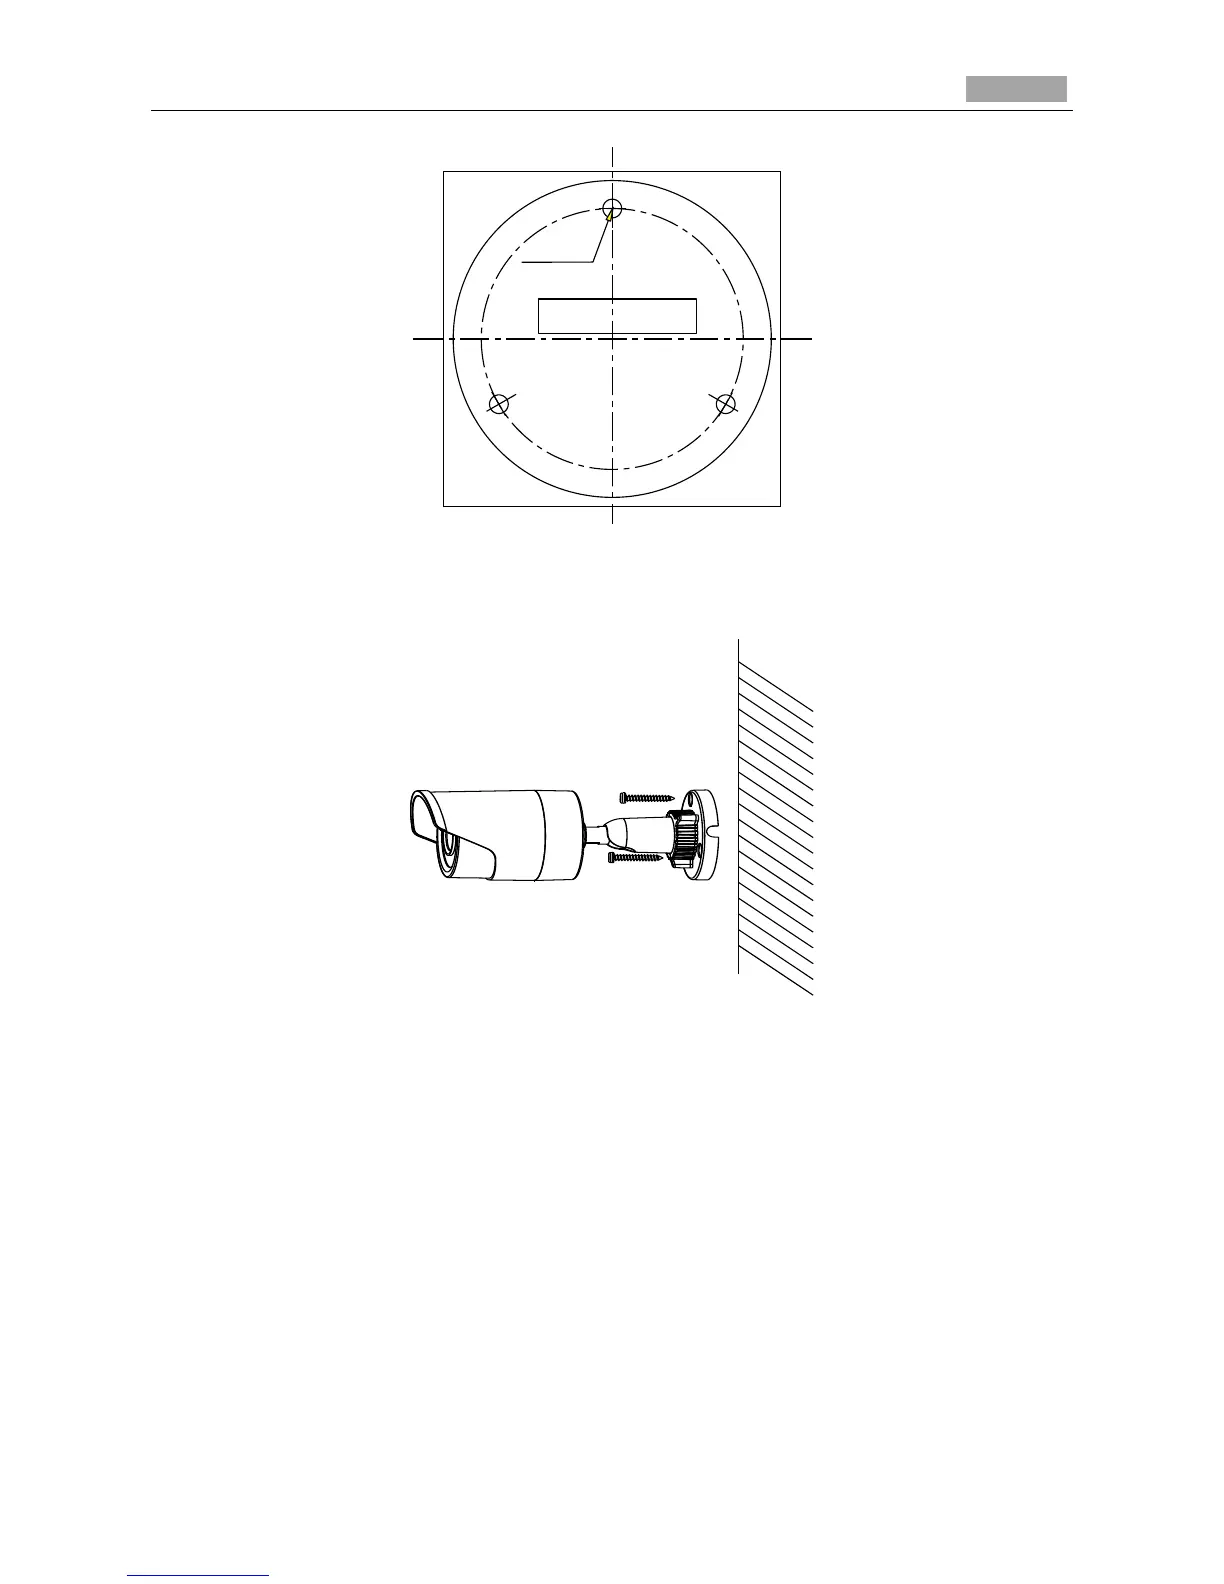
Figure 4-16 Attach the template
2. Secure the camera to the ceiling with the supplied expansion screws.
Figure 4-17 Secure the Camera to the Ceiling
3. Adjust the Lens.
1). Loosen the adjustable nut on the bracket.
2). Adjust the panning angle [0~360°] of the camera.
3). Adjust the tilting angle [0~90°] of the camera.
4). Rotate 0~360° to adjust azimuth angle of the image.
5). Tighten the adjustable nut to complete the installation.
Lo-Call 1890 866 900
www.cctvireland.ie
shop@cctvireland.ie

Table of Contents

Other manuals for HIKVISION DS-2CD4012F-A

Questions and Answers:

Question and Answer IconNeed help?

Do you have a question about the HIKVISION DS-2CD4012F-A and is the answer not in the manual?

HIKVISION DS-2CD4012F-A Specifications

General IconGeneral
BrandHIKVISION
ModelDS-2CD4012F-A
CategorySecurity Camera
LanguageEnglish

Related product manuals