EasyManuals Logo

HIKVISION DS-2CD864-EI3 Installation Manual

HIKVISION DS-2CD864-EI3
131 pages
To Next Page IconTo Next Page
To Previous Page IconTo Previous Page
Page #53 background imageLoading...
Page #53 background image
Installation Manual of Network Camera
52
Black Liner
Bubble
Screw Hole
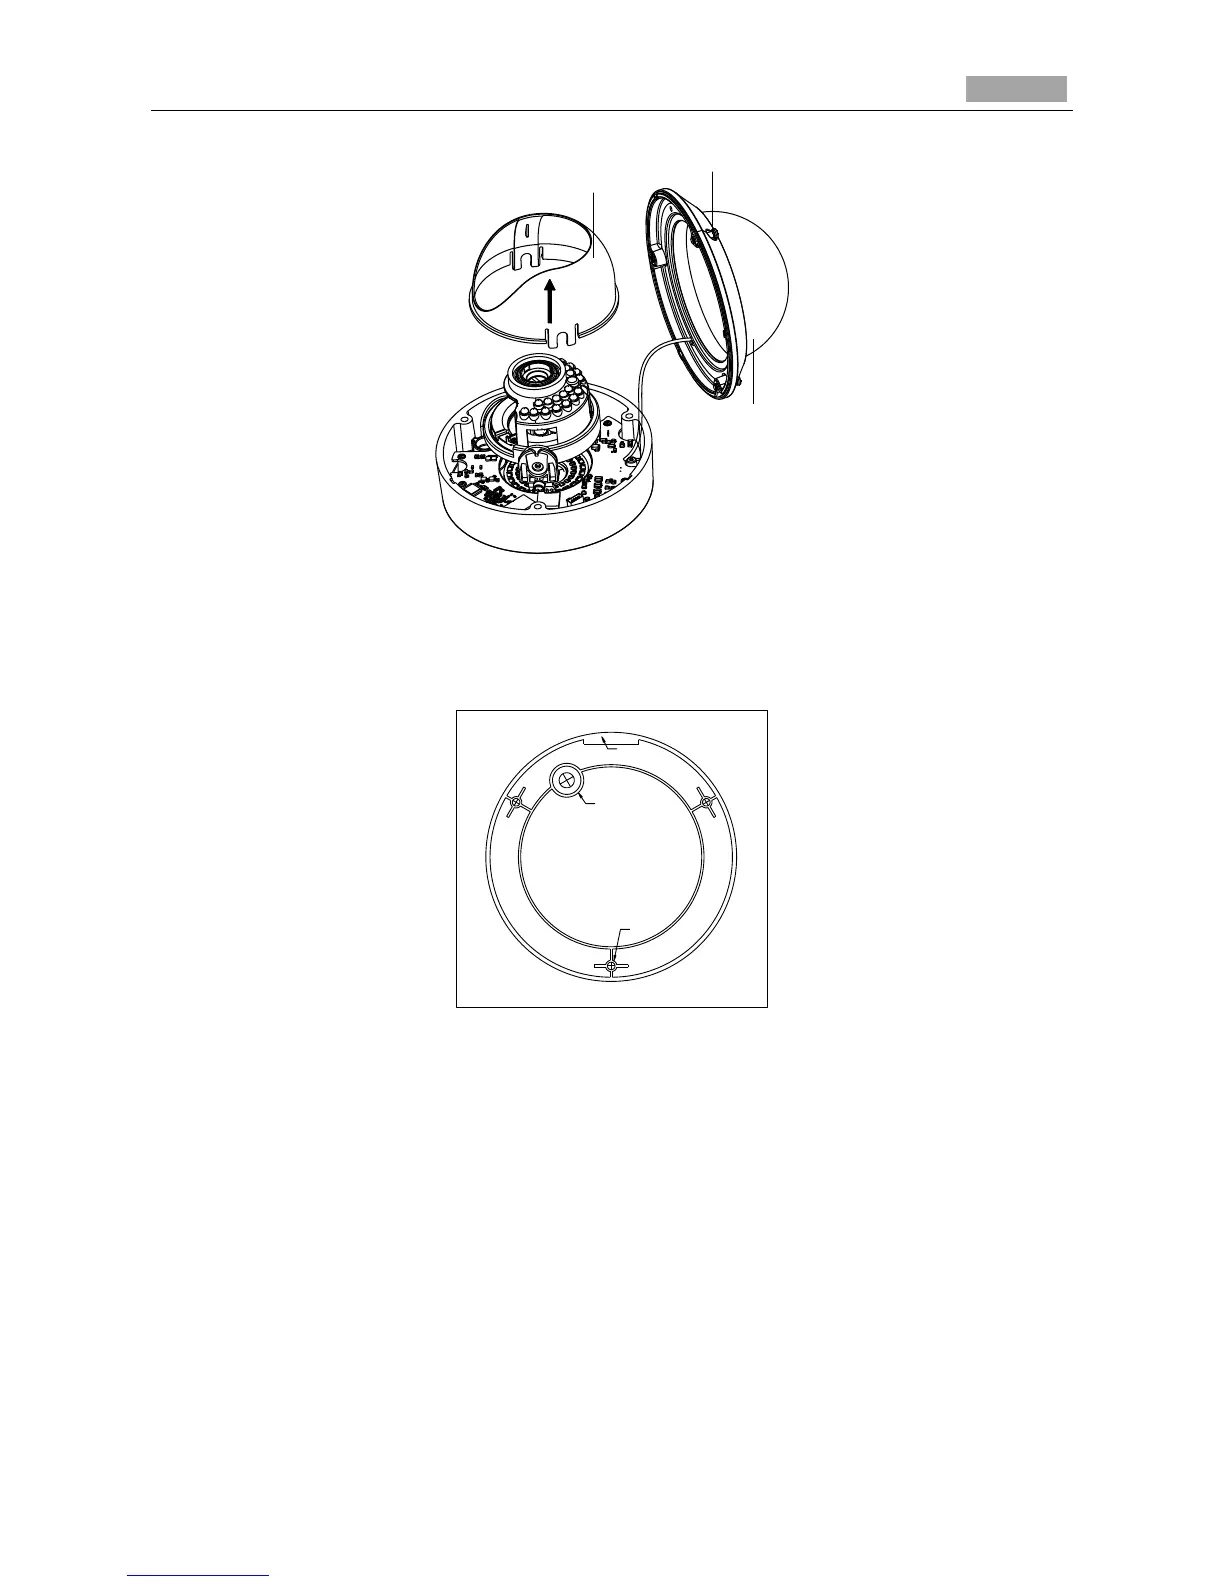
Figure 3-62 Remove the Bubble and Black Liner
3. Attach the drill template (supplied) to the place where you want to fix the camera.
4. According to the drill template as shown below, drill three screw holes in the ceiling.
Cable Outlet
Screw Hole
Drilling Template for Outdoor
Day/Night Vandal-proof Dome Camera
Side Cable Outlet
Figure 3-63 Drill Template
5. If you want to route the cables inside the ceiling, drill a cable hole in the ceiling according to the
drill template. Skip this step if you want to route the cables on the surface of the ceiling. Refer to
Conduit Installation on the Side for side cable routing.
6. Attach the camera to the ceiling by aligning the holes of the back box with the holes on the
ceiling.
7. Secure the camera with the supplied screws as shown below.
Lo-Call 1890 866 900
www.cctvireland.ie
shop@cctvireland.ie

Table of Contents

Other manuals for HIKVISION DS-2CD864-EI3

Questions and Answers:

Question and Answer IconNeed help?

Do you have a question about the HIKVISION DS-2CD864-EI3 and is the answer not in the manual?

HIKVISION DS-2CD864-EI3 Specifications

General IconGeneral
BrandHIKVISION
ModelDS-2CD864-EI3
CategorySecurity Camera
LanguageEnglish

Related product manuals