Three side outlets on the enclosure are selectable, which makes routing the cables easier instead of
drilling a cable hole on the ceiling. Use a plier to remove the plastic and route the cables through the
hole.
3. Connect the corresponding power/network cable.
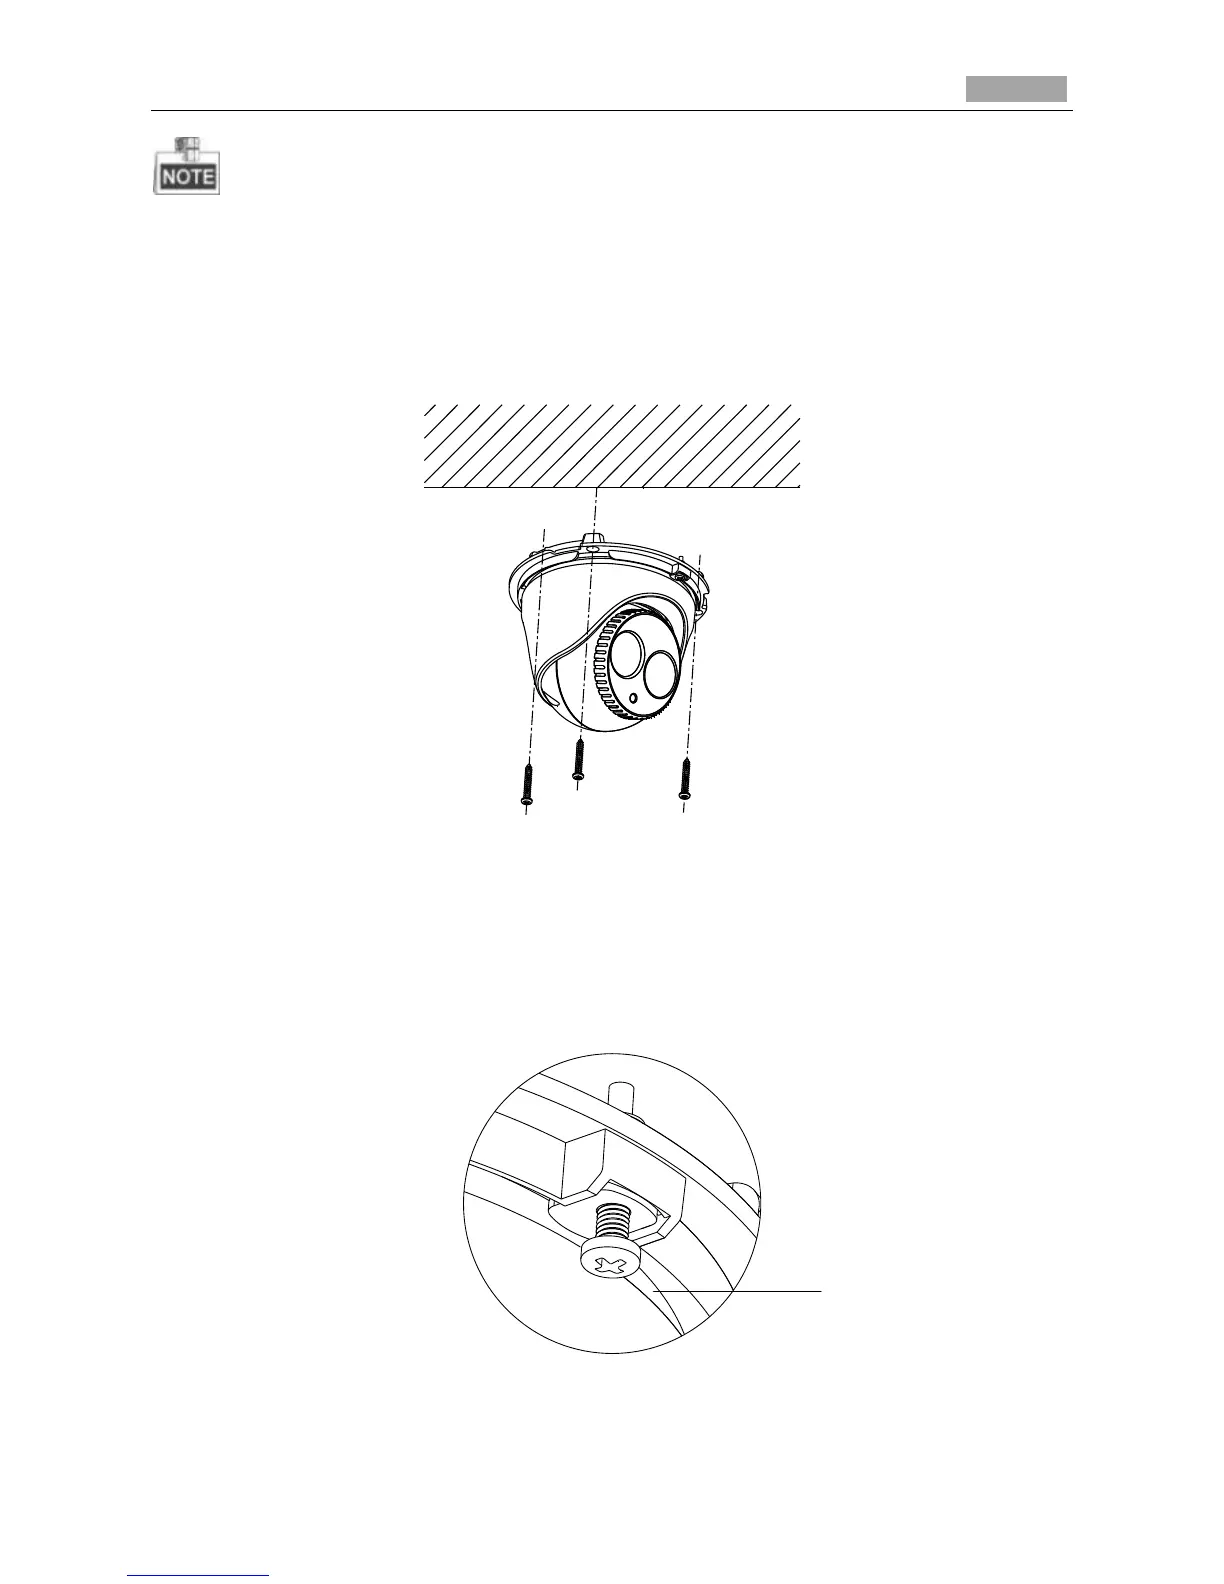
4. Fix the camera to the ceiling with the supplied expansion screws.
Figure 5-5 Secure the Camera to the Ceiling
5. Adjust the Lens.
1). Loosen the lock screw.
2). Rotate the enclosure to adjust the pan angle; rotate the camera to adjust the tilt angle.
3). Tighten the lock screw to fix the optimum surveillance angle.
Figure 5-6 Lock Screw