DS-7600 Series NVR User Manual
85
11. Input the password and click the Apply button to save the settings. Click OK to exit this menu. Click Cancel without clicking Apply or
OK will back without saving.
12. You can click on the camera list anytime you want to configure the added camera.
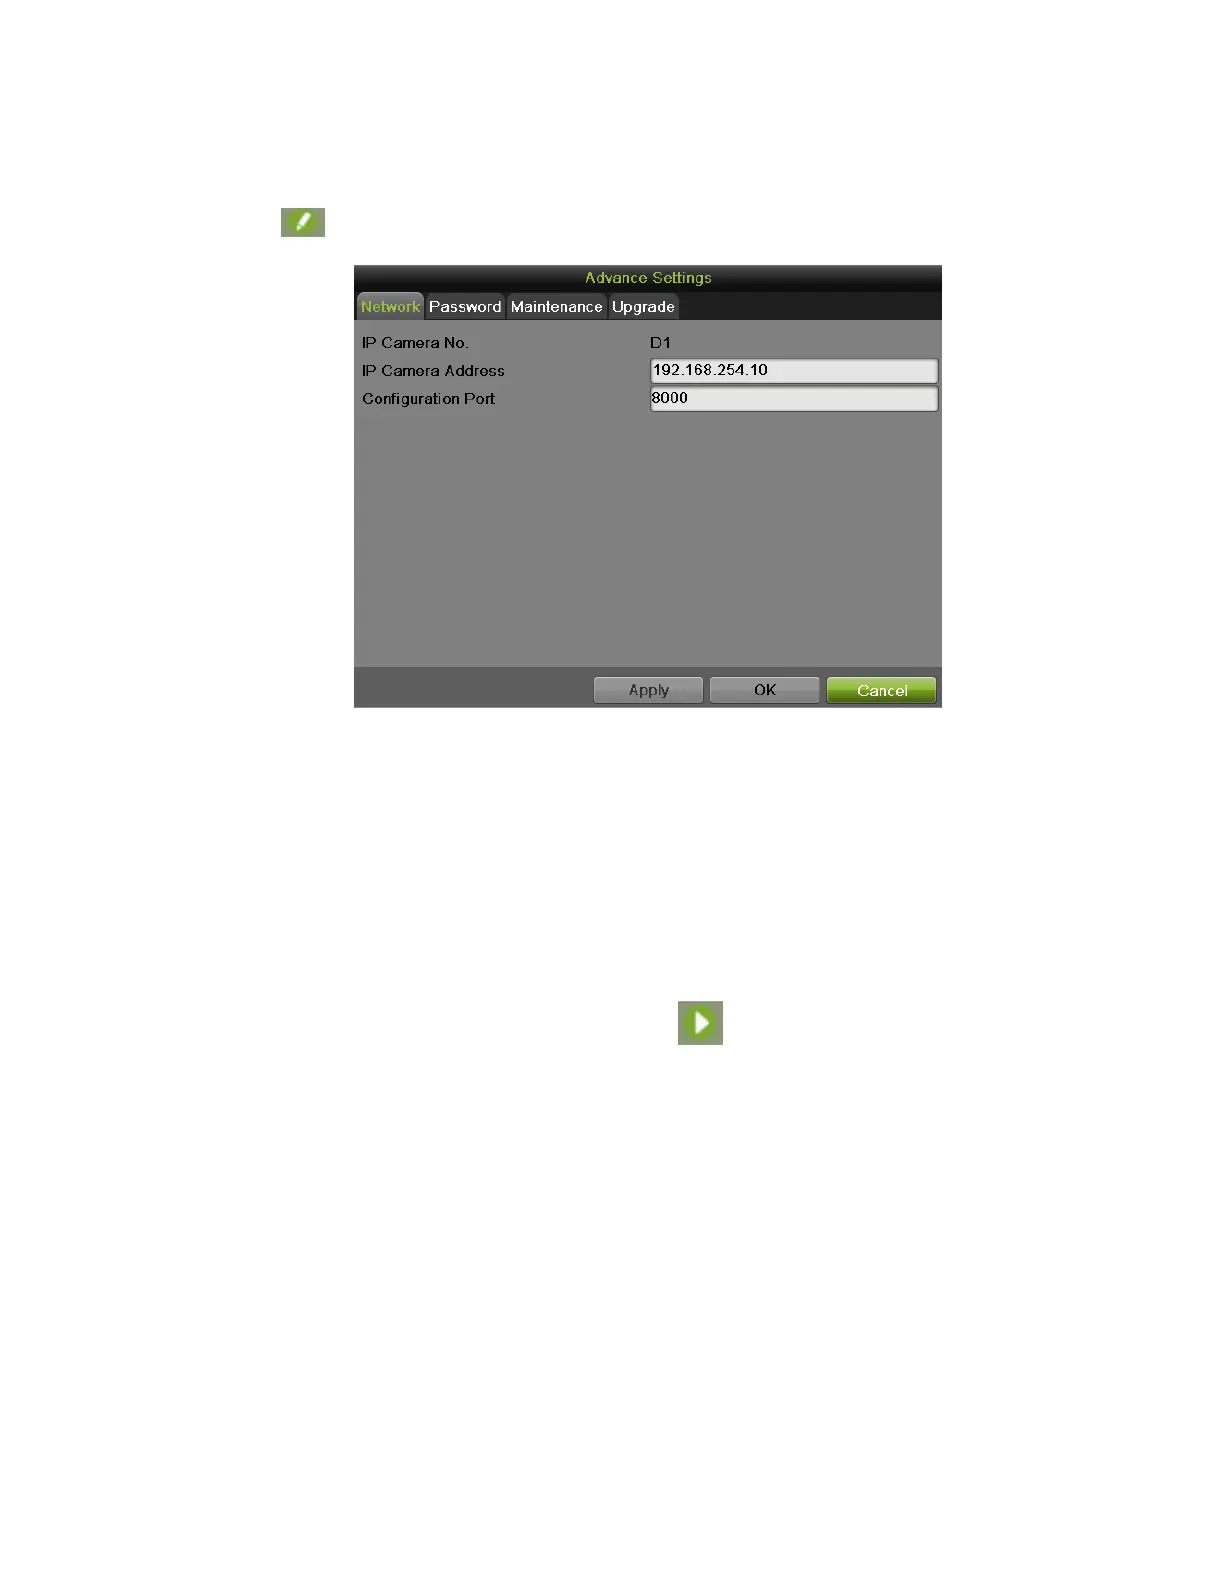
Figure 111, Advance Settings Menu
13. If the camera is manually added, you can select the camera and click the Advance Set button to pop up an Advance Settings window,
as shown in Figure 111, Advance Settings Menu.
14. Select the Network tab to modify the IP Camera Address and Configuration Port. Click Apply to save the settings.
15. Select Password tab to change the password. Click Apply to save the settings.
16. Select Maintenance tab to reboot or default the selected camera.
17. Select Upgrade tab to upgrade IPC using firmware from external storage device.
18. Click OK to back to the previous menu.
19. If the camera status turns Disconnected to Connected, you can click to get the live view of the camera.
NOTE: Supports third party IP cameras: Panasonic, Sony, Axis, Sanyo, Bosch, and Acti.
Configuring Privacy Mask
Privacy Mask can be set up to mask off sensitive or private areas in the field of view of a camera. To configure privacy zones:
1. Enter the Privacy Mask menu, shown in Figure 112, by going to Menu > Cameras Setup > Privacy Mask.
 Loading...