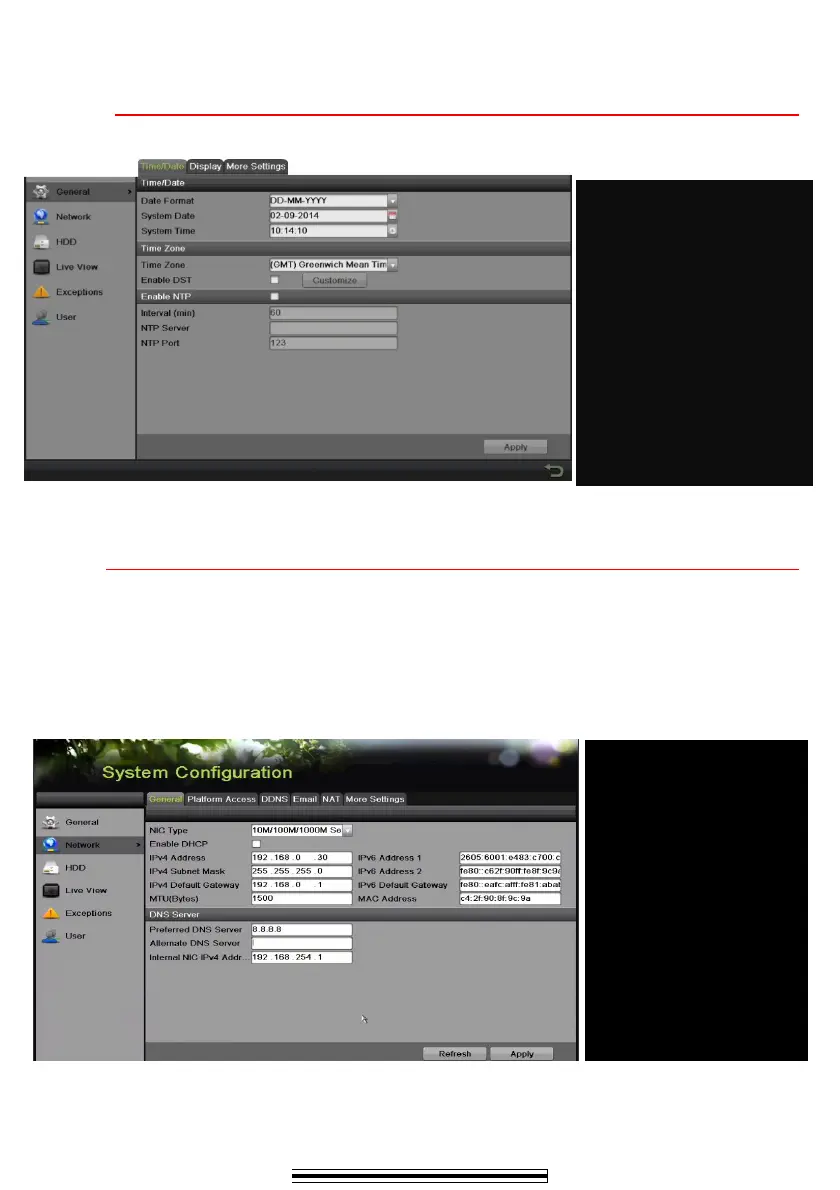
5 S E T D A T E A N D T I M E
1. Go to MENU > SYSTEM CONFIGURATION > GENERAL.
6 S E T U P N E T W O R K A C C E S S
1. Set up access to cameras remotely: MENU > SYSTEM CONFIGURATION > NETWORK.
2. Enable DHCP (check the checkbox).
3. Press Refresh button to update the IPv4 address, subnet mask, and IPv4 default gateway.
4. Disable DHCP (uncheck the checkbox).
5. Change “Preferred DNS Server” value to 8.8.8.8 (leave Alternate DNS Server blank).
q
Date and time settings
w TIME ZONE
Time zone and daylight savings
time settings
e ENABLE NTP
Network Time Protocol settings
q
q q
q
Select this tab
w
ww
w
NIC TYPE
Set LAN type
e
e e
e
ENABLE DHCP
Check box so that router will
assign IP address
r
r r
r
REFRESH
Press to update values
t
t t
t
IP V4 ADDRESS
Default 192.0.0.64
y
y y
y
PREFERRED DNS SERVER
Default is 8.8.8.8
u
u u
u
ALTERNATE DNS SERVER
Leave blank
q
w

 Loading...